Installing the light bulb & glass shade – Minka Group F563-SP-BS/DW User Manual
Page 17
9
INSTALLING THE LIGHT BULB & GLASS SHADE
WARNING: Shut off the power supply before removing or replacing lamp. In handling of halogen bulb,
care should be taken not to touch it with your bare hands. Oil residue will shorten the life of the
halogen bulb. If you accidentally come into contact, wipe thoroughly with a clean, lint-free, cotton
cloth. Allow the bulb to cool for 10 minutes before changing the bulb. Use light bulb in accordance
with the fan's specification. DO NOT EXCEED THE MAXIMUM WATTAGE RATING.
Step 1. Install 1x100W halogen bulb (included) into bulb socket.
ATTENTION:
ATTENTION: The Energy Policy Act of 2005 requires this fan to be equipped with a 190 watt limiting
device. If lamping exceeds 190 watts, the ceiling fan's light kit will shut off automatically.
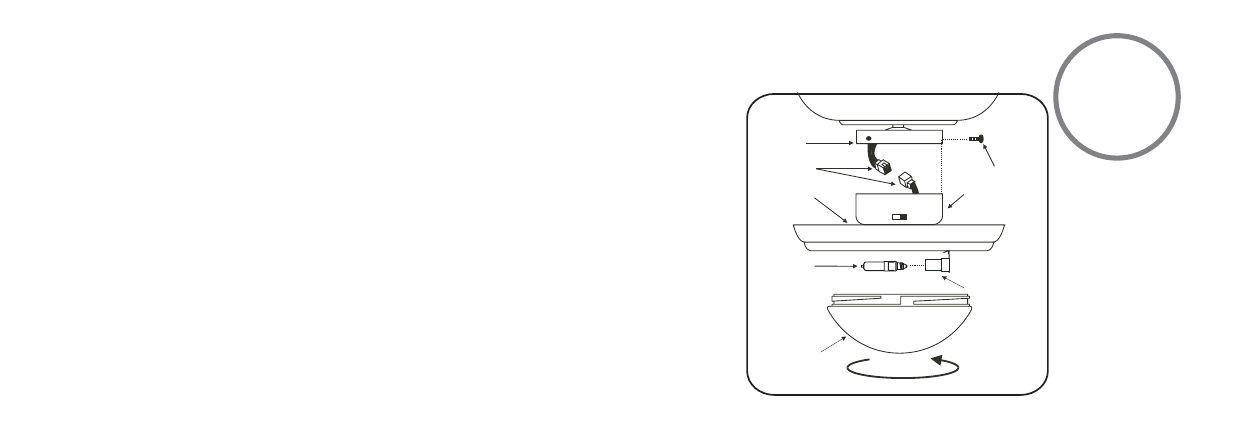
Step 1. Remove the screws from the switch cup plate. Place the switch cup with light kit attached close
to the switch cup plate, align the plastic connectors from switch cup and the switch cup plate and
firmly snap the two connectors. (Fig. 18) Make sure the connectors are properly connected and that
non of the single wires is pushed out of the plastic connectors.
Step 2. Slide the switch cup up over the switch cup plate and rotate until the screw holes are aligned.
Secure the switch cup with three screws previously removed. (Fig. 18)
CAUTION: Make sure that the wires are not pinched between the switch cup and the switch cup plate.
Step 3. Install 1x100W halogen bulb (included) into bulb socket.
Step 4. Install the glass diffuser.
Fig 18
SWITCH CUP
SWITCH CUP
PLATE
SOCKET
GLASS SHADE
BULB
MOLEX
SCREWS
LIGHT FIXTURE