Fagor SF-800 User Manual
Page 13
24
EN
25
EN
6 - TROUBLESHOOTING
Some incidents may arise when you are using your dryer. Here are the points you should check:
7 - INTERVENTIONS
Any work on your appliance must be performed by a Brand-approved qualified professional. When you call,
mention your appliance’s full reference (model, type, serial number). These details are shown on the manufac-
turer’s information plate
. (Fig. 1.1).
Fault:
Check whether:
The dryer does not start:
- the plug is in the socket.
- the door is properly closed.
- the “Start” key was pressed (if the appliance was
not in pause).
The drying times are too long:
- the filter in the drum is clogged with fluff.
- the laundry has been spun enough beforehand
(500rpm minimum, but spinning at 850rpm provides
better drying times).
- the vent hose has too many bends.
- the air inlets and outlets are unobstructed enough to
ensure correct air circulation.
- the laudry choice selected matches the type of
items in the drum.
The laundry is too damp:
- the filter in the drum is clogged with fluff.
- the type of laundry has been selected correctly or if
the drying time is good enough.
The laundry is too dry, too creased:
- the drying time selected is too long: the drying time
is better to be too short than too long: this avoids
the laundry becoming too dry and difficult to iron.
The items are unevenly dried:
- the types of textiles in the load are too different (e.g.
sheets together with jeans).
- the laundry has been laid correctly ‘unfolded’ in the
dryer.
- the drum is not overloaded.
The synthetic items are loaded with
static electricity:
- the laundry has been dried too much.
- you have used softener during washing. By using
this product, you can reduce most of the problems
with static electricity.
4.1 - C
LEANING THE FILTER
This is located in the lower part of your dryer.
Clean it as follows:
— Remove it from its housing by pulling it upwards
(Fig. 4.1.1).
— Open the filter and clean it by removing the thin
coating of fluff covering it
(Fig. 4.1.2).
— Re-insert it in its housing, pushing it well in.
Do not wash filter with water (Fig. 4.1.3).
The filter must be cleaned after every drying.
4 - REGULAR MAINTENANCE
4.2 - C
LEANING THE APPLIANCE
To clean the control panel, the access to the drum
and the casing, use only a sponge or a damp cloth
and some soapy water.
— Ensure that there is no fluff accumulating round
the dryer.
— Clean the door seal with a damp cloth and the fil-
ter housing with your vacuum cleaner once a year.
— You should not use, under any circumstances,
the abrasive powders, the metal or plastic
sponges and the alcohol-based products (Fig. 4.2).
5.B - PROGRAMAS NORMALIZADAS
P
ROGRAMAS RECOMENDADOS PARA LAS PRUEBAS DE ACUERDO CON EN
61121
D
IRECTIVA
95/13/
CEE
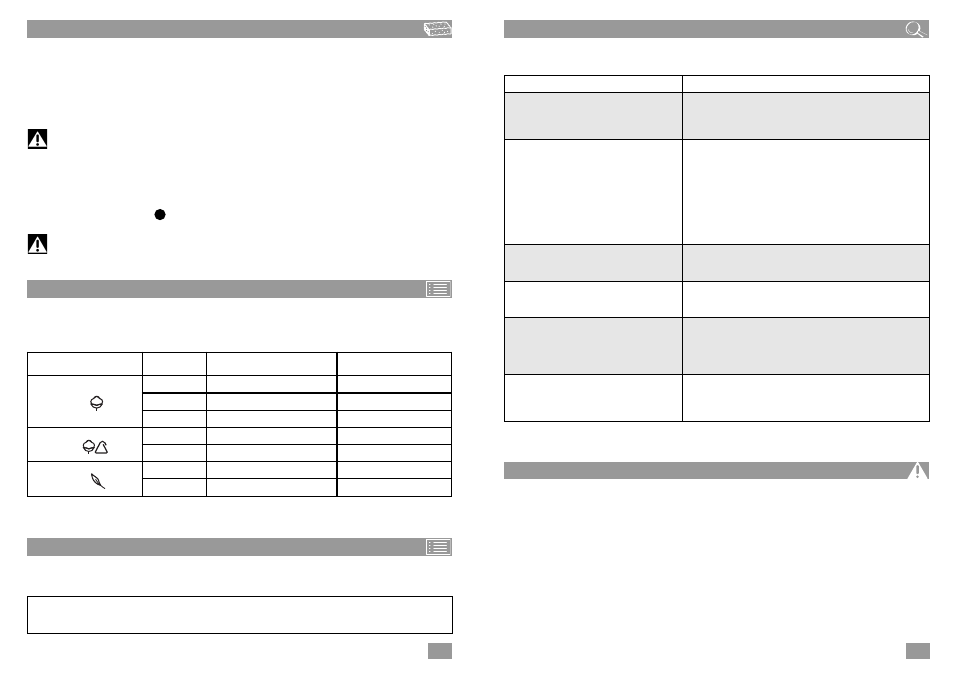
5.A - TIEMPO DE SECADO
Los tiempos de secado que se enumeran a continuación se ofrecen a título indicativo, ya que dependen:
— Del resultado deseado: seco, húmedo…
— De la temperatura ambiente (estos valores corresponden a una temperatura ambiente de 20º C).
— De la calidad del centrifugado.
Para velocidades de centrifugado más bajas, los tiempos serán relativamente más largos.
(Por ejemplo, para 5 kg de ropa normal centrifugada a 500 vueltas/minuto: de 120 a 160 minutos.
Tipo de ropa
Carga
Para ropa centrifugada a…
Duración del ciclo de
secado
ALGODÓN -
8 kg
1200 vueltas/minuto
de 120 a 160 minutos
5 kg
1200 vueltas/minuto
de 80 a 100 minutos
3,5 kg
1200 vueltas/minuto
de 60 a 80 minutos
MEZCLA -
5 kg
850 vueltas/minuto
de 80 a 100 minutos
2,5 kg
850 vueltas/minuto
de 50 a 60 minutos
DELICADO -
3 kg
500 vueltas/minuto
de 60 a 80 minutos
1,5 kg
500 vueltas/minuto
de 40 a 50 minutos
Carga I
”Algodón seco”
8 kg ....
seleccionar
“Algodón” - 140 min
Carga II
”Algodón listo para planchar”
8 kg ....
seleccionar
“Algodón” - 110 min
Carga III
”Tejido de fácil mantenimiento”
4 kg ....
seleccionar
“Delicado” - 70 min
4.3 - C
HANGING THE BULB
(according to model)
You can replace the light bulb (type E14-15W/230V) yourself
(Fig. 1.1).
To do this:
— Unscrew the glass cover located to the left inside the appliance.
— Unscrew the extinguished bulb
and replace it.
— Screw on the glass cover tightly.
Important:
Unplug the power cord before changing the bulb.
The bulb must be replaced when the appliance is cooled down.
F