Brockston mirror with lighting, Connecting the power, Mount mirror to finished wall – Decolav 1795 User Manual
Page 2: Setting up your new wall mounted mirror, Assembly instructions
Please contact 1-866-332-6528 for further assistance
DecolaV.com
© Deco laV, inc. 2014
2
assembly instructions
• make sure not to crimp or pinch wire for safe connections. Plug in the
power cord (please check local electrical codes for the height of the outlet,
as each area may be different. We recommend using a Gfci outlet.)
connecting the Power
2
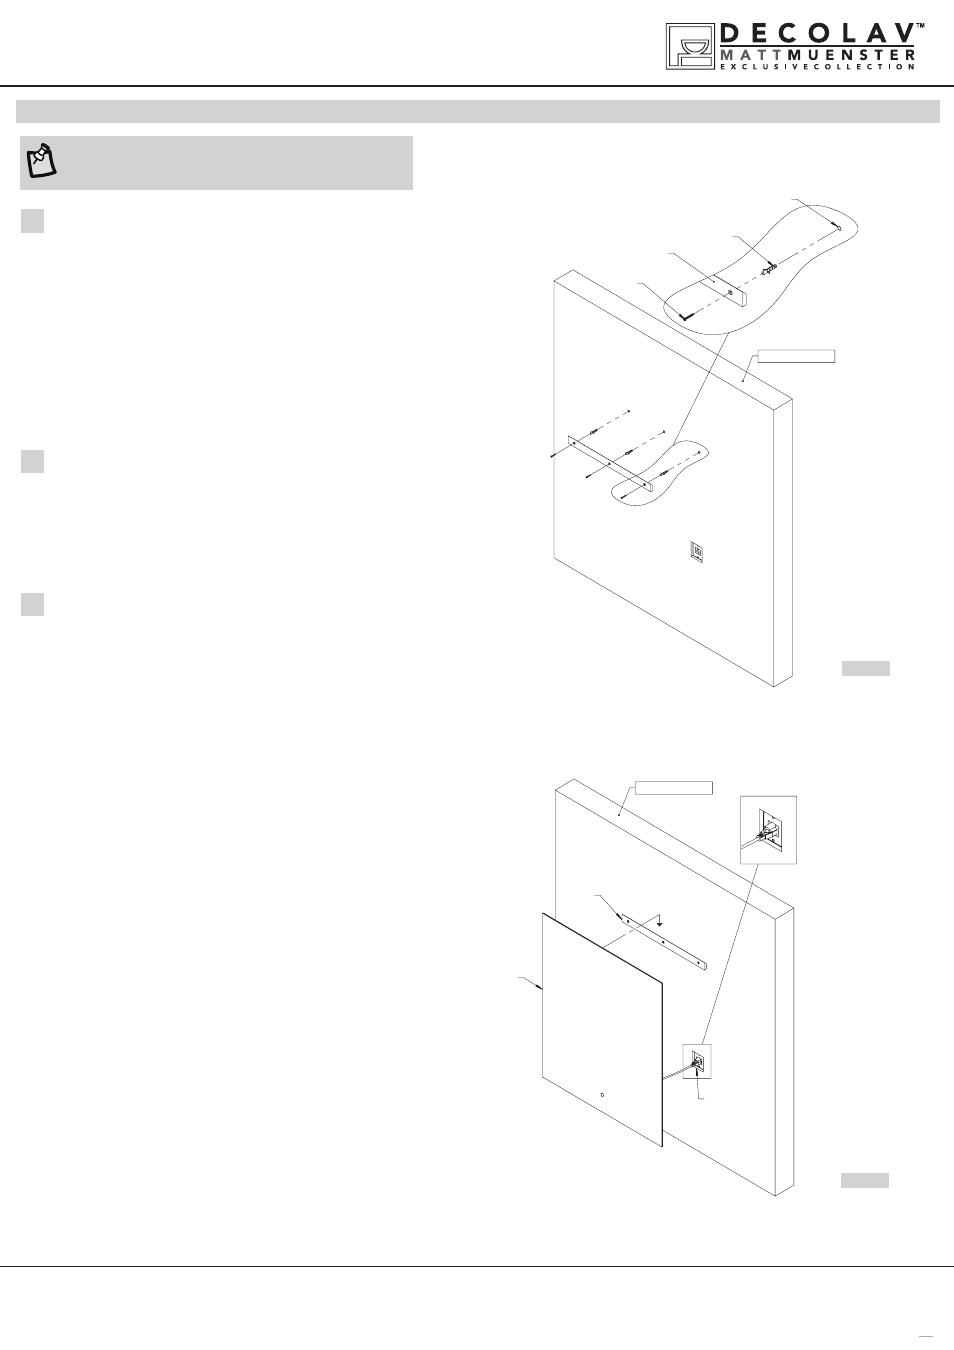
• raise Wall mounted mirror above Wall cleat and lower mirror cleat into
• position. see figure 2
• Gently push down on the top of the Wall mounted mirror to ensure
the cabinet cleat and wall cleat are fully seated into position. the Wall
mounted mirror should be fully against the wall when cleats are fully
seated
• slight side to side adjustments can be made by lifting up slightly on the
cabinet or sliding the cabinet left and right
mount mirror to finished wall
3
• carefully remove your new mirror from carton and place safely aside
• Determine at what height the wall cleat is to be hung. mark with pencil
• using a level, make a horizontal line where the mirror is to be hung that is
parallel to the floor
• Place the Wall cleat on this line in the desired location and mark for the
drywall anchor holes (note: if a hole will hit a wall stud use a screw instead
of a drywall anchor)
• Drill holes for the drywall anchors and install drywall anchors. see figure 1
setting uP your new wall mounted
mirror
1
brockston mirror with lighting
item #1795-roK
note: two individuals are recommended for installation of this
product.
figure 1
figure 2
Finished Wall
Finished Wall
Mirror
Wall
cleat
power supply
Wall
Anchor
Wall
Cleat
Wall
screw
Wall Hole
Finished Wall
Finished Wall
Mirror
Wall
cleat
power supply
Wall
Anchor
Wall
Cleat
Wall
screw
Wall Hole