Avalyn bath vanity, Mount vanity to your finished wall, Setting up your new vanity – Decolav 1740 User Manual
Page 2: Assembly instructions
Please contact 1-866-332-6528 for further assistance
DecolaV.com
© Deco laV, inc. 2014
2
assembly instructions
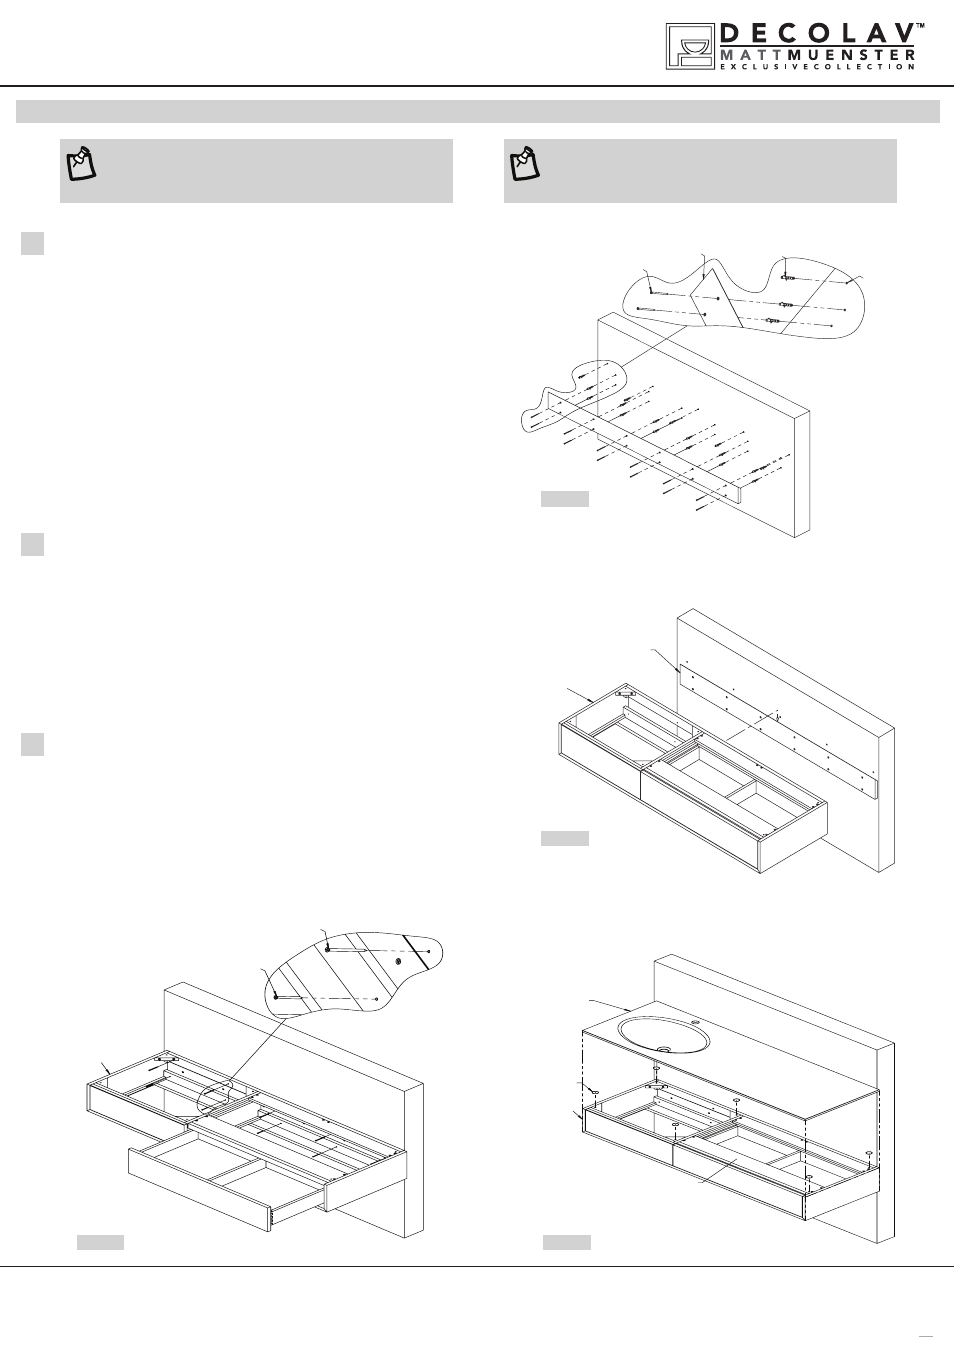
• Place the Painted tempered Glass countertop with sunken lavatory on top
of the vanity. adjustments may be necessary to align correctly. see figure 4.
(Please note to lift and move lavatory top to avoid scratching the bottom of
your new lavatory)
installing back Painted temPered glass
countertoP with sunken lavatory
3
• raise vanity above Wall cleat and lower into position so that the vanity sits
directly on the wall cleat. see figure 2 & 3
• Push down on the top of the Wall mounted Vanity to ensure the vanity cleat
and wall cleat are fully seated into position. the Wall mounted Vanity should
be fully against the wall when cleats are fully seated
• slight side to side adjustments can be made by lifting up slightly on the van-
ity or sliding the vanity left and right
• note wood glue can be used to permantly adhere both halves of the cleat
mount vanity to your finished wall
2
• carefully remove your new vanity from carton and place safely aside
• turn off water supply to faucet
• remove existing vanity
• Determine the location in your bathroom the vanity will be installed
• outline the vanity width and height and mark on wall
• locate and mark wall studs (we suggest attaching vanity to at least 3 studs)
• Determine at what height the wall cleat is to be hung. mark with pencil
• using a level, make a horizontal line where the vanity is to be hung and is
parallel to the floor
• Place the Wall cleat on this line in the desired location and mark for the
anchor holes (note: if a hole will hit a wall stud use a screw instead of a
drywall anchor)
• Bore holes for the drywall anchors and install drywall anchors.
setting uP your new vanity
1
Finished Wall
Wall Hole
Wall
cleat
Wall
screw
Wall
anchor
Vanity
Finished Wall
Mounting
Screw
Wall
Cleat
avalyn bath vanity
item #1740-ccB / 1740-eBY
figure 2
figure 4
Glass
sink
Vanity
Rubber
bumper
Finished Wall
Apply Silicone Here
Finished Wall
Vanity
Wall Cleat
figure 1
figure 3
note: use Decolav drain item #9290-cP/sn/Pn/DB,
9296-cP/sn/Pn/DB or #9298-cP/sn/Pn/DB.
Decolav cannot guarantee leakage wih other manufacturer drains.
note: use Decolav decorative bottle trap item #9102-cP/sn/
Pn/DB to complete the look.