Woodhead EB Balancer Series User Manual
Page 2
©Aero-Motive Sep-99
Page 2 of 5
SM113201B
WARNING:
To prevent personal injury, death or property damage, do not attach secondary support to
same structure that supports balancer.
3. Attach the other end of the secondary support (45) to a separate support so that the balancer will drop
no more than twelve inches if the main support fails.
II. Adjustment
A. Tool Attachment
1. Lift the complete tool (including any hose, cable, fittings and attachments) up to the tool clip (40).
CAUTION:
Do not pull cable down to tool. Personal injury, product damage or property damage
could occur when tool clip is released without tool attached.
NOTE: After the tool is attached, make sure the retaining latch on tool clip (40) has snapped back to the
closed position.
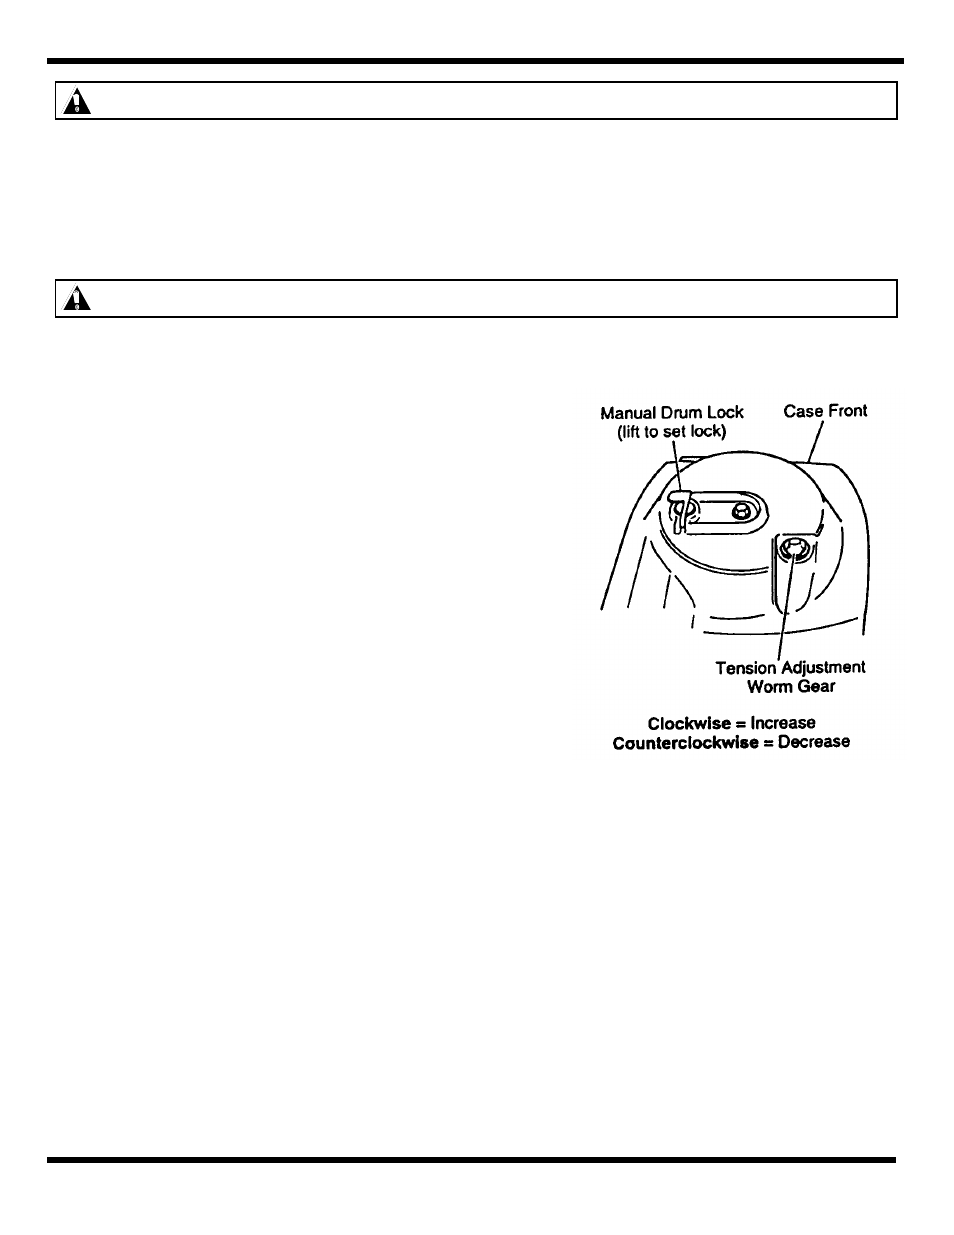
B. Spring Tension Adjustment
Please observe the following before making any spring
tension adjustments:
•
The tool and all accessories are attached to the tool
clip.
•
The tool will lower if the weight of the tool exceeds the
existing tension adjustment of the balancer mainspring.
•
The autostop may prevent drum from rotating when unit
is under-tensioned. (See Automatic Lock)
•
Tension adjustment worm gear must be turned twenty
times to equal one turn on the spring.
To increase spring tension:
1. Turn the wormgear (37) in a clockwise direction
(indicated by the “+” symbol on the case).
2. Repeat this process until desired tension
is achieved.
NOTE: Do not over-tension balancer mainspring.
This will reduce cable travel and spring life.
To reduce spring tension:
1. Turn the wormgear (37) in a counter-clockwise direction (indicated by the “-“ symbol on the case).
2. Repeat this process until desired tension is achieved.
NOTE: If the drum locks up (cable will not pull out) when reducing spring tension, increase tension until
the automatic lock disengages. (See Automatic Lock)
C. Cable Stop Adjustment
NOTE: Make all cable stop adjustments after the tool and accessories have been attached to the tool clip
and
after adjusting the spring tension. (See Spring Tension Adjustment)
1. Loosen hex on cable stop and dislodge lead inserts clamping cable.
2. Slide cable stop up or down on cable so that tool is positioned at desired working height.
3. Reinsert lead inserts into cable stop thimble.
4. Tighten loosened hardware to hold cable stop at set position.
NOTE: Moving the cable stop and bumper closer to the cable guide (38) will shorten the active travel of
the cable. If additional cable is required, extension cable assemblies are offered as an accessory.
D. Automatic Lock