Char ge, Charging the hair clipper – Panasonic ER1511 User Manual
Page 3
3
English
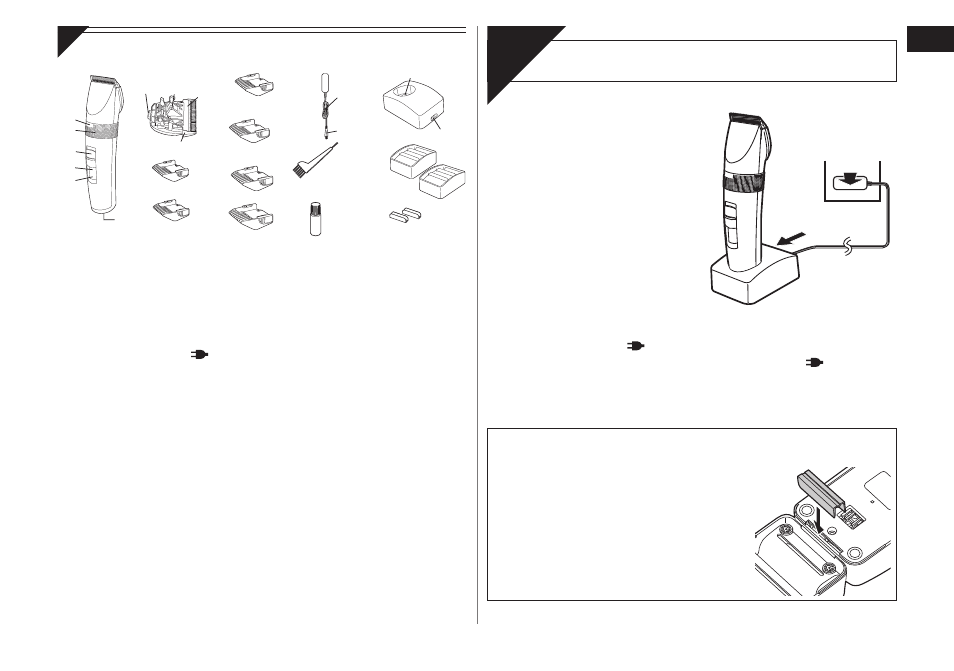
Parts identification
3
mm
0/0"
6
mm
0/0"
9
mm
0/0"
12
mm
0/0"
15
mm
0/0"
4
mm
0/0"
A
Main body
1
Trimming height indicator
2
Dial (Height adjustment
control)
3
0·CHARGE/1 switch
4
Battery capacity lamp
5
Charge status (
) lamp
6
Appliance socket
B
Blade
7
Mounting hook
8
Cleaning lever
9
Moving blade
Stationary blade
C
3 mm comb attachment
D
4 mm comb attachment
E
6 mm comb attachment
F
9 mm comb attachment
G
1 mm comb attachment
H
15 mm comb attachment
I
AC adaptor (RE9‑41)
;
Power cord
Appliance plug
J
Cleaning brush
K
Oil
L
Charging stand
Charging plug
Socket
M
Comb attachment shelves
(×)
N
Connectors (×)
Charging the hair clipper
Char
ge
1
1
Connect the power
cord to the charging
stand.
2
2
Slide the 0·CHARGE/1
switch to “0·CHARGE”.
3
3
Place the clipper on
the charging stand and
plug in the adaptor
into a household
outlet.
Charge status (
) lamp glows and charging starts.
Charging is completed when Charge status (
) lamp
blinks. (Max. 1 hour later)
1 full charge will provide approximately 70 minutes of
continuous operation.
Connecting the comb attachment shelf to the charging
stand
Determine the connection position for the
charging stand and comb attachment
shelf. Firmly insert the connector into the
slot at the bottom of the charging stand.
If the unit wobbles, then further push in
the connector since it has not been
firmly inserted.
•
•
•
•