Charging the shaver, Parts identification – Panasonic ESLV65 User Manual
Page 12
12
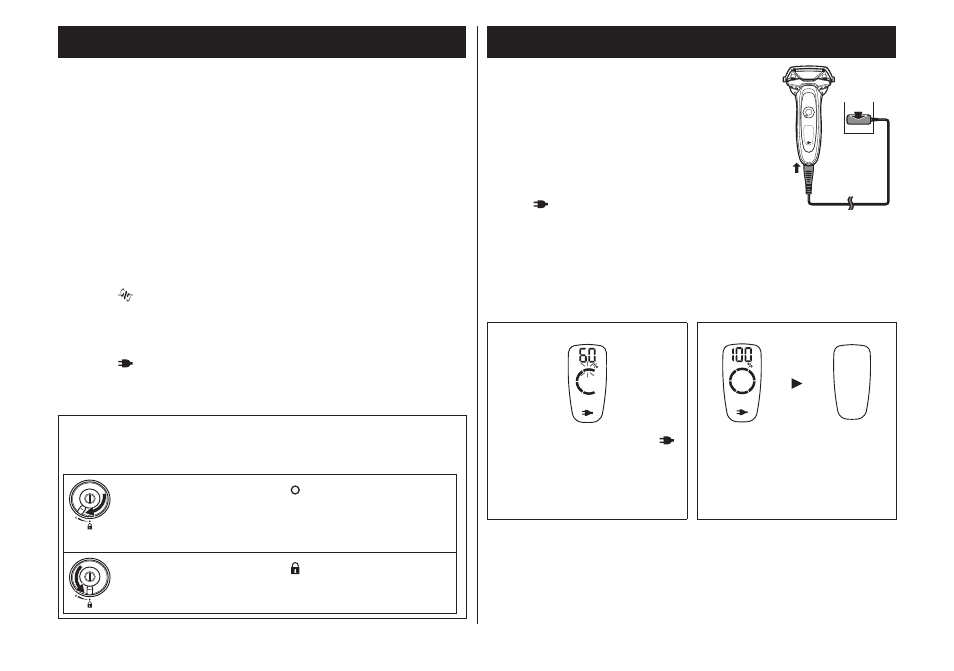
Charging the shaver
1
1
Insert the appliance plug [B]
into the shaver.
• Turn the shaver off before inserting.
2
2
Plug in the adaptor [B] into a
household outlet.
• Check that the charge status lamp
( ) glows.
1
2
• Charging is completed after approx. 1 hour.
The charging time may decrease depending on the
charging capacity.
• Wipe off any water droplets on the appliance socket.
• Check that the outer foil is not deformed or damaged
when you are attaching the shaver.
While charging
After charging is completed
The charge status lamp ( )
glows.
The number of the battery
capacity lamp will increase
as charging progresses.
The battery capacity lamp
and the charge status lamp
will light up and then turn off
after 5 seconds.
Parts identification
A
Main body
1
Protective cap
2
System outer foil
3
Foil frame
4
Foil frame release
buttons
5
Finger rest
6
Power switch
7
Lock ring
8
Lamp display
a. Used time lamp
b. Battery capacity lamp
c. Shaving sensor lamp
( )
d. Clean lamp
e. Foil/blade check lamp
f. Charge status lamp
( )
9
Appliance socket
Outer foil section
System outer foil release
buttons
Inner blades
Trimmer
Trimmer handle
B
AC adaptor (RE7-59)
(The shape of the AC
adaptor differs
depending on the area.)
Adaptor
Power plug
Cord
Appliance plug
Accessories
C
Travel case
D
Cleaning brush
Oil
Operating Instructions
Guarantee Card
Using the lock ring
Use the lock ring [A7] to lock or unlock the power switch [A6].
Rotate the lock ring until it clicks.
Rotate the lock ring to “ ” to unlock the
power switch:
Used when shaving, washing the shaver,
lubricating the shaver.
Rotate the lock ring to “ ” to lock the power
switch:
Used when carrying the shaver.