Setting the time – Panasonic RRUS310E User Manual
Page 9
FOLDER
VQT4R68
9
9
ENGLISH
Set the correct date and time as this information is used for file names (
➜
page 33) and recording.
Set the date and time correctly every time a new battery is replaced.
• Turn the power on beforehand. (➜ page 8)
• When turning the power on for the first time
after purchase or replacing the battery,
proceed to step
3
.
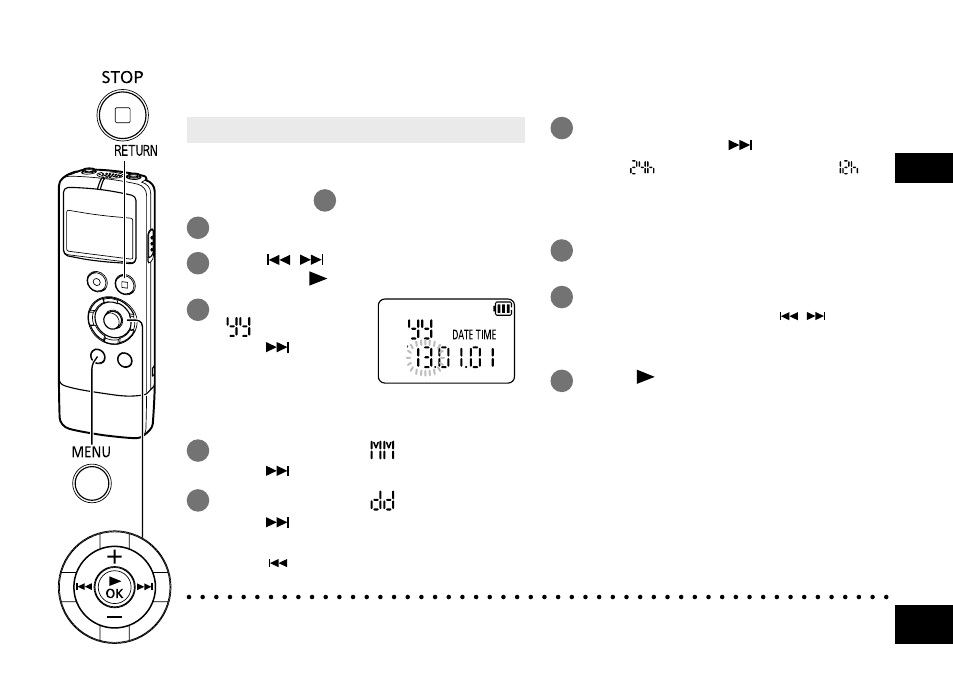
1
Press [MENU/FOLDER].
2
Press
,
to select “DATE TIME”
and press [ OK].
3
Press +, – to set
“
” (year) and
press
.
• Set the last two digits of the year.
(“13” in the case of 2013)
4
Press +, – to set “
” (month) and
press
.
5
Press +, – to set “
” (day) and
press
.
• To return to the previous setting item,
press
.
6
Press +, – to select the time display
format and press
.
Select “
” for 24-hour display, and “
” for
12-hour display.
• The display format that is blinking is
currently selected.
7
Press +, – to set the hour and press
i.
8
Press +, – to set the minute.
To change the setting, press
,
to move
between the items, and press +, – again to
make the setting.
9
Press [ OK] to confirm the setting.
• The date and time are set and the clock
starts to operate.
To exit the setting screen, press
[g STOP/RETURN].
Displaying the set date and time:
See “Select a file” of “Playing”. (➜ page 12)
●
The clock operates with a monthly loss/gain of approx. ±60 seconds at normal temperature.
●
When the battery completely runs out of power, the clock operation stops.
Setting the time