Rear panel, Connector description – Sony KLH-40X1 User Manual
Page 44
10
GB
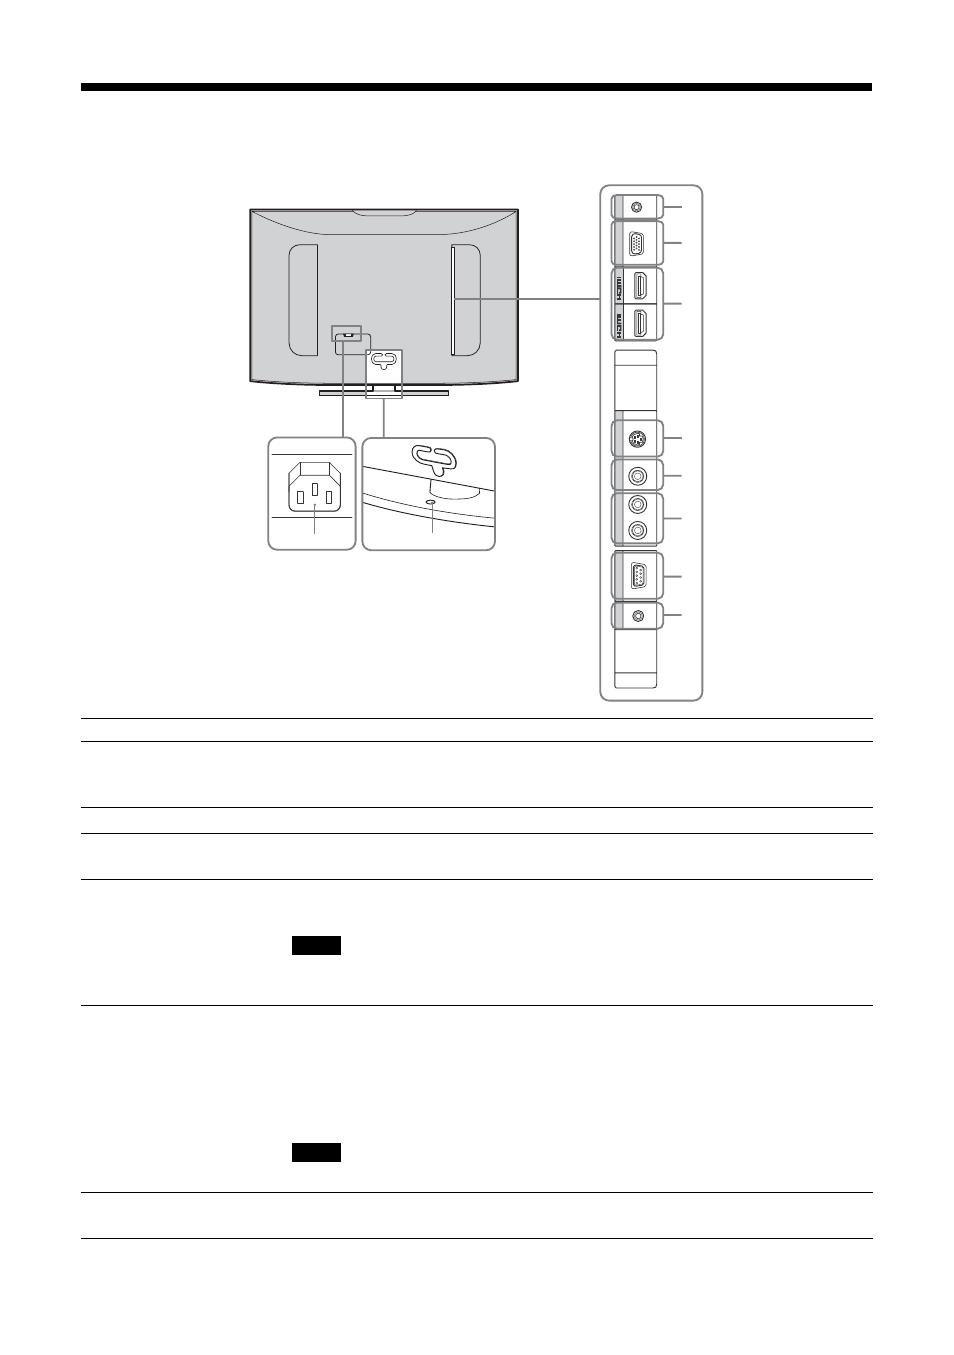
Rear Panel
Connector
Description
1
AC IN socket
Connect the supplied AC power cord to this socket and to a wall outlet. Once you connect
the AC power cord, the STANDBY indicator lights up in red and the display goes into the
standby mode. See page 17.
2
Stand attachment hole
Use this hole to secure the display on a table, etc. using an M6 screw.
3
AUDIO (COMMON
AUDIO IN)
(Stereo mini jack)
Inputs an audio signal. Connects to the audio signal output of a piece of video equipment
or PC. Supports audio signals corresponding to 4 and 5.
4
HD15 (RGB/
COMPONENT IN)
(D-sub 15-pin)
Connects to the analog RGB signal or component signal output of a piece of video
equipment or PC. See page 31.
When inputting a component signal, be sure not to input sync signals to pins 13 and 14. If
you do so, the picture may not be displayed properly.
5
HDMI 1/HDMI 2 IN
HDMI (High-Definition Multimedia Interface) provides an interface between the display
and any HDMI-equipped audio/video equipment, as well as PC. You can enjoy enhanced
or high-definition video, and two-channel digital audio. You can also connect a piece of
DVI-equipped equipment to your display by using an HDMI-to-DVI cable (not supplied).
The appropriate mode for a piece of audio/video equipment or PC is automatically
selected in accordance with the connected equipment.
Be sure to use only an HDMI cable that bears the HDMI logo.
6
S VIDEO IN
(Mini DIN 4-pin)
Connects to the S Video output of a piece of video equipment.*
1
2
IN
RL
S VIDEO IN
VIDEO IN
AUDIO IN
OUT
2
AUDIO
VIDEO
REMOTE
CONTROL S
IN
1
COM MON
AUDIO IN
RGB/COMPONENT IN
HD 15
3
4
5
6
7
8
9
0
Note
Note