Consumables – Karcher Installation de potabilisation d’eau WPC 2500 SW User Manual
Page 17
English
17
Î Unscrew the filter pot using the filter
key.
Î Take out the filter inlay.
Î Clean filter casing and filter pot if re-
quired.
Î Insert new filter inlay into filter pot.
Î Install and tighten filter pot.
Î Close raw water testing tap.
Î Restart the raw water flow.
Î Set main switch to “1”.
ṇ
Warning
Danger of damage to the plant. The follow-
ing values should not be exceeded when
you make changes to the plant settings:
–
Maximum pump pressure 7 MPa
–
Maximum drinking water quantity 2,500
l/h
–
Concentrate quantity min. 5,000 l/h
Note
There is a time delay before the plant reacts
to the changes done to the regulating valve.
Hence do the settings at the pressure regu-
lation valve in small steps and wait for the
respective effect.
(1) Drinking water flow has fallen from
_______ l/h to _______ l/h
Î Read the quantity of drinking water at
the flow meter for drinking water and
compare it to the value when the plant
was started (see start-up report). If the
drinking water flow ahs fallen to ______
l/h, then do the following fine regulation:
Î Close the pressure regulation valve in a
clock-wise direction until the flow meter
for the drinking water has almost
achieved the target value.
Note
Inform Kärcher Customer Service if this fine
regulation does not lead to any changes to
the drinking water flow.
(2) Conductivity of drinking water has in-
creased from _____µS/cm to _____µS/
cm
Note
Small increases in the conductivity of drink-
ing water does not affect the quality of the
drinking water.
Î Read the current conductivity value on
the display of the operating panel and
compare it to the value at the time of
start-up (see start-up report). If the
drinking water conductivity has in-
creased to _____µS/cm, then you need
to rinse the membrane of the RO filter
unit:
Î Reduce the drinking water output by
opening the pressure regulation value
to approx. 600 l/h.
Î Operate the plant for approx. 1 hour;
then reset the nominal output by closing
the pressure regulating valve.
Î Check again the conductivity of the
drinking water.
Note
If rinsing the membrane does not result in
lower conductivity values, then inform
Kärcher Customer Service.
ƽ
Danger
Risk of burns injury on account of chemi-
cals. Please wear safety gloves and safety
goggles while handling acid-resistant
chemicals.
Note
The values for dosing the different chemi-
cals are based on the raw water analysis
and the plant output. Kärcher Customer
Service will enter the dosing quantities re-
quired for your plant in the following table at
the time of startup.
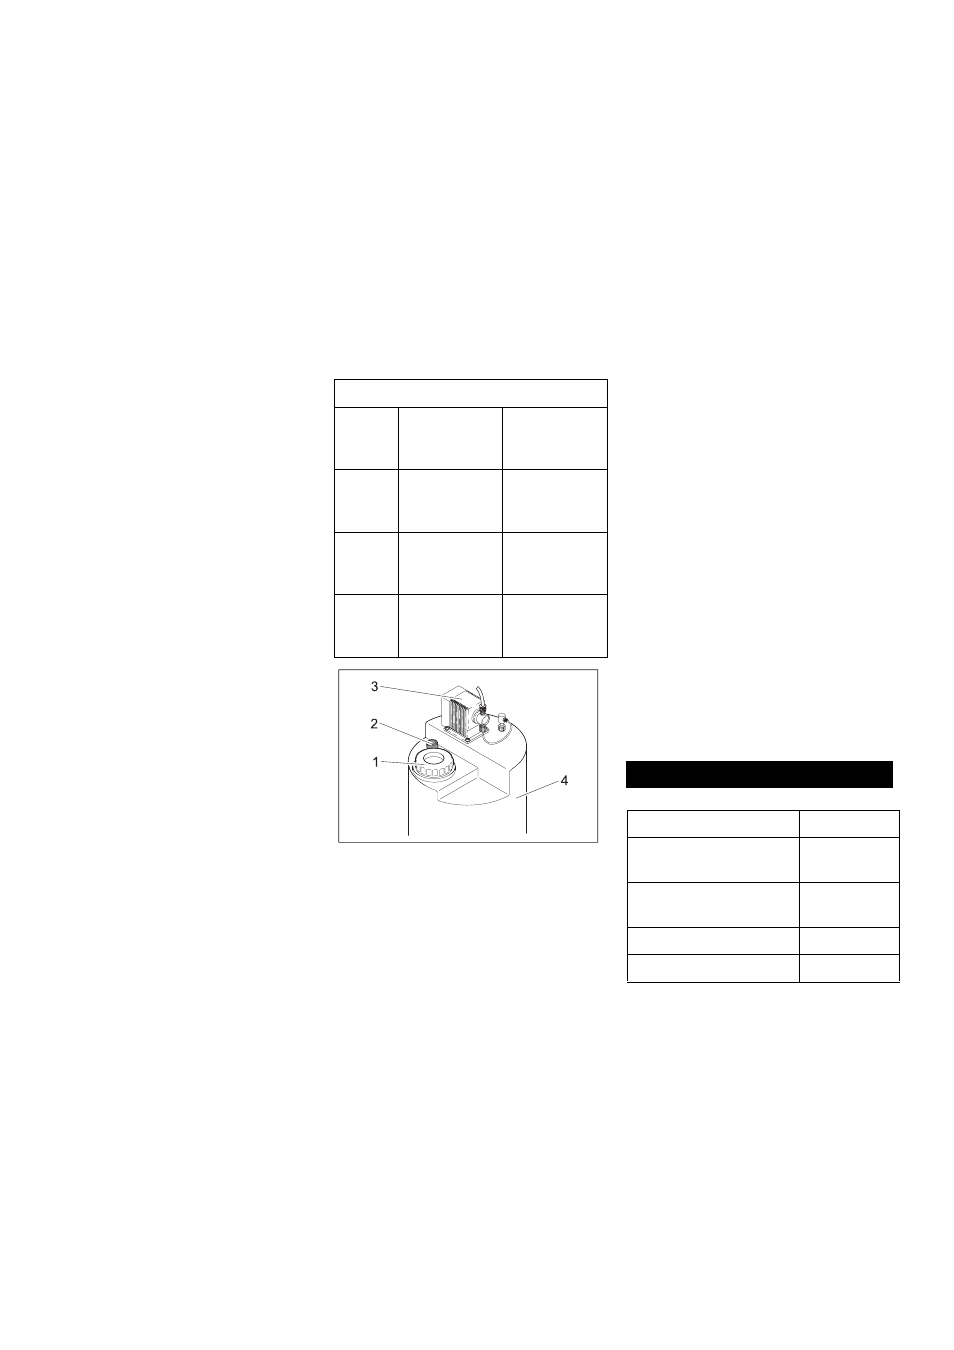
1
Cover
2
Mixing rod
3
Dosing pump
4
Dosing container
Î Wear safety gloves and safety goggles.
Î Remove the can from the dosing sta-
tion.
ƽ
Danger
Risk of injury on account of chemical reac-
tion. The dosing stations should not get in-
terchanged and be filled up with the wrong
chemicals.
ṇ
Warning
Risk of flocculation or other undesirable
chemical reactions. Only use chlorine-free
drinking water from the drinking water test-
ing tap to mix the chemicals.
The dosing depends on the filling level in
the dosing container.
Fully emptied dosing container.
Î Fill 20 l drinking water in the dosing can.
Î Use the measuring beaker to measure
10 times the quantity indicated in the
dosing table and fill it into the dosing
container.
Î Fill up the dosing container to the "100
l" mark with drinking water.
Î Close the cover of the dosing station.
Î Pull out the mixing rod from the dosing
container until the stop and push it back
into the container.
Repeat this process for approx. 2 min-
utes until the chemicals are fully mixed.
Î Deaerate the dosing pump according to
the instructions in the chapter "Mainte-
nance and Care".
Partially emptied dosing container:
Î Read the filling level of the dosing con-
tainer on the scale, for e.g. 50 l.
Î Determine the refill quantity; for that de-
duct the filling level that you have read
from 100 l. In the example: 100 l – 50 l =
50 l.
Î From the dosing table, ascertain the re-
quired quantity of the corresponding
chemicals. In the example: 5 x the
quantity for 10 l water.
Î Measure the ascertained quantity of the
corresponding chemical and fill it into
the dosing container.
Î Fill up the dosing container to the "100
l" mark with drinking water.
Î Close the cover of the dosing station.
Î Pull out the mixing rod from the dosing
container until the stop and push it back
into the container.
Repeat this process for approx. 2 min-
utes until the chemicals are fully mixed.
Note
With the WPC 2500 SW-AM system, the
dosing container holds 100 l.
Fine regulation of the operating pres-
sures
Mixing the chemicals
Dosing table
Dosing
con-
tainer
Chemical
Dosing per 10
l of dosing so-
lution [ml]
Pre-
chlorin-
ation
RM 852 Steri-
lisation agent
Anti-
scalant
RM 5000
Hardness sta-
biliser
Post-
chlorin-
ation
RM 852 Steri-
lisation agent
Consumables
Description
Order No.
RM 852 Sterilisation
agent
RM 5000 Hardness sta-
biliser
Coarse filter
6.414-919.0
Fine filter
6.414-920.0