Samsung LS19UBPEBQ-XAA User Manual
Page 21
USB Monitor - Limitation
Supported OS (Operating Systems)
Windows XP
- Service Pack 1 or earlier: Unsupported
- Service Pack 2 or later: Supported
Windows 2000
- Service Pack 3 or earlier: Not Supported
- Service Pack 4 or later: Supported
Windows Server 2003: Not Supported
Windows Vista: Supported. (64bit Not Supported)
* To check the information on the operating system of your PC, right-click ‘My Computer’ on the
‘Windows Desktop’ and select ‘Properties’ from the displayed menu. Check the information in
the ‘General’ tab of the ‘Computer Properties’ window.
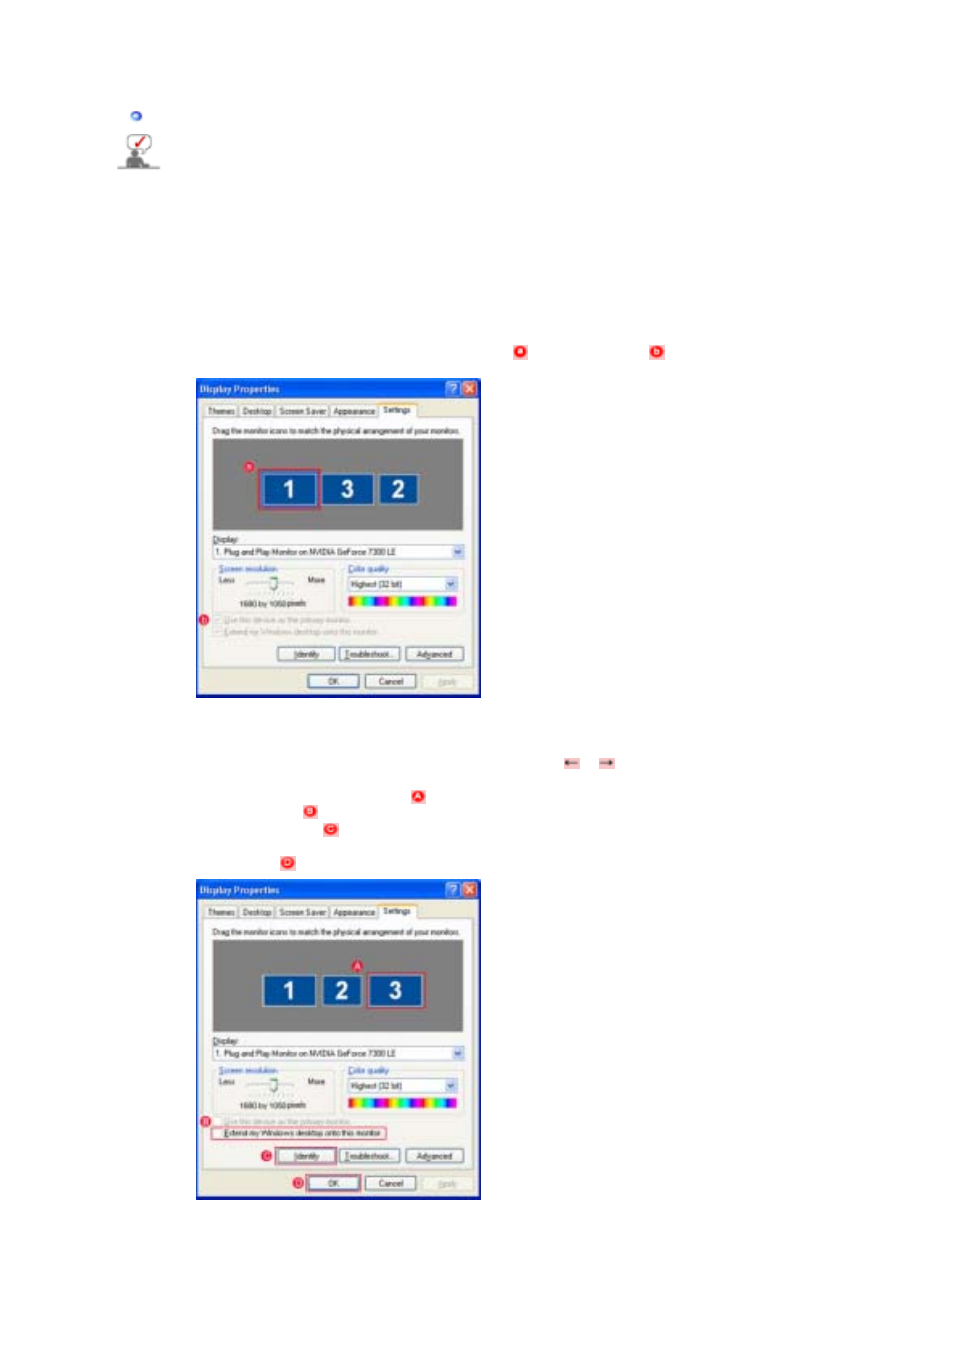
1. If you are using more than one USB monitor, first place the primary monitor in the leftmost
position in the 'Display Properties - Settings' window before installing the USB monitor driver.
(As shown in the figure on the left, if an existing monitor (
) is clicked, checkbox
must be
checked.) Otherwise, no screen may be displayed on the existing primary monitor.
※ Right-click on the 'Desktop' and select 'Properties' from the displayed menu.
1. Right-click on the 'Desktop' and select 'Properties' from the displayed menu.
2. If the 'Display Properties' window is not shown on the screen, press AltSpaceM
and press Space Key again. Then press the arrow keys (
or
) until the 'Display
Properties' window is displayed on the other monitor.
3. Select the deactivated monitor (
) in the 'Display Properties - Settings' window
and then click
to activate it.
4. 'Click 'Identify(I)' (
) to check the monitor numbers and then rearrange them
according to their actual sequence.
5. Click 'OK' (
) to finish the setup.
2. Because this USB monitor is recognized as a USB device, the DOS screen that appears for
general monitors when a PC is booting up is not displayed.
- If you want to use your USB monitor as the Primary Monitor, connect a D-Sub cable (for analog
signals) or a DVI cable (for digital signals) as well.