Audiovox 50-0263x-019 SERIES User Manual
Page 4
4
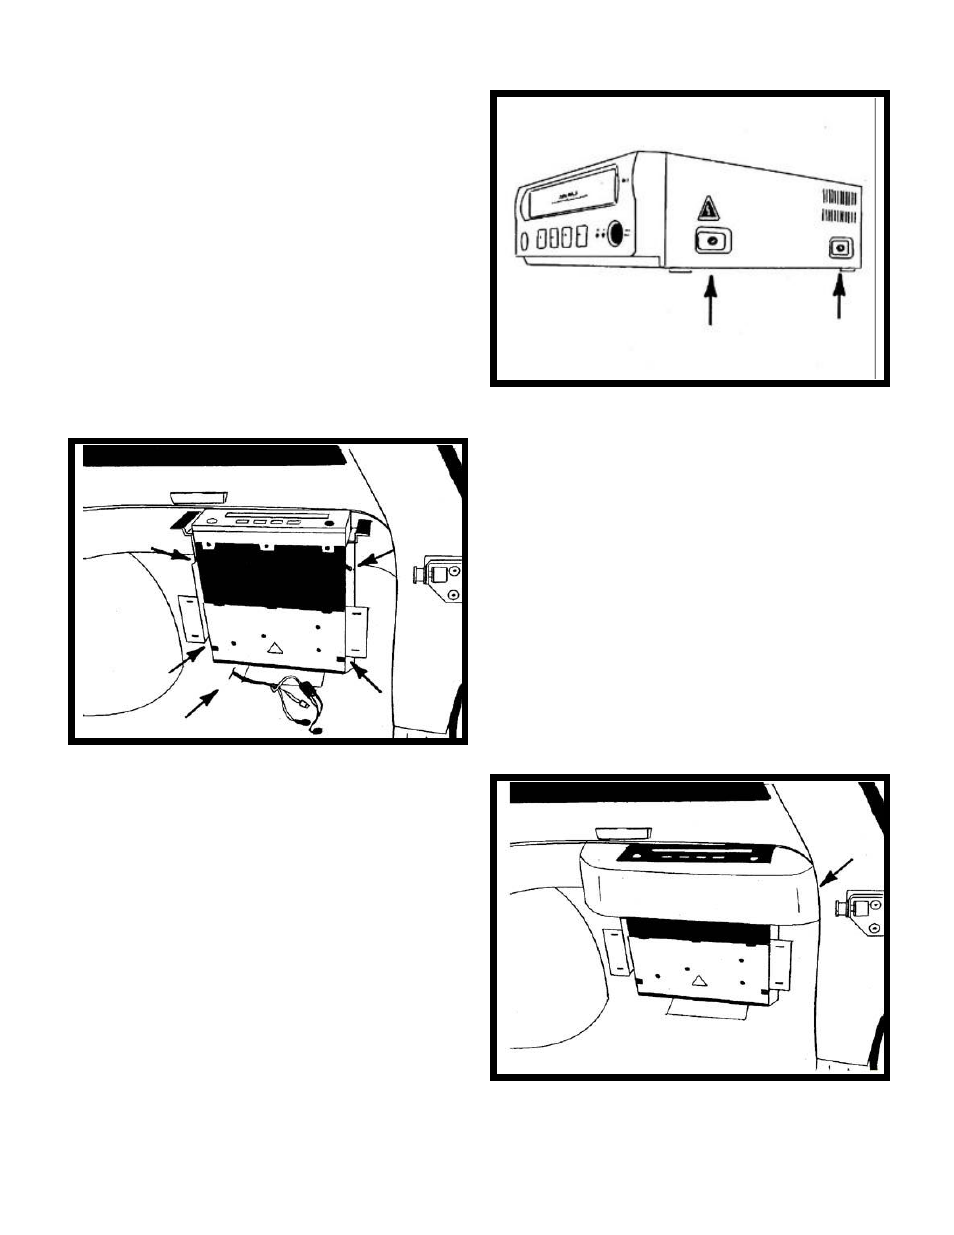
4. Remove and discard (4) four screws from the side
of VCP. Partially install (4) four #8 x 3/4" screws
(item 2 pg 2). See Figure 4.
5. Align screws in VCP with slots in bracket and
slide into position. Make sure wiring does not
rub against edge of bracket. See Figure 5.
6. Carefully position housing top (item 4 pg 2) on
VCP and slide VCP rearward until housing
contacts plastic panel. Mark position of bracket
and remove housing and VCP. Install (3) three
#8 x 1 1/2" (item 2 pg 2) in holes in bracket and
tighten (1) one screw previously installed.
NOTE: Do not overtighten screws.
See Figure 6.
FIGURE 4
FIGURE
5
FIGURE
6
This manual is related to the following products: