Controlling audio, Setting audio, Controlling audio (p.82) – Kenwood DNX7210BT User Manual
Page 42: Ontrolling audio
82
82
83
NOTE
• Each operation in this section can be started from
the multi function menu.
You can adjust the various settings such as
audio balance or subwoofer level.
1
Touch [Menu] on any screen.
2
Touch [Audio].
Audio screen appears.
See the following section for each setting.
• Setting audio
• Controlling audio
• Controlling equalizer
• Performing zone control
• Set space enhancer
• Set listening position
Setting Audio
1
Touch [Audio SETUP].
Audio SETUP screen appears.
See the following section for each setting.
• Set up speakers
• Set up your car type
• Select DSP
• Set up elevation
Speaker Select screen appears.
• Set up speakers
Speaker setup
You can select a speaker type and its size to
get the best sound effects.
When the speaker type and size are set,
the speaker crossover network is set
automatically.
1
Touch [Speaker Select] in the Audio
SETUP screen.
Speaker Select screen appears.
2
Touch the speaker you wish to adjust
and set each item as follows.
C
ontrolling Audio
Subwoofer
Select if you are using a subwoofer.
Tweeter
You can set the tweeter when you are
selecting front speakers.
If you are using a tweeter together with the
front speakers, set the tweeter to “ON”.
X’over
Displays the speaker crossover setup screen.
You can adjust the crossover setup that was set
automatically when you selected the speaker
type.
For details, see
3
Select a speaker size using [
2] and
[
3]. The speaker size is different
depending on the speaker type and
the unit.
Front
OEM, 8 cm, 10 cm, 12 cm, 13 cm, 16 cm, 17 cm,
18 cm, 4x6, 5x7, 6x8, 6x9, 7x10
Rear
None, OEM, 8 cm, 10 cm, 12 cm, 13 cm, 16 cm,
17 cm, 18 cm, 4x6, 5x7, 6x8, 6x9, 7x10
Subwoofer
None, 16 cm, 20 cm, 25 cm, 30 cm, 38 cm over
NOTE
• Select “None” if you have no speakers.
Front
Standard, Wide, Middle, Narrow
Crossover network setup
You can set a crossover frequency of
speakers.
1
Touch the speaker to set the crossover
in the Speaker Select screen.
2
Touch [X’over].
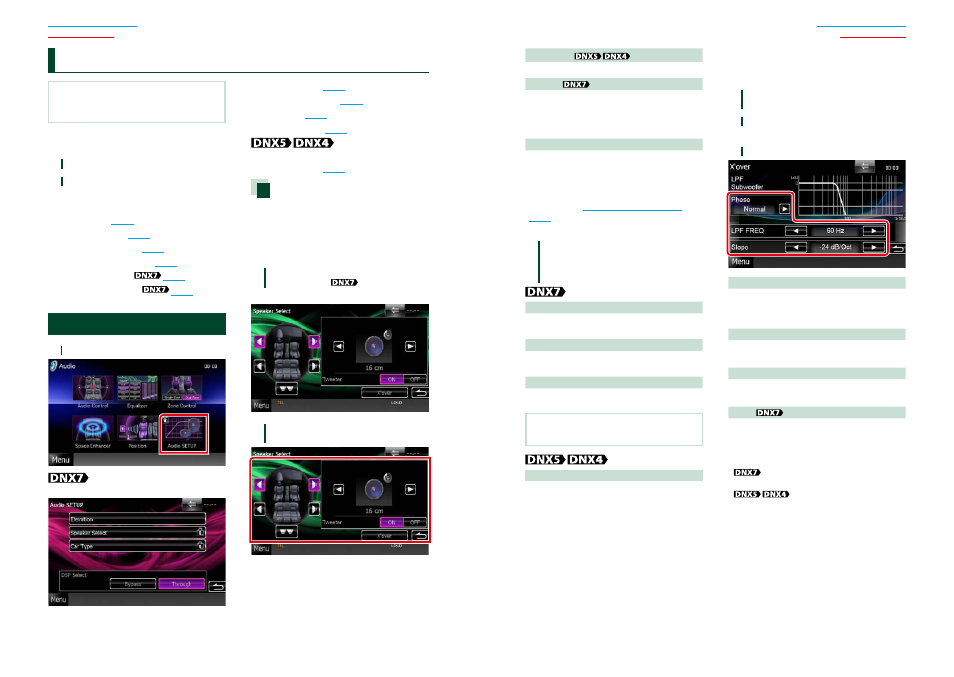
X’over screen appears.
3
Set each item as follows.
Phase*
Sets the phase of subwoofer output.
The phase is reversed 180 degrees when set to
“Reverse”.
HPF FREQ
High Pass Filter adjustment. (When front or rear
speaker is selected on Speaker Select screen)
LPF FREQ
Low Pass Filter adjustment. (When subwoofer
is selected on Speaker Select screen)
Slope
Sets a crossover slope.
* This function is available in the specific
situation.
Only when “Subwoofer” is set to
other than “None” in “Speaker Setup”.
Only when “Subwoofer” is
set to “ON” in “Speaker Setup” and “LPF
FREQ” is set to other than “Through”.