Changes on page 27 (text changed), Changes on page 28 (text changed) – Electrix Repeater Addendum User Manual
Page 3
Repeater can begin recording when it hears something, rather than in response to a button being pressed. Here is
how to do it:
¥ Press and hold Stop and then press Record. This puts the
unit into audio triggered mode.
¥ Whilst record is held down the trigger level can be adjusted using
the tempo encoder.
¥ The audio trigger is activated when Record is released. This is
indicated by the record button LED flashing.
¥ The audio triggered record will start when audio is detected above the selected trigger level.
¥ Audio triggered record can be cancelled by pressing the Stop button
CHANGES ON PAGE 27 (TEXT CHANGED)...
I M P O R TA N T !
Repeater must record or Overdub though the entire length of the ÒVirtual TrackÓ after which it flattens the
track and it is no longer virtual. If you do not record through the entire length of the loop Repeater will auto-
matically keep recording until the end of the loop. During this time the Record LED will flash to indicate that
Repeater is still Recording. If you press Stop during the recording immediately after a Loop Multiply your
overdub will be lost.
You can multiply the loop out by a factor greater than two by pressing and holding the Loop Multiply Button.
Use the Tempo encoder to select the multiplication factor. Release Loop Multiply to execute. If you have multi-
plied the loop further than you wanted, you can multiply the loop by a fraction to get back to where you started, or
to a smaller number of multiples of the original loop. Just rotate the tempo encoder to the left to access the available
fractional multiples of the current loop. Note this is only possible for loops consisting completely of 'virtual' tracks.
CHANGES ON PAGE 28 (TEXT CHANGED)...
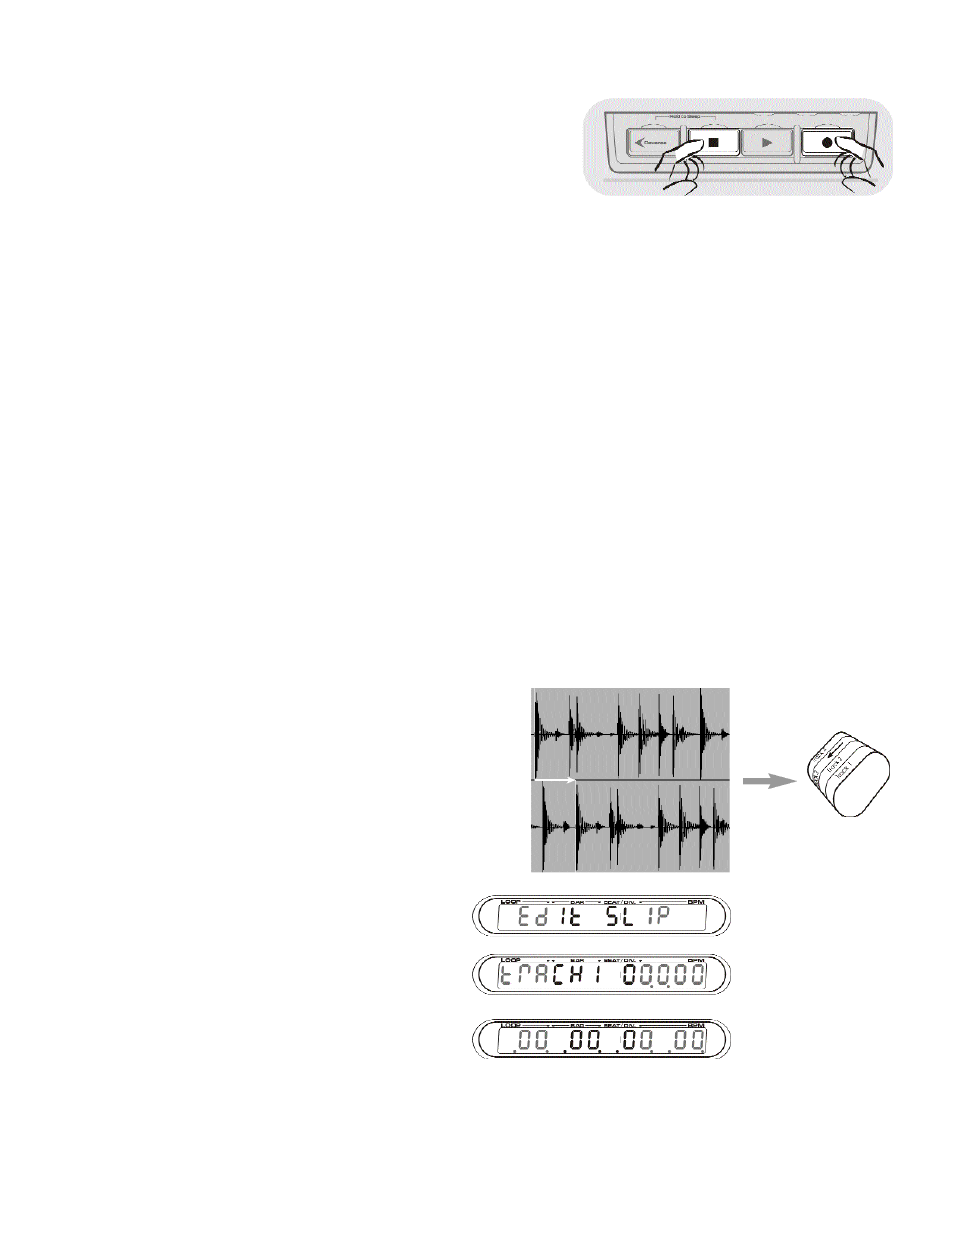
S L I P P I N G
Slipping lets you offset the start position of a loop
or its individual tracks.
¥ Press Slip, and the display will change to show
the slip offset of each active track in beats.
¥You can select/deselect the appropriate tracks
for Slipping by using the Track Select but-
tons. Editing one track at a time displays the
slip amount with a finer resolution.
¥ Use the Tempo knob to set the slip position in
bars/beats/1/100 of a beat, with zero being the
original position. Use the Loop knob to slip
whole beats
¥Twist the knob quickly to edit in larger steps.
Twist the knob slowly to adjust in finer amounts.
¥ Press Slip again to confirm and exit.
¥ Press and hold Slip to reset to 0 slip.
Setting up for Trigger Recording
Track 1
Track 2