Electrix Tweaker Editor Reference User Manual
Page 6
2. Overview
6
Some of the changes that you can explore are:
8
Enable and disable local control of LED rings and button LED’s
8
Create preset files that are stored on the computer to extend
the preset possibilities and share setups with others
8
Test and confirm your Tweaker’s settings and LED’s
8
Reset the Tweaker to default settings
8
Change the function and look of LED rings
8
Change the MIDI channels of different controls
8
Change the output message of button from MIDI notes to
continuous controller (CC)
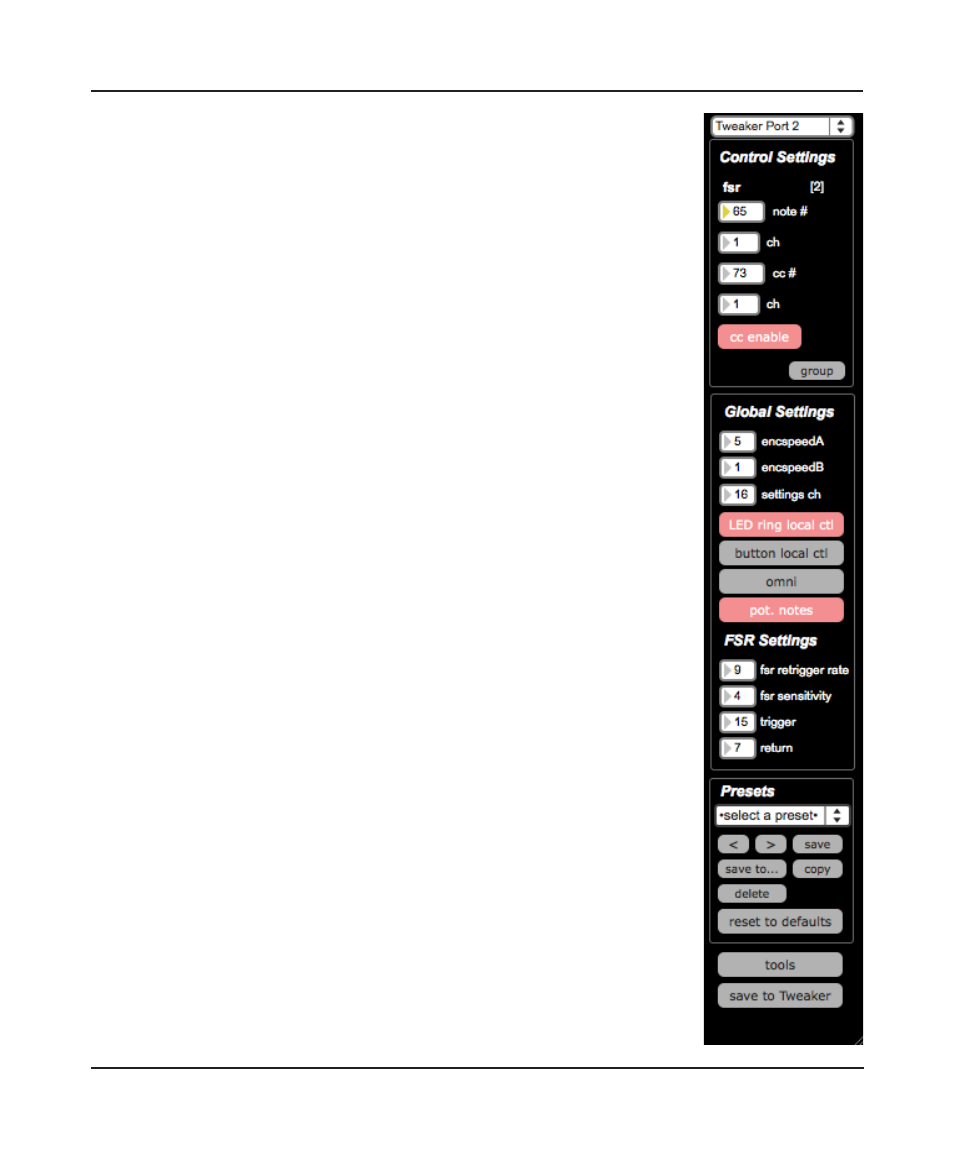
It is easy to navigate and select controls. Use the mouse to click on
controls on-screen or just use TWEAKER: press a button or turn a dial,
and the appropriate editor will appear in the interface so you can change
settings. This is, of course, limited to buttons and encoders: LED rings
must be clicked on to show the LED ring Inspector panel.
Selecting a control highlights the midi note/cc# number box in the
Control Settings panel enabling you to just type in a value. This makes it
easy to quickly edit MIDI note and CC values: select, type, enter, select,
type, enter, etc...
Any time you modify a property of a control, the change is instantly sent
to the TWEAKER. However, for the change to be permanent – so the
Tweaker will power up with the new settings – you must press the “Save
to Tweaker” button. This writes the settings to flash memory on the
hardware. Don’t do this more than necessary, because the flash memory
has a finite lifespan of data writes.