Electronics, One-point rh-calibration, Replacement of the humicap sensor and the filter – Vaisala HMD60 User Manual
Page 3
HMD60U/Y
HMD60U/Y-M210276en-A
Operating Manual
2003-01-22
3
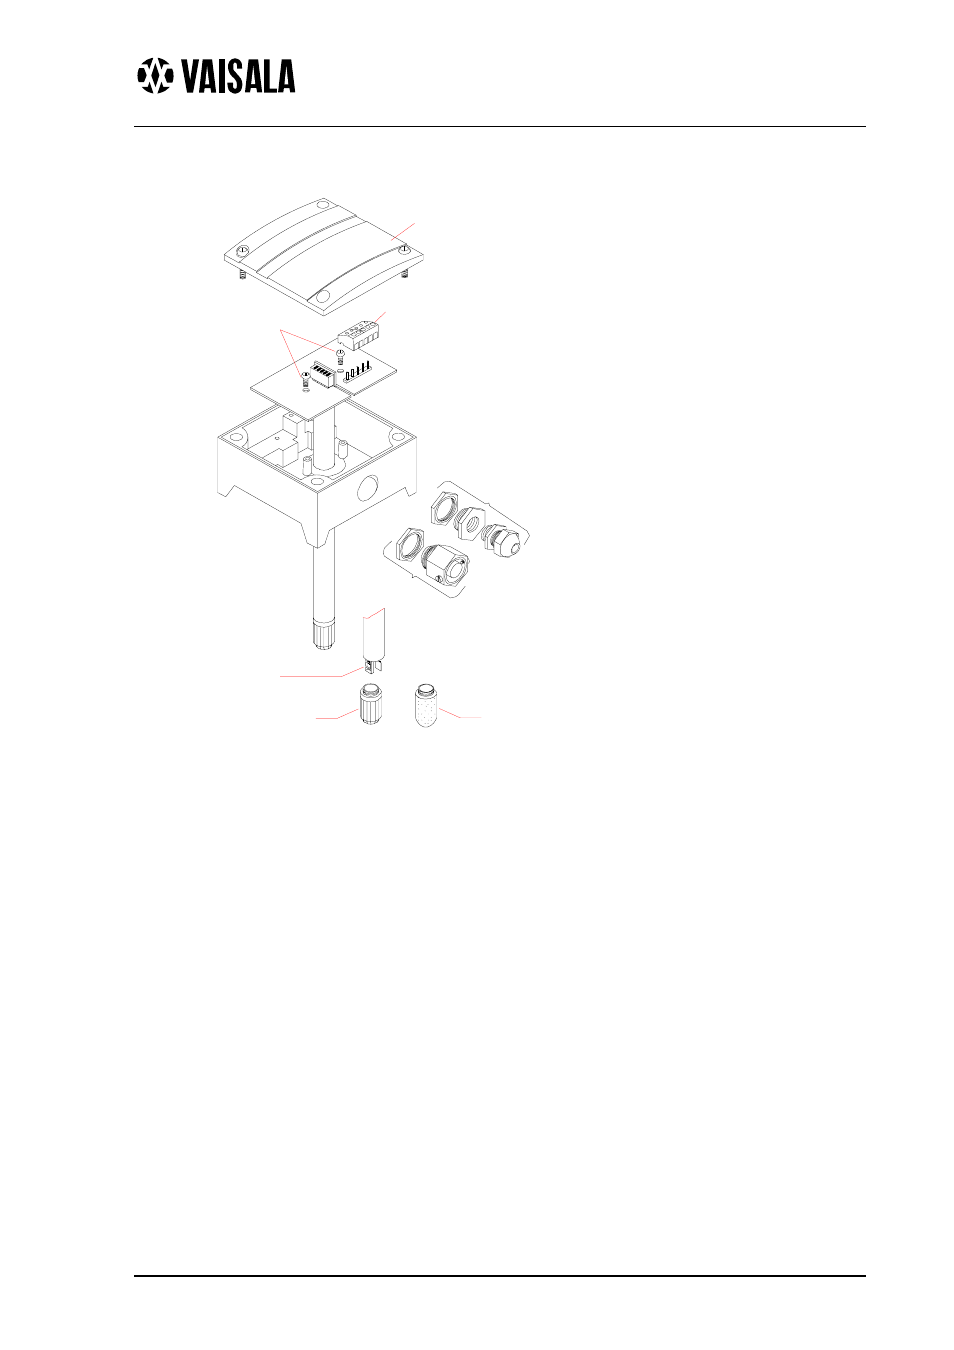
ELECTRONICS
10528HM
18941HM
GLANDS
LID
SCREW TERMINAL
S C R E W S
MEMBRANE FILTER
part no. 17039HM
SPARE PART SENSOR
HUMICAP180
STAINLESS STEEL SINTERED FILTER
part no. HM46670
TO REMOVE THE SENSOR HEAD:
1. Open the lid
2. Disconnect the screw terminal
3. Open the screws (2 pcs)
4. Pull out carefully
TO REINSTALL THE SENSOR HEAD:
1. Push in the sensor head
2. Fasten the screws
3. Connect the screw terminal
4. Close the lid
Electronics (can be disconnected), accessories, spare parts
ONE-POINT RH-CALIBRATION
The accuracy is recommended to be
checked at least once a year; the interval
depends on the operating conditions and
the required accuracy of the
measurement. The transmitter calibration
can be conveniently checked with the
HMI41 or HM70 indicator equipped with
an appropriate probe and optional
calibration cable. If adjustment is
needed, use the one-point calibration
potentiometer. If you prefer to calibrate
the HMD60U/Y transmitters against
saturated salt solutions, use LiCl (11
%RH) and NaCl (75 %RH) solutions.
REPLACEMENT OF THE HUMICAP
SENSOR AND THE FILTER
Remove the damaged sensor and insert a
new one. Recalibrate the transmitter.
Replace a dirty filter (membrane or
sintered) to ensure a maximum lifetime
and a fast response for the sensor. Do not
attempt to clean the filter.