Haws 2000SMS User Manual
Page 5
3/14
Model 2000SMS
Page 5 of 5
Step 7:
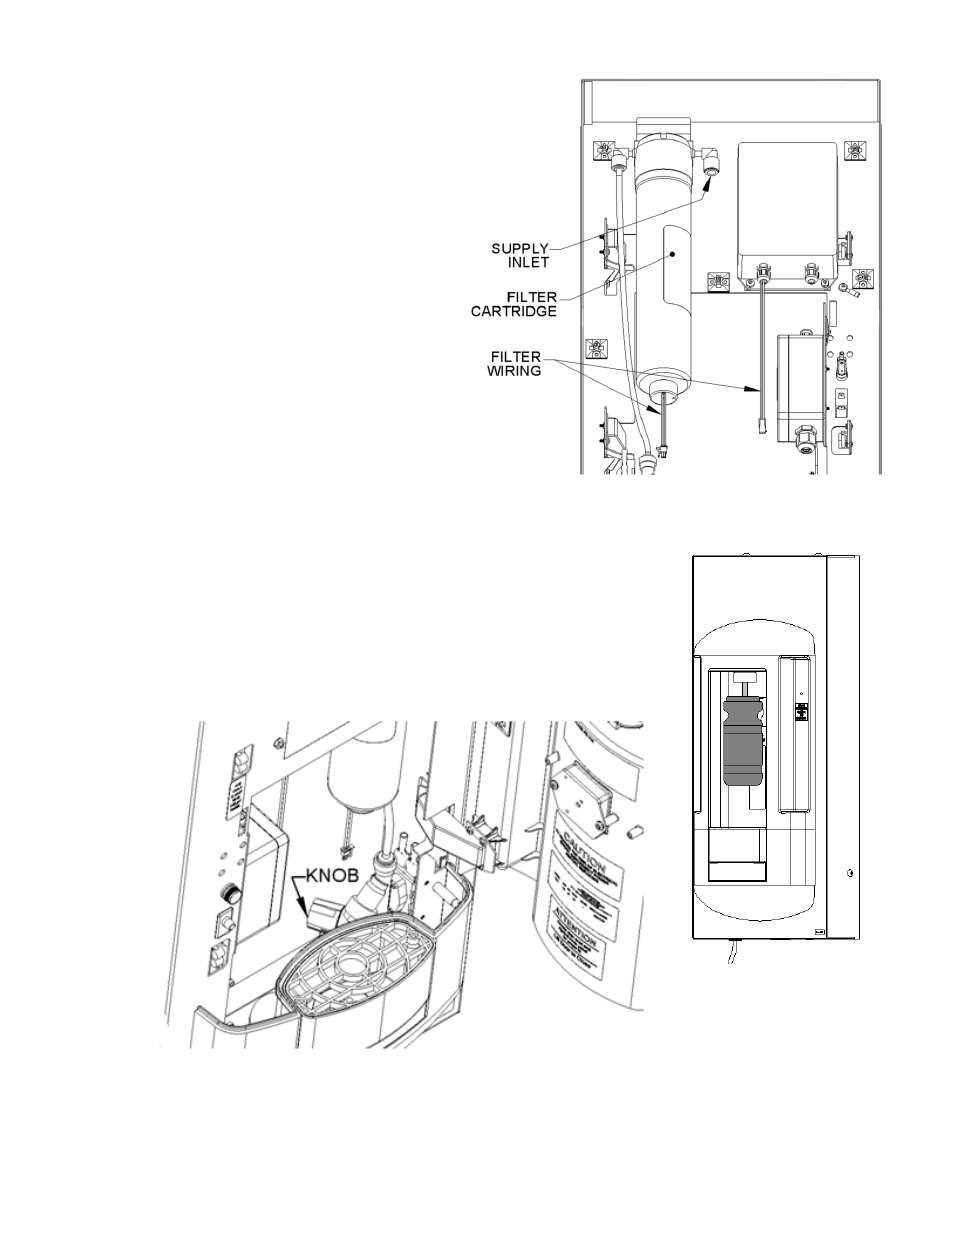
Place the Hydration Station onto its
mounting bracket and run 3/8” tubing (not
supplied) between the screwdriver stop (installed
in Step 5)and the Hydration Station’s supply inlet
elbow in the filter head (it may help to temporarily
remove the filter cartridge – see Step 7 Diagram).
Connect the wiring coming off of the filter cartridge
to the wiring coming out of the circuit board enclosure
(see Step 7 Diagram).
Step 8:
Replace the mounting screws removed
in Step 2 (see Step 2 Diagram for
details).
Provide AC power to unit.
Step 9:
Activate the Hydration Station by placing a bottle or cup in front of
the sensor (see Step 9 Diagram A). If water does not dispense,
see the Troubleshooting Guide in the Owner’s Manual.
The pressure regulator may need to be adjusted to better
complement the input pressure at the installation site (see Step 9
Diagram B). To do so, pull out the adjustment knob and rotate as
needed (clockwise from the front of the unit decreases flow); push
knob in when desired flow is achieved. * Flow rate is factory set to
the maximum flow rate for decreased water consumption.
Step 10:
Approximately five gallons of water must be run through the system after the unit is
installed in order to remove the loose carbon particles from the filter cartridge and any air
bubbles from the system (both of these are normal occurrences after a filter change).
Check the system for leaks. Place hex key in a secure location.
Step 7 Diagram (Back View)
Step 9 Diagram A
Step 9 Diagram B