Haws 2000SMS User Manual
Page 4
3/14
Model 2000SMS
Page 4 of 5
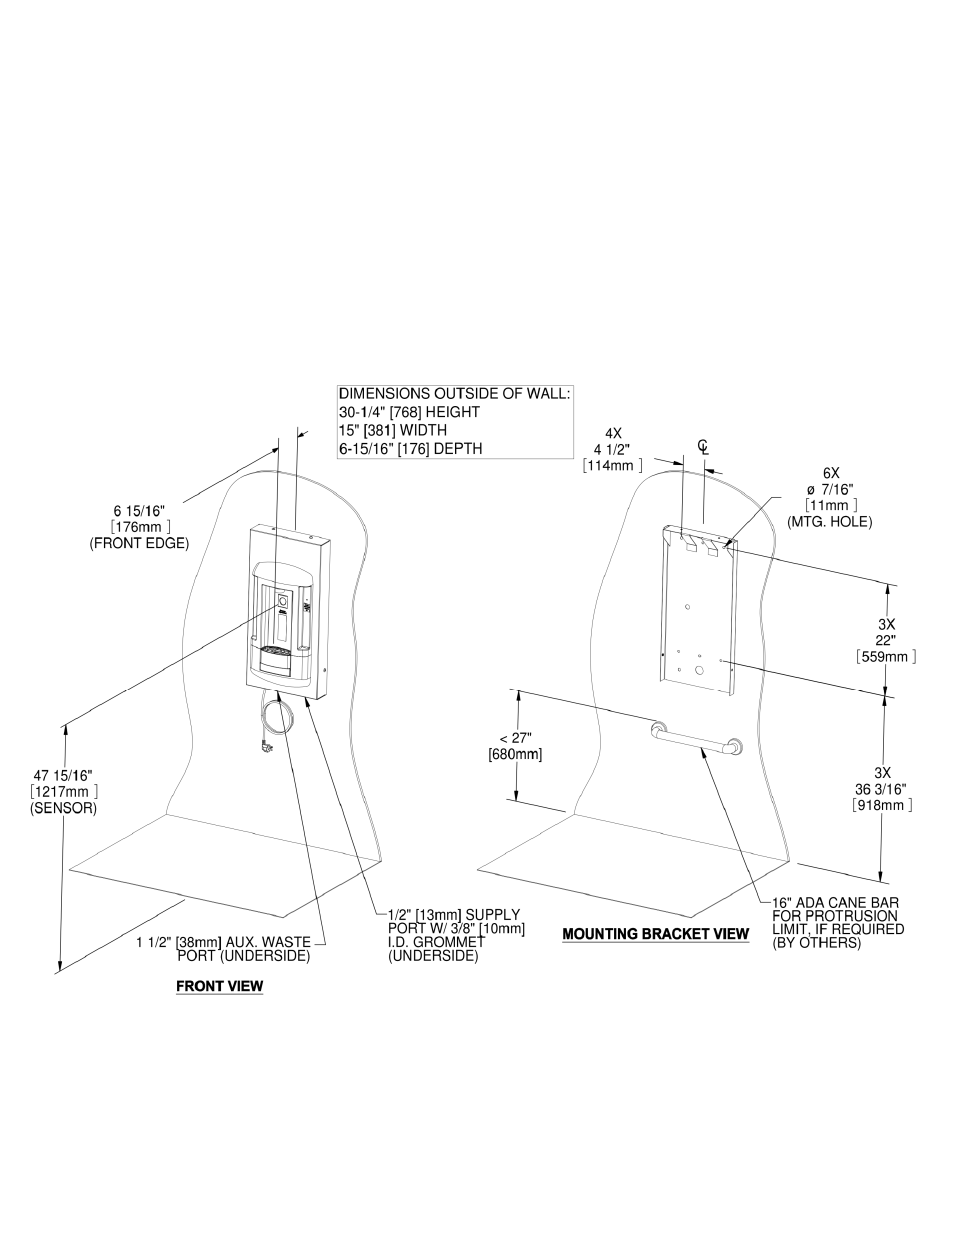
Step 5:
The Hydration Station is supplied with a power cord. If desired, the power cord may be
removed and the unit may be wired through one of the extra holes in the mounting bracket.
Install a supply line through the bottom as shown in Steps 5 & 6 Diagram by removing the
plug from the port and installing the supplied grommet – for use with 3/8” tubing. If desired,
one of the extra ports in the mounting bracket may be used for the supply inlet instead.
Connect the supply line with a screwdriver stop (not supplied).
Double-check supply and electrical locations.
NOTE: When installing this unit, all pertinent local, state, or federal codes should be adhered
to.
Step 6:
Secure the detached mounting bracket to the wall; a number of mounting holes are provided
to fasten the bracket direct to the wall (see Step 5 & 6 Diagram for mounting hole pattern or
use the mounting bracket itself as a template).
Note that the Hydration Station weighs approximately 30 pounds. As such, attach the
mounting bracket using six 1/8” x 3” zinc-plated steel toggle bolts (not supplied) in
conjunction with six appropriately-sized zinc-plated steel 1/8” fender washers (not supplied).
Use a level to verify horizontal and vertical frame mounting.
Steps 5 & 6 Diagram