La100s 6.pdf, Caution warning, Vesa – Monoprice 7842 MLA100-S User Manual
Page 6: 75 x 75, Detail 3 detail 4, Tilting
6 of 6
®
Fix the AA on the display screen with VESA mounting Pattern
C
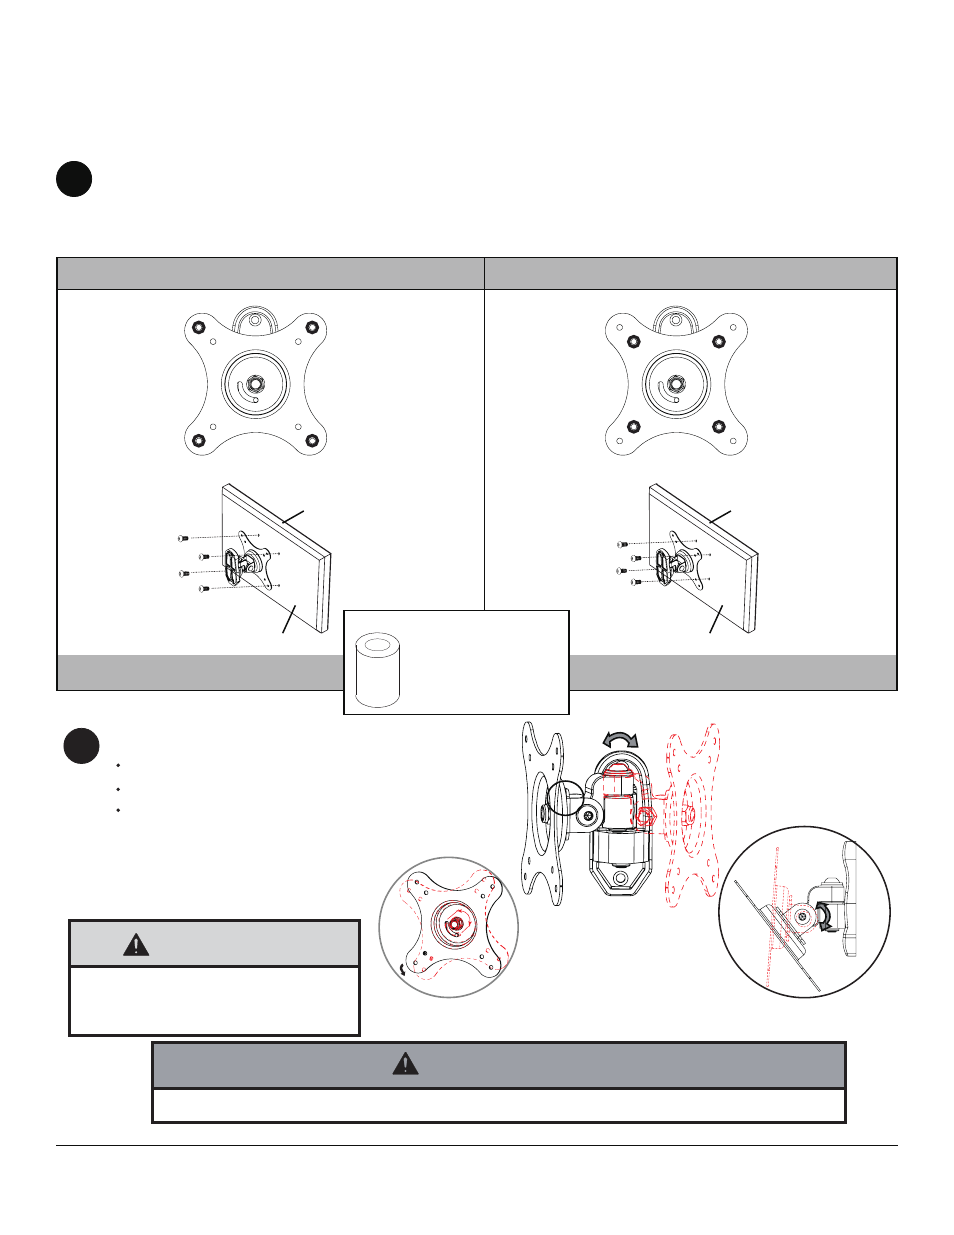
VESA
®
100 x 100
VESA
®
75 x 75
Choose hole pattern as shown in detail 3 for VESA mounting pattern. Begin with the shortest length screw, hand thread
through adapter plate into screen as shown in detail 4. Screw must make at least three full turns into the mounting hole
and fit snug into place. Do not over tighten. If screw cannot make three full turns into the screen, select a longer length
screw from the fastener pack. Repeat for remaining mounting holes. Securely tighten screws.
NOTE: Spacers may not be used, depending upon the type of screen.
NOTE: For screens with a hole
pattern in a pocket,
spacers go between
adapter plate and
screen.
DETAIL 3
DETAIL 4
ADAPTER
PLATE
SCREEN
ADAPTER
PLATE
SCREEN
Tilting
The rotation angle of head is 180
° as shown in fig.D.1.
The rotation angle of adapter is 90
° as shown in fig.D.2.
The tilt angle of adapter is 45
° up and 90°down as
shown in fig.D.3.
90°
-45°--90°
180°
D
• Be careful not to pinch fingers when
opening and closing mount from the
wall.
CAUTION
WARNING
• Do not remove or loosen screw while the mount is in use. Doing so may cause the screen to fall.
fig. D.1
fig. D.2
fig. D.3