Monoprice 6277 Wall Mount Bracket User Manual
Page 4
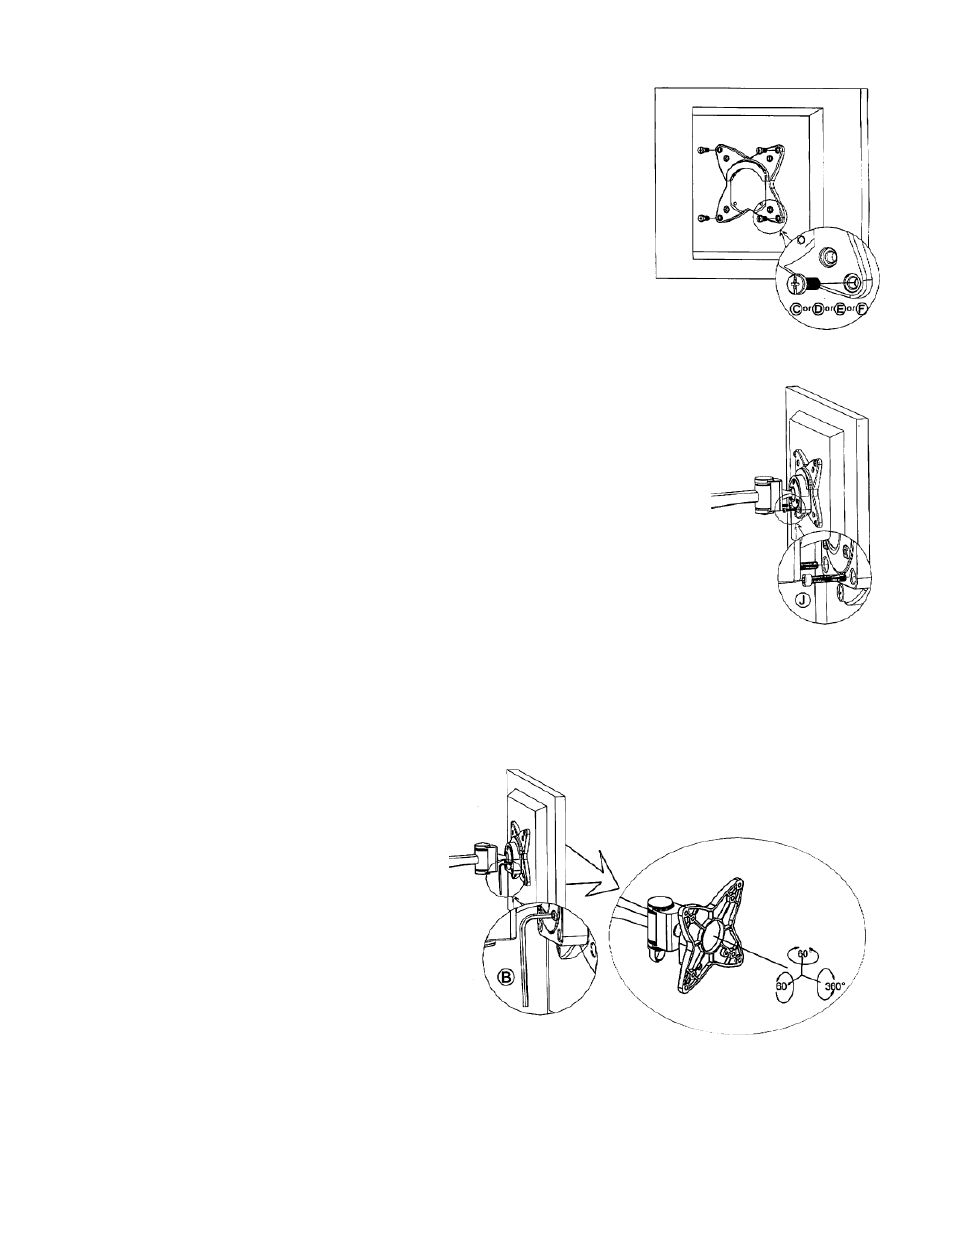
Step Six:
After having prepped your flat panel display by removing any table
top stands as instructed in the manual for your display, attach the
display mounting plate (part O) to the back of your display. Make
sure it is in the correct orientation. The “U” shaped lip should be on
the top of the plate pointing downward. Use four of the machine
screws included with the mount (Part C, D, E or F) or included with
your display to attach the plate to the back of the display. If none of
the included screws fit, contact the manufacturer of your display to
find out the appropriate size needed and purchase them at a local
hardware store.
Step Seven:
Hook the lip of the display plate onto the head of the arm assembly. Align
the two bottom holes on the head to the holes on the plate and attach them
with the allen bolts (Part J) and tighten with the included Allen key (part A)
Step Eight:
Adjust your display to the desired position. Once in the desired position, use the Allen key (Part B) to
tighten the three smaller allen bolts securing the ball retention ring to secure your display’s position.
Congratulations, You’re Done!
The display should be able to swivel freely side to side on it’s swing arm but should hold it’s tilt and
rotational position. Enjoy.
Figure 8
Figure 7
Figure 6