Caution, Warning – Monoprice 5921 Wall Mount Bracket User Manual
Page 7
7 of 8
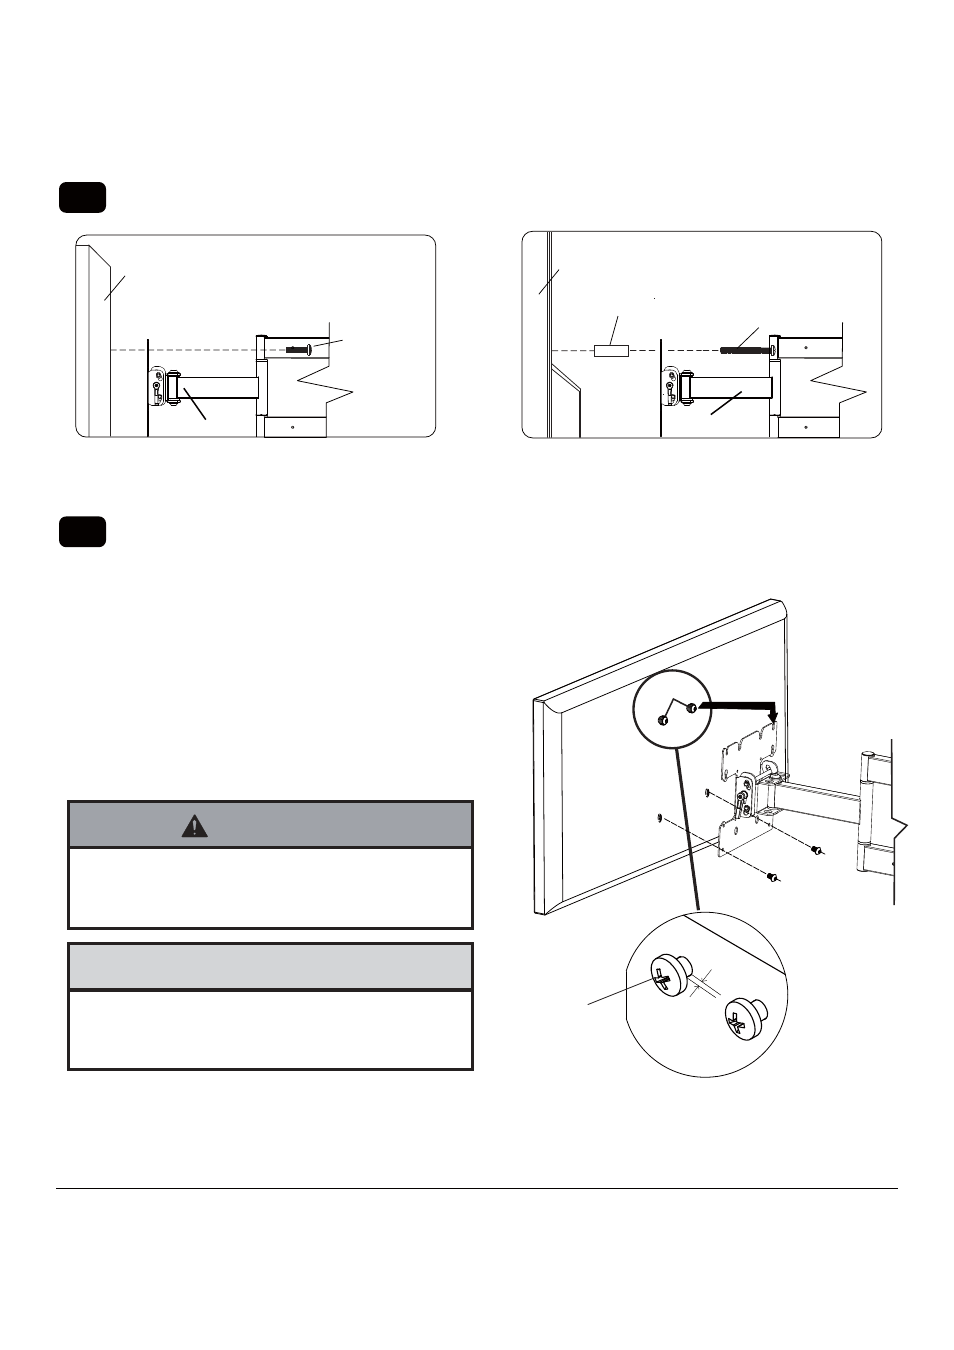
For Flat Back Screen
For Beveled Back Screen
C.1
C.2
SCREEN
SCREW
SPACER
SCREEN
fig C.1.1
fig C.1.2
SCREW
AA
AA
OR
Do not tighten screws with excessive force.
Overtightening can cause damage to mount.
CAUTION
Do not lift more weight than you can handle. Use
additional man power or mechanical lifting equipment
to safely handle placement of the screen.
WARNING
Insert two for 200x200 & 200x100 VESA patterns appro-
priate sized bolts( C ) into the top two mounting holes
on the back of your display as shown in fig.C.2.1Leave
approx. 1/4" of exposed thread.
Select the small,medium,large or extra large screws from the baffled .fastener pack then attach
screen brackets(AA) to screen following figure C.1.1 or C.1.2 on page 7.
Lift the display and hook it on to the display mount-
ing plate by lowering the exposed portion of the top
screws down the notches on the top edge of the
plate for a 200x200 pattern or into the key hole.
Once in position, attach the bottom two for a
200x200 pattern bolts(C) to secure the display to
the mounting plate as shown in fig.C.2.2
fig.C.2.1
fig.C.2.2
top screw
0.25"
( A B C
D or E)