Monoprice 4856 Wall Mount Bracket User Manual
Page 3
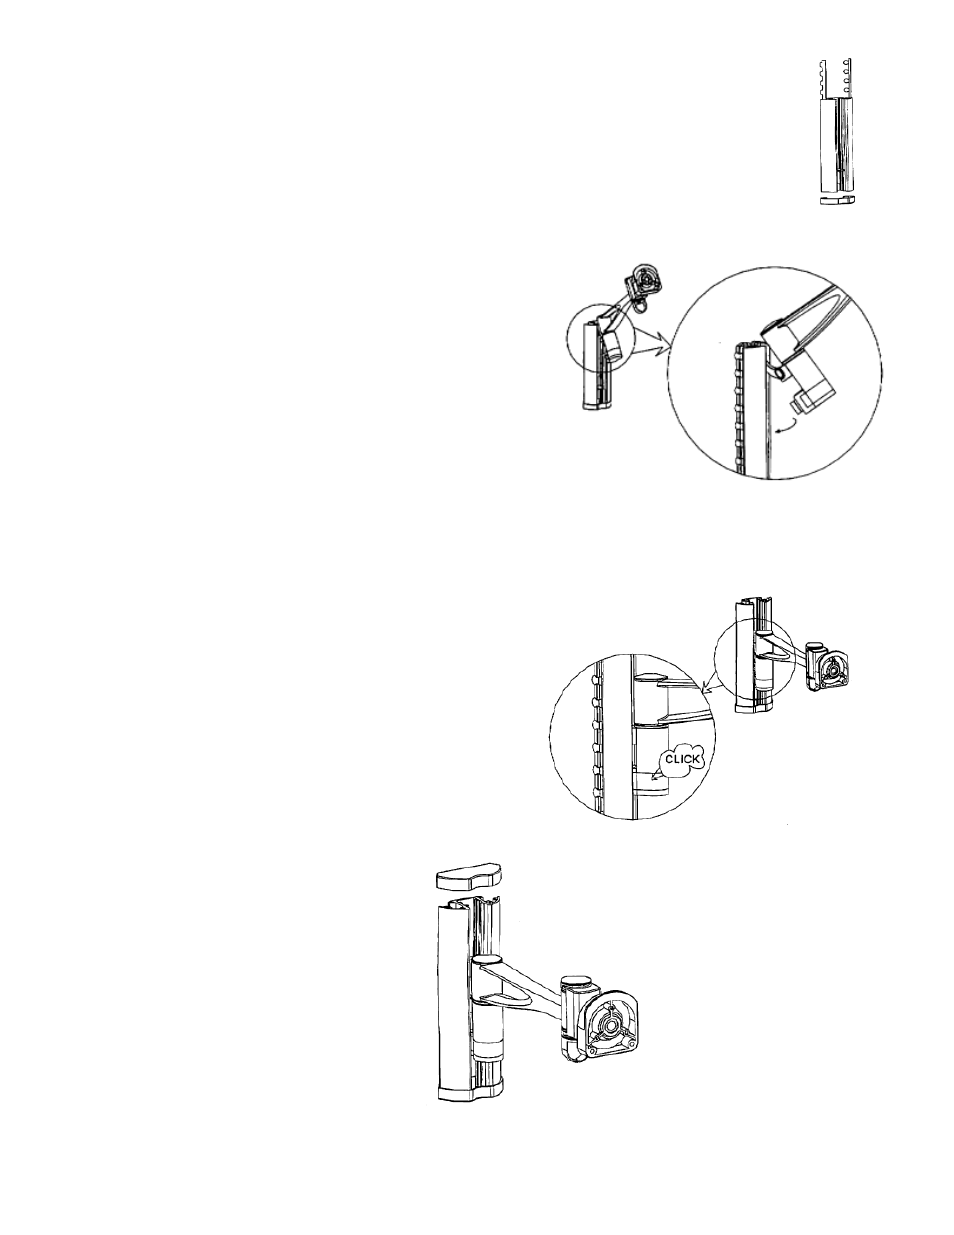
Step Two:
Attach the bottom wall bracket cap (part L) and slide the cable
management guides (part M) into their appropriate groves on
the wall bracket if they are not already installed.
Step Three:
Make sure the arm assembly (part N) is oriented correctly.
The arm should extend out from the top of the cylinder that
attaches to the wall bracket and the plastic snap clips
should be on the bottom cylinder. Slide the wall bracket
attachment arm of the arm assembly on to the wall bracket
into the center grove from the top opening of the wall
bracket. Slide the arm assembly down keeping it tilted at
an upward angle till you bring it to the position on the wall
bracket you desire.
Step Four:
Snap the bottom snap clip into the wall bracket grove. It
should click into place and the arm assembly should be
upright and not able to slide up and down once it is
snapped properly in place.
Step Five:
Attach the top wall bracket cap (part N).
Figure 2
Figure 3
Figure 4
Figure 5