Monoprice 10221 Speaker Volume Control with IR Repeater User Manual
Page 2
wires to ensure no stray strands are sticking out of the
bundle.
4d. Connect the positive wire from the IR transmitter bulb to
the IR terminal on the volume control. Connect the
negative wire to the G (ground) terminal on the volume
control.
5. Double-check all your connections. Ensure that no stray wires
are sticking out.
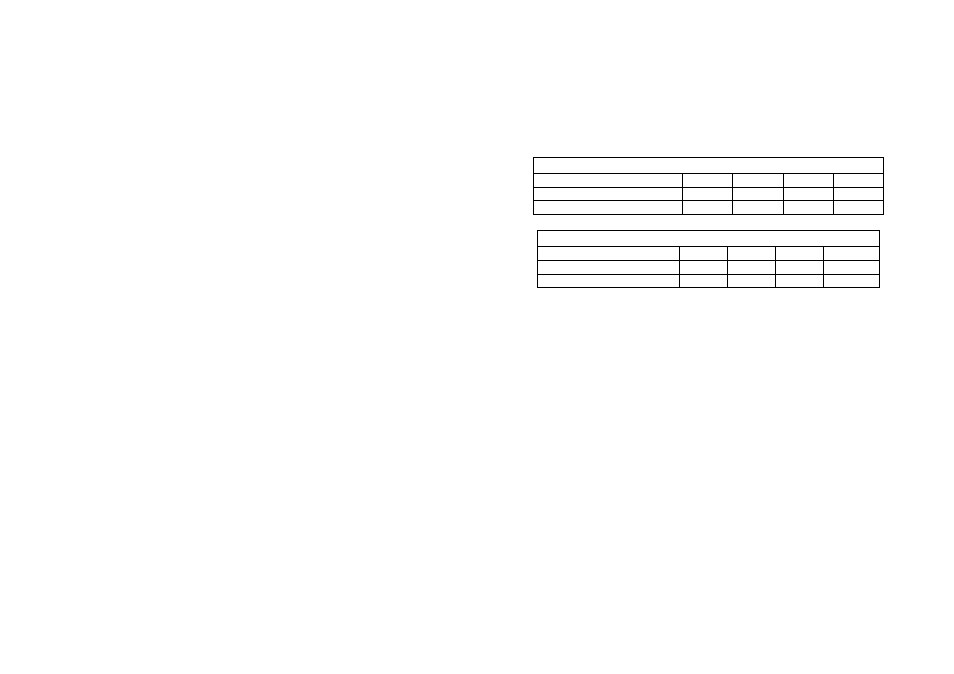
6. Note the number or pairs and the impedance of the speakers
connected to the volume control. Refer to the two jumper
settings charts to determine the proper settings for the
jumpers on the back of the volume control circuit board. Move
the jumpers as required to match the needs of your system.
7. Insert the completed volume controller assembly into a
low-voltage box (not included). Ensure that there is no strain
on the wires and that the wires are still properly attached to
the controller. Use the two long screws to secure the volume
controller assembly to the low-voltage box.
8. Attach the interior plate to the volume controller assembly
using the two short screws. Snap the outer plate into place on
top of the interior plate.
9. (Optional) If step 4 above was performed to setup the IR
repeater functionality, plug the 12VDC/500mA adapter into a
wall outlet to provide power to the volume control unit's IR
receiver.
10. (Optional) If step 4 above was performed to setup the IR
repeater functionality, position the IR transmitter bulb so that it
can "see" the IR sensor on the AV receiver/amplifier (or
whichever component you intend to control from the remote
location).
Impedance jumper settings to maintain an 8 ohm load
SPEAKER OHMS (Ω)
1X
2X
4X
8X
8
1 PAIR
2 PAIR
4 PAIR
8 PAIR
4
-
1 PAIR
2 PAIR
4 PAIR
Impedance jumper settings to maintain a 4 ohm load
SPEAKER OHMS (Ω)
1X
2X
4X
8X
8
2 PAIR 4 PAIR 8 PAIR
16 PAIR
4
1 PAIR 2 PAIR 4 PAIR
8 PAIR
Note: Multiple pairs of speakers should be connected in parallel.