Tuff Country 53905 - Toyota Tacoma 05-14 3 uni-ball lift kit User Manual
Page 6
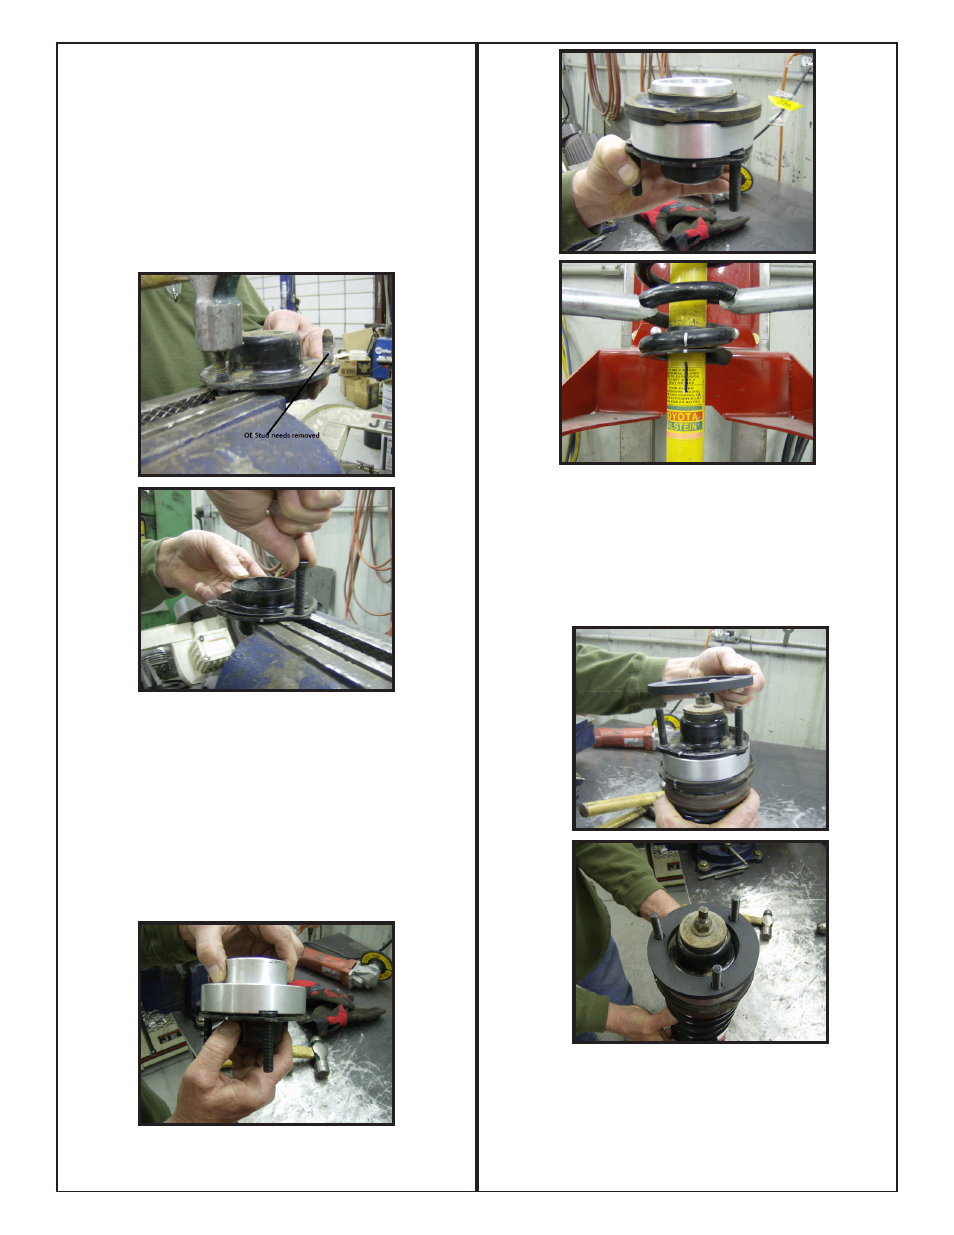
14. Carefully compress the strut until the upper top plate can
be removed. Remove the nut and hardware and save for
re-assembly.
15. Remove upper top plate and remove rubber isolator,
save for re-assembly.
16. Locate (3) 10mm x 2 1/4” strut stud bolts from hardware
bag BU30000. Working on the top plate that was removed
from the strut, knock out the 3 OE studs and discard. Now
carefully install the new 10mm strut studs.
17. Locate (1) new upper strut spacer, the newly modified
top plate, the rubber isolator, the OE strut and hardware.
Place the strut spacer onto the strut plate making sure that
the cut outs in the spacer fit over the head of the studs,
then install the rubber isolator onto the new upper spacer.
Place assembled top plate onto the coil spring and carefully
compress back together and re-attach OE Nut and hard-
ware.
Torque to 65 ft lbs. Also, make sure that the lines
that were scribed on the top plate, rubber isolator, coil
spring, and the bottom coil seat are all lined back up
together.
18. Locate (1) new strut pre-load spacer and (3) 10mm nylon
lock nuts from hardware bag BU30000. Working on the
driver side, install new pre-load spacer on top of upper strut
plate, it will go over the 3 new studs. Now install entire strut
assembly back into the vehicle OE location and secure using
new 10mm nylon lock nuts.
Torque to 36 ft lbs. Special
note: It makes things a bit easier to cut off the excess
threads on the studs.
19. Locate the lower strut bolt and hardware. Secure the
Strut assembly into the lower control arm mount.
Torque
to 75 ft lbs. Special note: when installing the lower bolt,
make sure it is installed the same direction that it was
removed. Such as the head of the bolt will be towards
the rear of the vehicle.