Spyder Auto Proper Headlight Adjustment for Spyder Auto Headlights User Manual
Spyder Auto For the car
Proper Headlight Adjustment for Spyder Auto Headlights
There are many factors involved when you are adjusting your headlights; ride height, age, and of course general wear
and tear. It’s no secret that headlights are the most important factor when talking about safety on your vehicle. This is a
handy guide to adjusting your headlights for an optimal beam pattern and vision line.
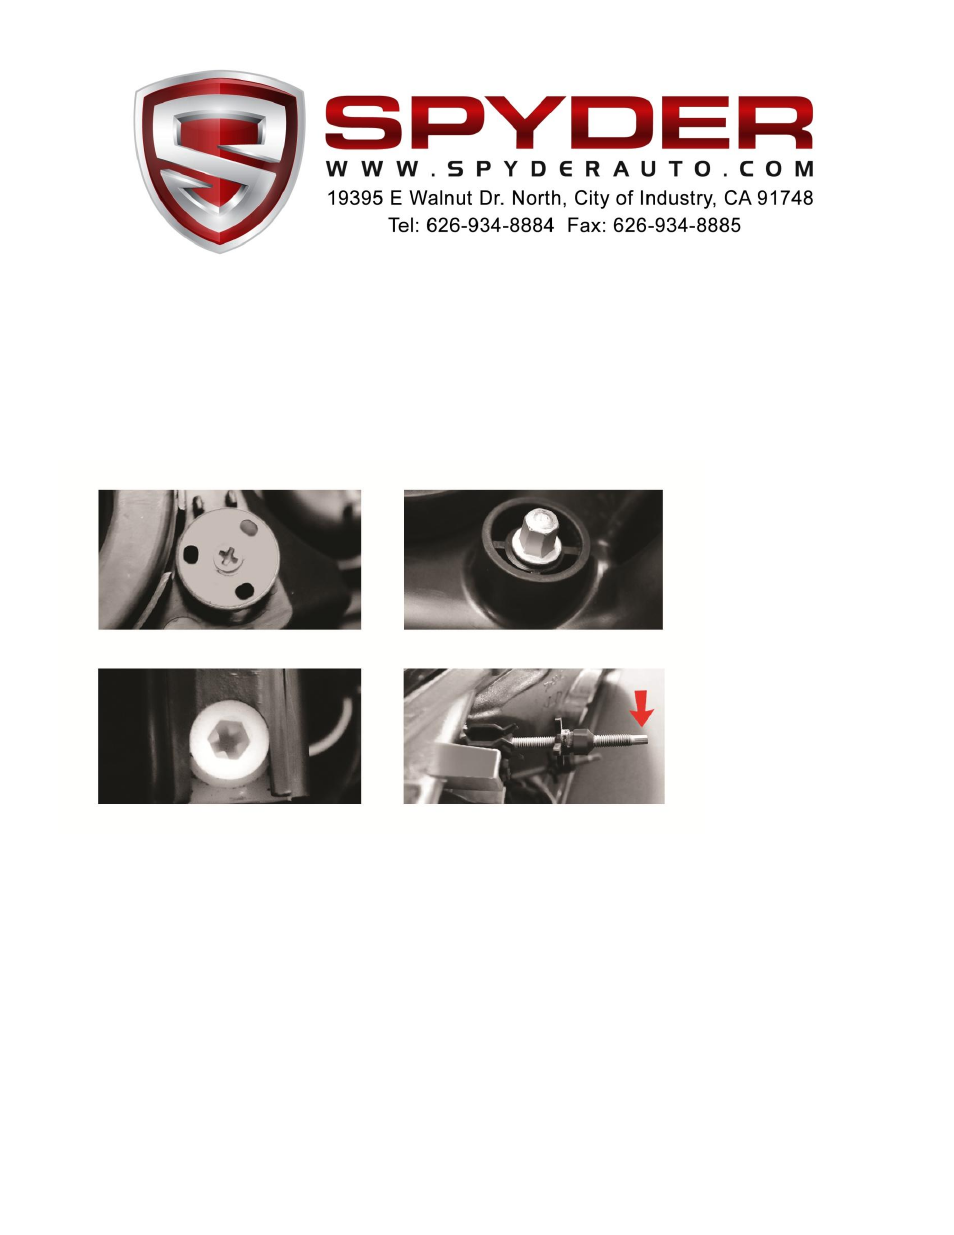
First, locate your headlight adjustment knobs. Spyder Auto uses a multitude of different adjustment knobs based on the
headlight set you have. Here you will see an example of each of them:
Next locate the tools that will be needed to adjust your headlamps. Note: Please do not ever use power tools on your
adjusters this may cause severe damage to the internals of your lights.
Next, on a level surface, back your vehicle 25 feet away from a wall. Check your owners manual to see what their
optimal distance may be. For example – Toyota suggests you should be 10 feet away from a wall and Chrysler suggests
for you to be 33 feet away from a wall. This is for your STOCK headlight system, Spyder Auto recommends that you are
25 feet away.
Make sure you are doing this at night with a passenger inside of the vehicle. To test east side of the light cover it up with
a jacket or stand in front of it. Make sure not to do it for too long, you don’t want the headlight to retain an excess
amount of heat.