Speedtech 68-74 Nova Torque Arm User Manual
Page 3
3 |
P a g e
Note: This kit requires approximately 30 minutes of welding time to install the upper rear cross
member and rear axle mounted support brackets. If you have opted to use your current rear
axle rather than ordering a Speedtech prepped rear axle, you will need to remove the existing
leaf spring mounts and have your Torque Arm rear axle brackets installed. A guide for bracket
location is included with the brackets. We highly recommend you use a professional shop
familiar with welding brackets onto rear axles, one who has an axle jig and/or the ability to
straighten the axle tubes should they warp during welding.
The vehicle should be on a level surface before you start.
1. The first step will be to disconnect your brake lines and parking brake cables.
Then remove your original drive shaft, shocks, leaf springs, leaf spring pockets,
rear axle, pinion snubber and bracket, bump stops and fuel tank.
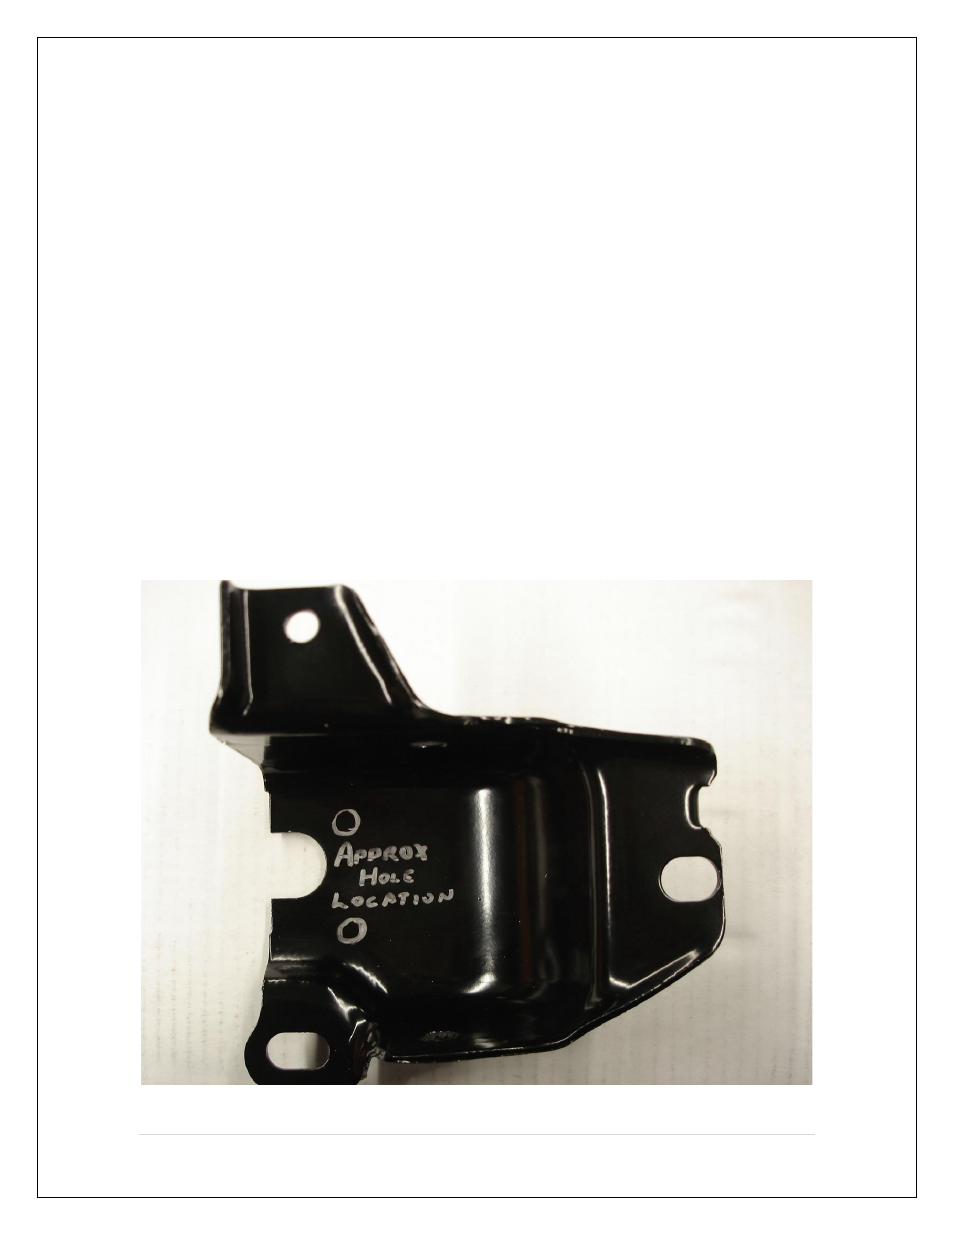
Front Spring Pocket
2.
There are two 3/8” holes that need to be drilled in the pocket. Approximate
location is shown below. These holes will be used later in the installation.