Ariens 924 SNO-THRO 924109 User Manual
Page 24
8 - 24
8.1 FRICTION WHEEL
1. To replace friction wheel, tip unit up into the upright
service position.
2. Remove bottom cover by removing four cap
screws.
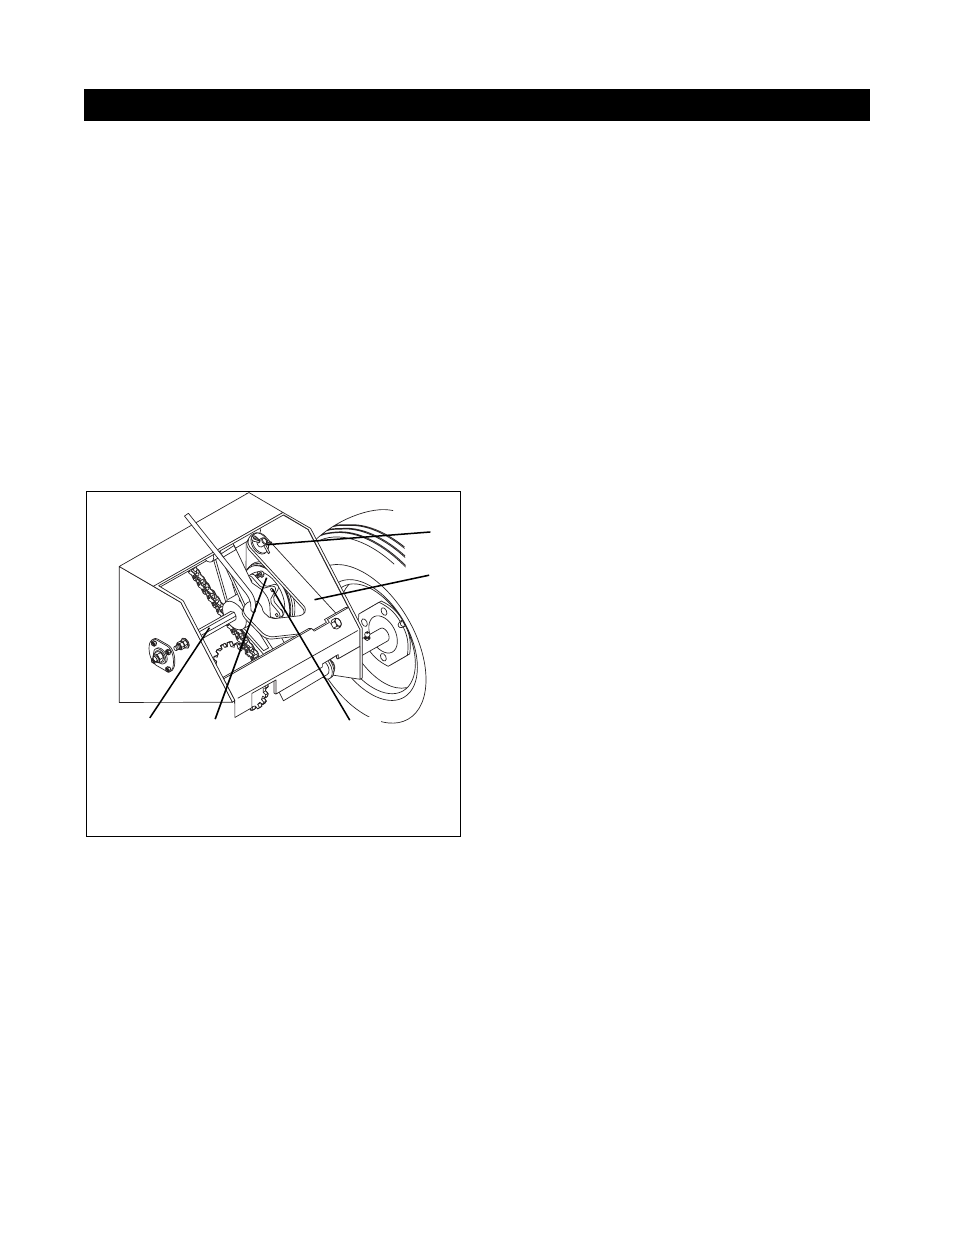
3. Place Speed Selector in first (1) position, depress
Traction Clutch Lever to hold friction wheel and hub
in position and remove cap screws. Release
traction clutch lever, shift to third (3) position, and
remove friction wheel (Figure 17).
4. Secure new friction wheel on hub with five cap
screws and torque cap screws to 8-10 ft. lbs.
(10,6-13,3 Nm).
5. Replace bottom cover.
6. Adjust Traction Drive Clutch (see Adjustments).
8.2 FRICTION WHEEL CARRIER
Remove roll pins from carrier shaft and pull shaft out of
frame far enough to free carrier (Figure 18).
Hold hex shaft on sprocket end with a wrench and
remove lock nut at outside of frame. Slide hex shaft to
center of frame until it clears sprocket and remove
carrier from frame.
Remove nylon lock nut from spindle hub and hub from
carrier.
Remove snap ring, washer, bearing and bushing from
carrier.
Check carrier bushings and other parts for wear or
damage and replace as necessary.
Assemble in reverse order.
8.3 DRIVE PLATE SPINDLE
Place unit in the Belt Service Position.
Remove lock nut from pulley end of spindle and pulley
from spindle (Figure 18). To remove nut, engage
friction wheel drive to keep spindle from turning.
Remove friction wheel carrier following instructions
above. Remove drive spindle housing from frame by
removing three cap screws and lock washers from
housing. Check spindle bearings and other parts for
wear or damage and replace as necessary.
Assemble in reverse order applying Locktite Antiseize
to outside of bearing housing.
NOTE: Mix 1 part Mobil 1 with 16 parts Locktite
No. 767 Antiseize.
SECTION 8 - FRICTION WHEEL DRIVE
1. Cap Screw
2. Friction Wheel
3. Friction Wheel Shift
Arm
4. Idler Hex Shaft
5. Cotter Pin
Figure 17
1
2
3
4
5