Assembly i nstr uc tions – Poolmaster 70745 Rio Sun Adjustable Lounge User Manual
Page 2
A
ssembly I
nstr
uc
tions
2
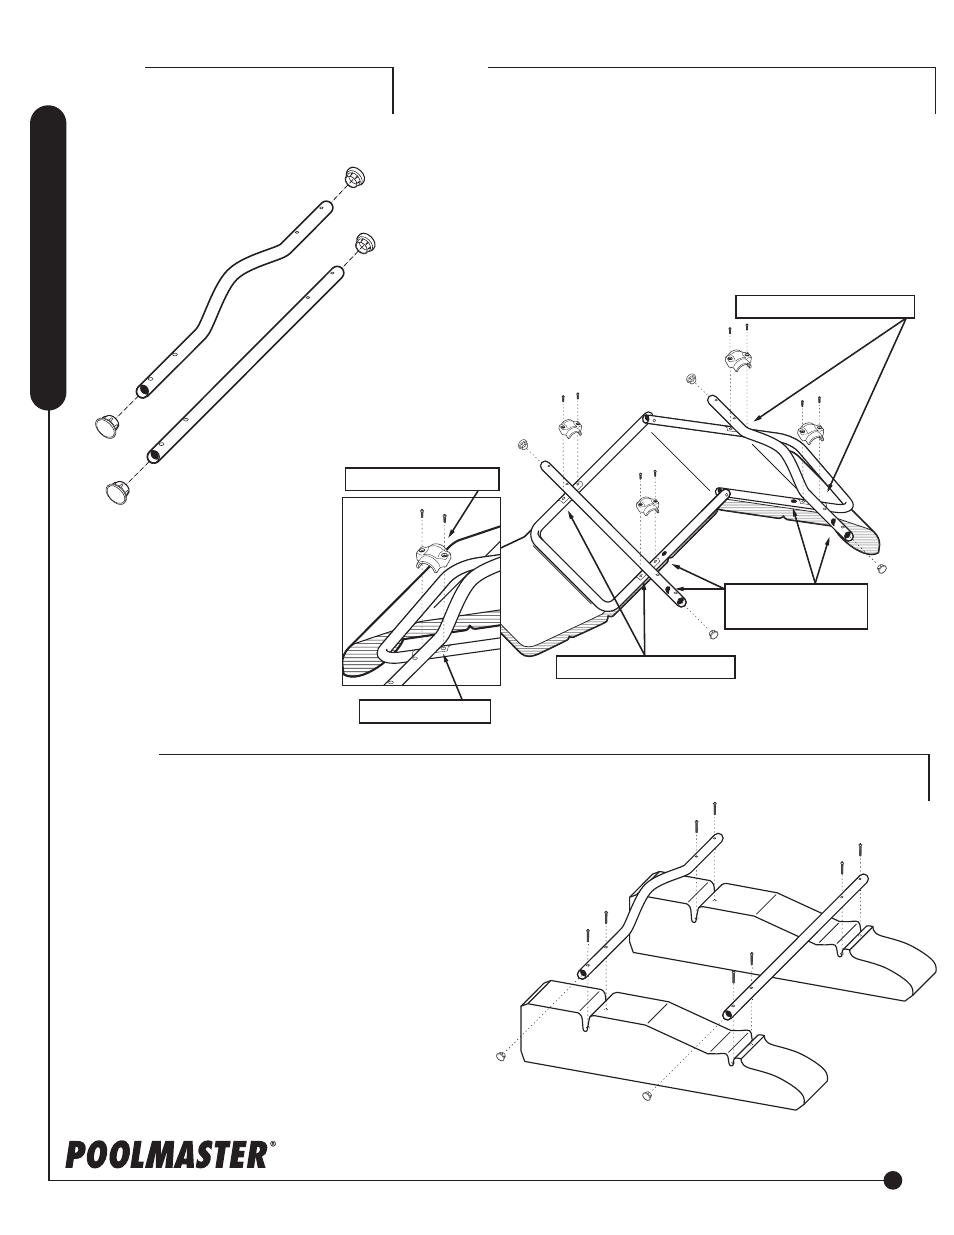
Step 1
• Insert End Caps(4) Into each
end of both Cross Bars
Tip: Soften caps in warm water if difficult to insert
Step 2
Step 3
• Turn the Lounge Seat upside down
• Attach Curved Rear Crossbar into pre-installed Mounting Slide
on Lounge back.
NOTE: for proper alignment, match Red Dots on the curved
rear crossbar to the back of the Lounge.
• Place Mounting Brackets on top and secure with two 5⁄8” Bolts
as shown.
• Repeat Step 2 with front Crossbar on front mounting slides.
poolmaster.com
• Place Pontoons face down on flat surface beside
each other as shown.
• Place the ends of the Front Straight Crossbar into
the channels of each small end of the Pontoon
and align the mounting holes as shown.
• Place the ends of the Rear Curved Crossbar into
the channels of the large end of the Pontoon and
align the mounting holes as shown.
• Insert the four 1½ “ bolts through the inside holes
(closest to the seat) on both sides and into the
molded nuts of the Polyform™ Pontoon Float.
Do not tighten.
• Insert the remaining four 1½ “ bolts thought the
outside holes of both crossbars and into the
molded nuts.
• Tighten all bolts, and enjoy.
Note: Complete lounge seat
assembly from step 2 not shown.
Head
Foot
Note: Red Dots
(On Right hand Sides)
Front Mounting Slides
Rear Mounting Slides
Mounting Slide
Mounting Bracket
Head