Smokers – MBRP S8112 User Manual
Page 2
S8112 © 11/09
PAGE 2 OF 4
Removal of Stock System:
1.
Apply a penetrating lubricant liberally to all exhaust fasteners, hangers and rubber insulators.
2.
Separate the stock exhaust system at the slip joint by the muffler. Remove the rear exhaust from the rubber
hangers and remove the system from under the truck.
3.
Using a 15mm socket wrench, remove the two (2) bolts at the turbo flange and remove the stock down pipe.
Installation of MBRP Inc.
““““
Smokers
Smokers
Smokers
Smokers
TM
TM
TM
TM
””””
:
1. Install the Down Pipe in the same position as the stock Down Pipe placing
the hanger into the OEM rubber insulator and attaching the flared end to
the turbo using the M10 – 1.5 x 60mm Bolts. Do not fully tighten until all
components are in place.
2. Loosely install the Extension Pipe over the Down Pipe. The Extension
Pipe may require cutting to accommodate vehicles other than the Quad
Cab Long Bed.
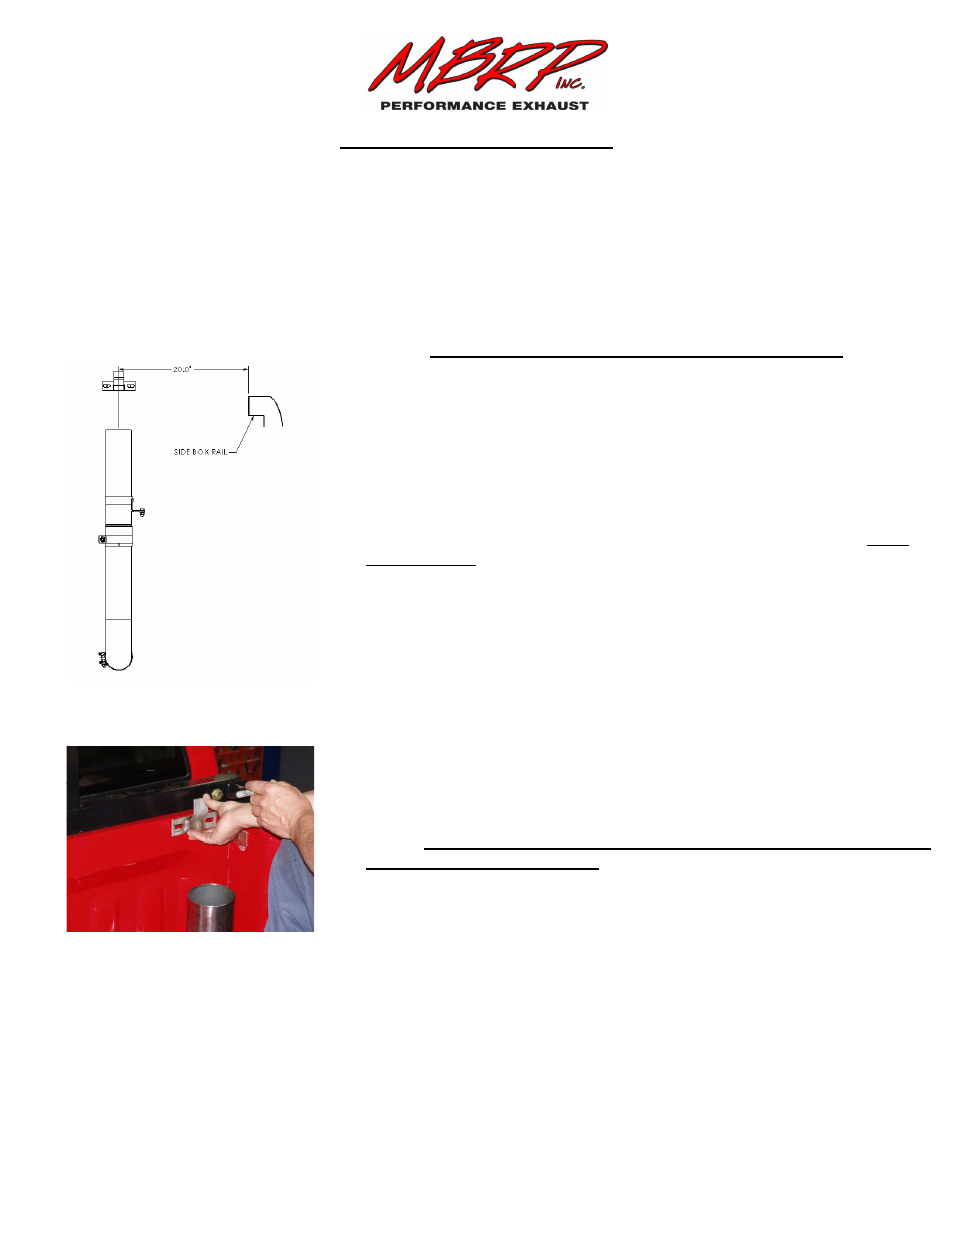
3. Measure 20” across from the inside surface of the passenger side bed rail.
Mark this location along the rail. This will be the approximate centerline of
the Stack once installed. Refer to Figure 1.
4. Slide the Band Clamp (from Stack kit – purchased separately) over the
Stack. Wedge the Stack Mounting Bracket between the Band Clamp
and Stack. Adjust to the bed rail height and tighten the Band Clamp
slightly. Make sure the Stack is vertical and the Stack Mounting Bracket
is flush against the bed rail and centered on the mark you made in Step 3.
Trace a circle around the base of the Stack and center punch the circle’s
center. Verify that the center punch hole is in line with your Extension
Pipe and adjust accordingly. This will be the center line of your Stack.
5. Align the Stack centered on the mark you made in Step 4. Mark the bolt
hole location of the Stack Mounting Bracket onto the front rail of the bed.
Center punch the marks and drill holes to accommodate the 3/8”
hardware. Refer to Figure 2.
Figure 1
Figure 2