Fantasea Line F Series EyeGrabber User Manual
Page 3
EyeGrabber FP7000 Instruction Manual 20110523
g. Hold the lens holder against one of the sides of the
T2 Connector attached to the arm, so that the lens
holder is facing out of the arm and the lens holder
connector is aligned with the T2 Connector. Make
sure that you attach the lens holder on the T2
Connector that faces outward from the housing, so
that you will have more space to mount the lens
on the EyeGrabber. Slide the lens holder on the T2
connector and tighten the screw on the lens
holder in order to fix its position (image #5). It is
important to ensure that the lens holder
connector and the T2 Connector are perfectly
aligned prior to tightening the screw, or else the
lens holder cannot be stabilized on the arm.
h. Install the snap cord of the accessory lens on the
arm. If you had the snap cord attached to the
housing before, remove it and install it on the arm instead, so the accessory lens can be secured when
mounted both on the housing lens port and the EyeGrabber.
i. Mount the arm, with the EyeGrabber installed, on your housing tray or handle.
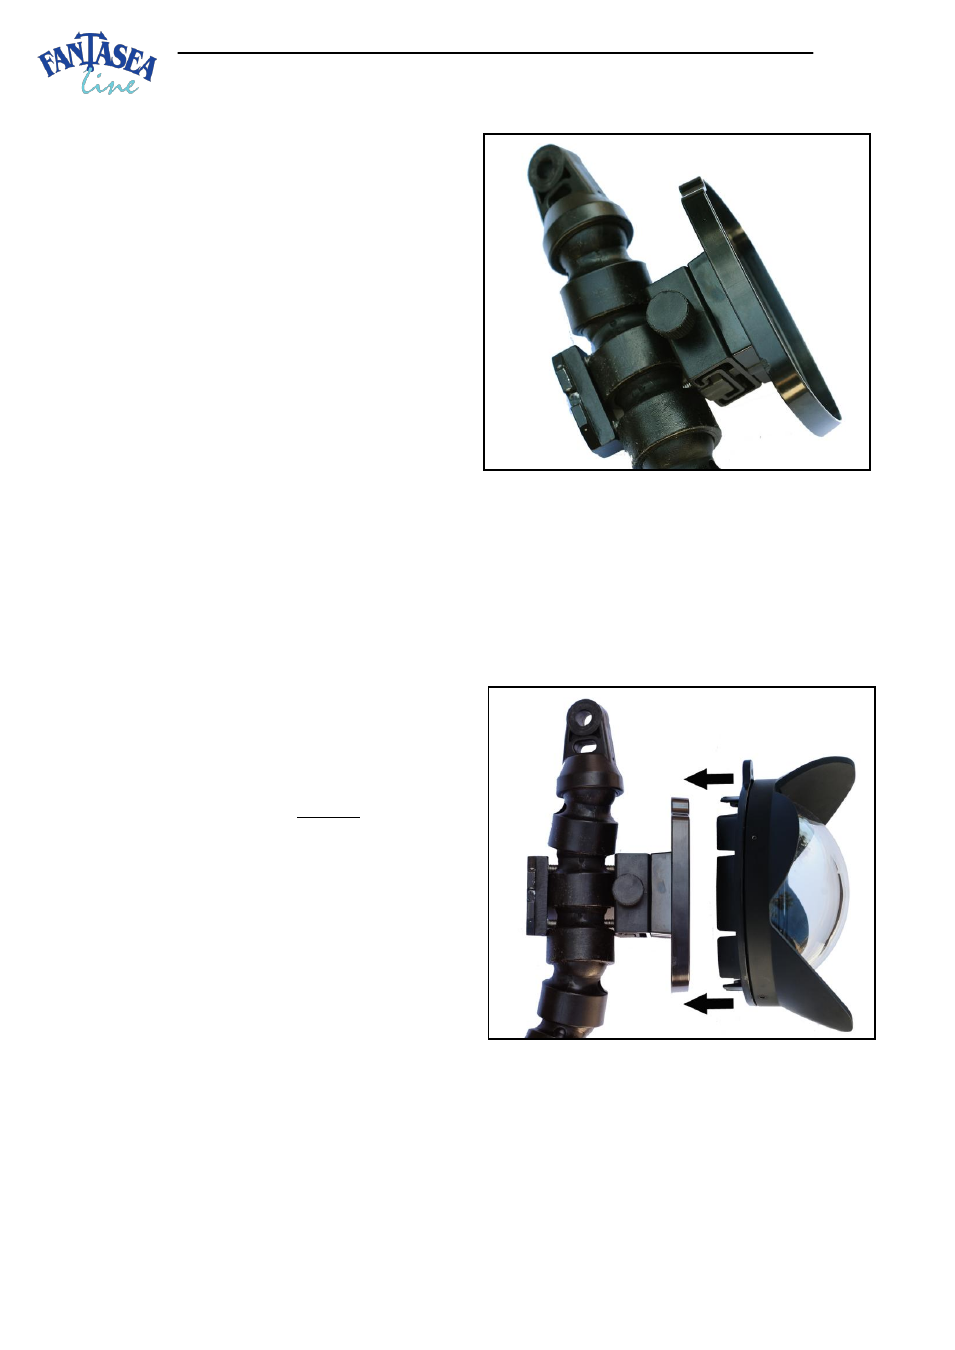
2. Installing and Removing Lens Accessories from the EyeGrabber
a. Installing and removing lens accessories from the
EyeGrabber during the dive is the same as when
installing and removing them from the housing lens
port. Hold the lens accessory in front of the
EyeGrabber so that the “TOP” marking printed on
the lens adaptor is pointed opposite the
EyeGrabber screw and the small niche at the
bottom right of the EyeGrabber corresponds with
the small niche at the bottom right of the lens
adaptor (image #6). Push the lens accessory against
the EyeGrabber starting from the side that is
opposite to the niche. Make sure that the accessory
lens is properly mounted on the EyeGrabber by
gently trying to pull it out. If properly installed, the
lens should not easily come off the EyeGrabber.
b. It is recommended not to detach the secure line
from the accessory lens during the dive, whether it is
mounted on the arm or on the housing lens port.
Image #6
Image #5
Image #6