Cloyes Hex-A-Just 9-3125A (Chrysler 3 Bolt) User Manual
Page 2
April 24, 2009
©
Copyright 2007, Cloyes Gear Company. All rights reserved.
9-3125A 2
timing mark on the bushing points away from the center of the hub (Figure 1). The
Hex-
A-Just® Adjustable Timing Bushing is infinitely adjustable so you can fine adjust your
engine's CAMSHAFT TIMING to EXACTLY WHERE YOU WANT IT.
6.
Mount the Camshaft Sprocket. Loop the chain over the camshaft sprocket. Align the
camshaft and crankshaft timing marks and loop the chain around the crankshaft sprocket.
Lift the camshaft sprocket into place on the camshaft, with the Thrust Bearing and
Hex-A-
Just® Bushing in place. Be sure that the timing mark aligns with the crankshaft timing
mark. Bolt it in place using the three existing OEM bolts or equivalent. Install these bolts
slightly loose.
7.
Install the Cam Button. Install the cam button (Part Number 9-204) using the
instructions enclosed with it.
8.
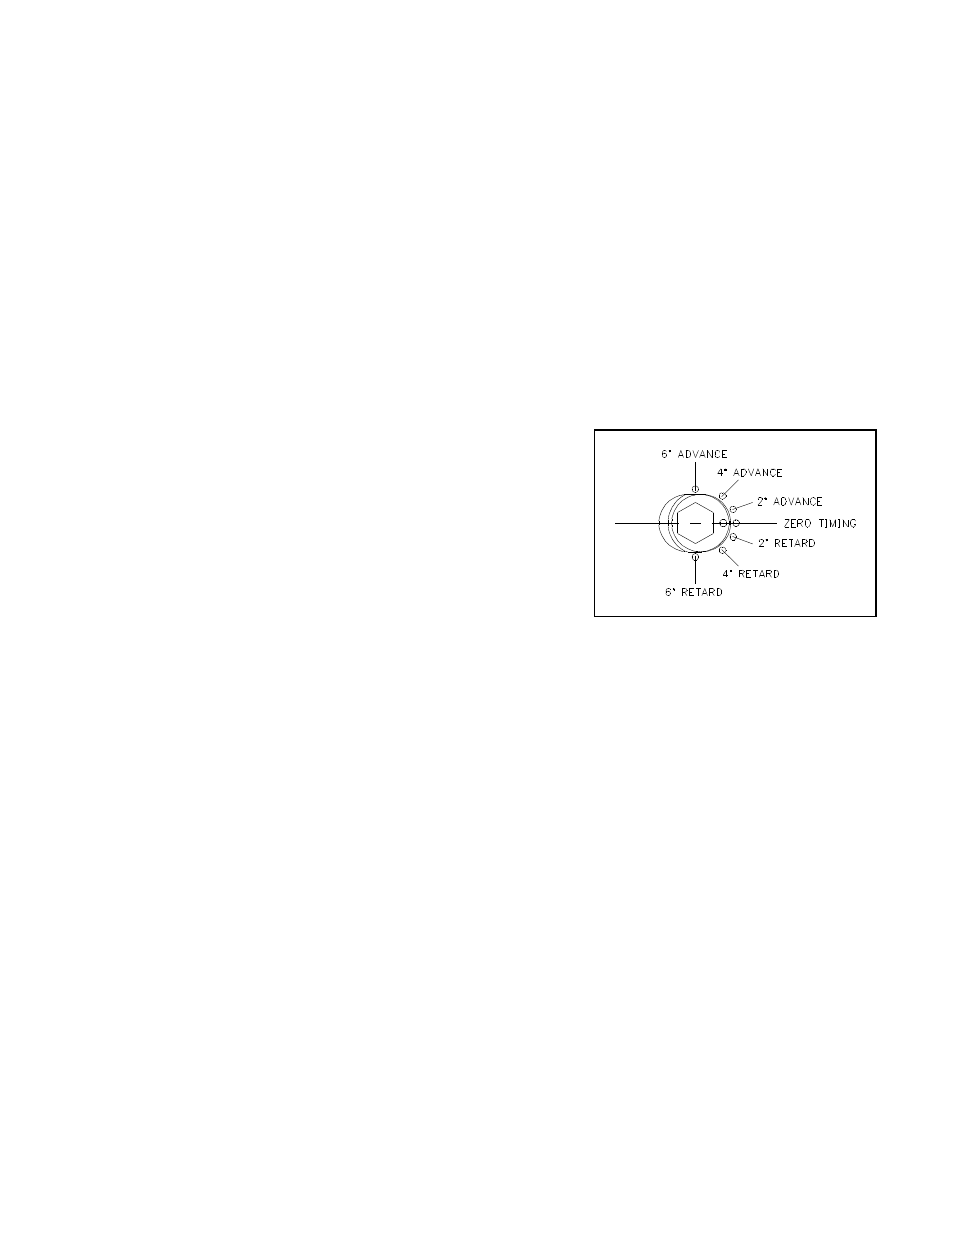
Adjust the Camshaft Timing. Do NOT try to turn
the camshaft with the bushing unless there is
NO
LOAD on the camshaft. There must be NO VALVE
SPRING PRESSURE
against the camshaft or the
Hex-A-Just® bushing will SPLIT. Make sure that
the three camshaft bolts are
LOOSE. For a simple
installation, adjust the
Hex-A-Just® bushing to the
desired timing setting (Figure 2). For a more
accurate installation, use a degree wheel. The
degree wheel method is strongly recommended.
9.
Torque Loose Bolts. Remove each of the three (3) Cam Gear mounting bolts, one at a
time, and apply the
Thread Locking Compound, then torque each bolt to 300 in-lb (25 ft-
lb).
10.
Lubricate the Timing Set. Make sure that the engine oil has a clear path to the timing
set through the lifter valley oil drain-back holes, or through some other means. A timing
set requires plenty of oil to survive. Before installing the timing cover gasket and timing
cover, pour plenty of assembly lube over the sprockets and bearings. Assembly lube will
stay on the sprockets until the engine is started.
11.
Install the Timing Cover and Gasket. Install the timing cover gasket using a small
amount of gasket sealer if desired. Mount the timing cover and install the mounting bolts.
Torque these bolts as specified by the manufacturer.