Getting started & verification, Power up the pim 31 unit & preparation, Turning off the pim 31 – Boonton PIM 31 Quick Start User Manual
Page 4
Getting Started & Verification
The following instructions walk through a basic operation and
functionality tests to verify that the unit is working properly.
1. Mount connector saver to RF Port and Load (if not al-
ready mounted)
2. Connect Low PIM cable to the Test system (Note: always
connect the test cable to the instrument first, before
connecting to the DUT)
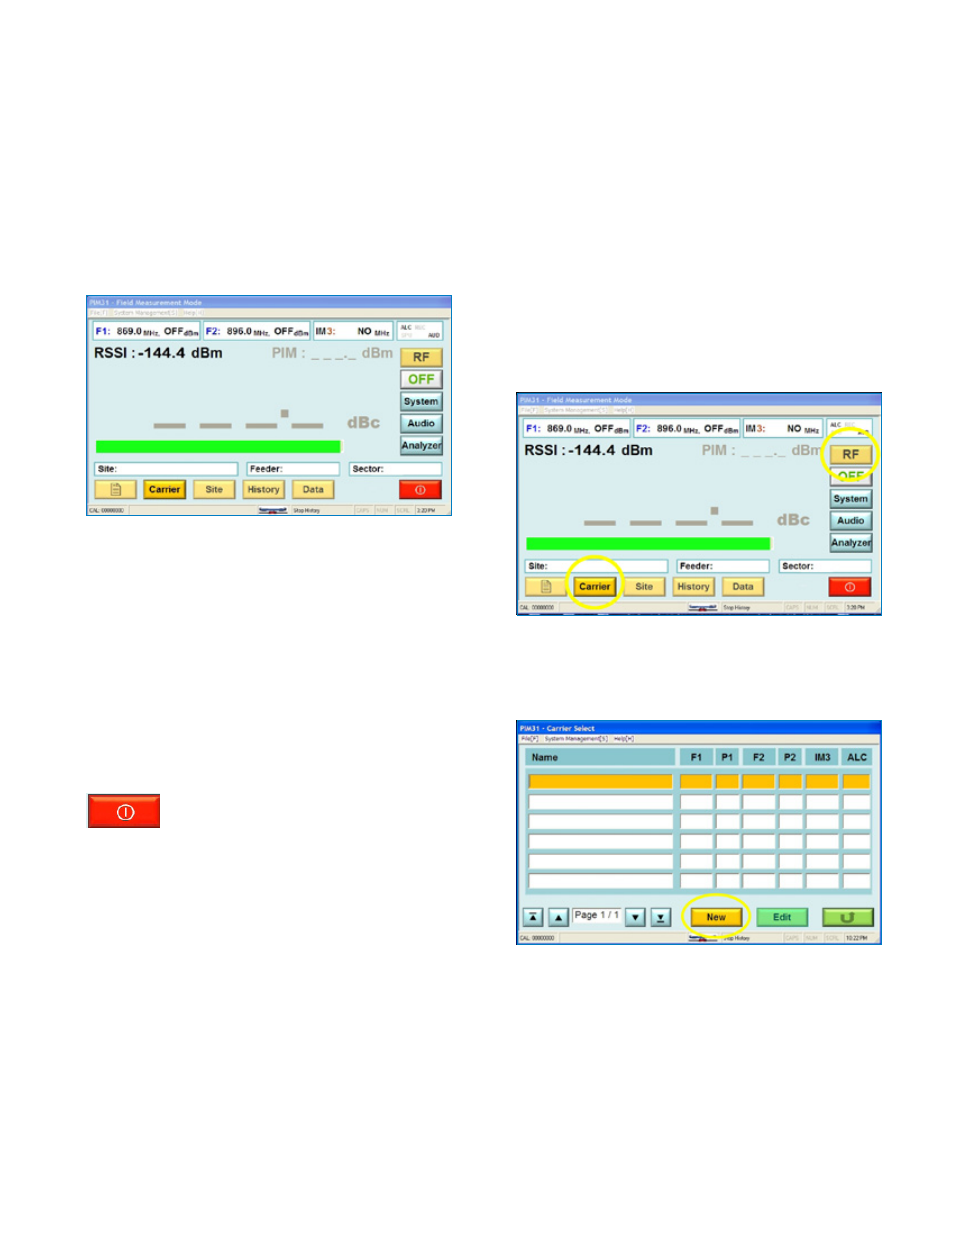
3. Now the RF Button is visible but inactive. Power levels
and frequencies of the carrier signals must be set in
order to activate the RF button. To do so, pushing the
“Carrier” button displays a list of Carrier signal settings.
4. Since this is the first boot up, the list is empty.
To enter carrier parameters, push “New” on the Car-
rier Select screen. Enter a Carrier name, frequencies and
power levels.
Power up the PIM 31 unit & preparation
1. Ensure that the main outlet has proper grounding.
2. Switch on the PIM31 main power switch on the backside
of the unit.
3. Wait 5 seconds before switching on front power button.
(This allows time for the protection circuitry to enable all
PIM 31 modules properly).
4. Push Start Button on at the front panel.
The system will boot up automatically and show the user
interface in Field Mode.
Turning off the PIM 31
It is not recommended to power down by “Pulling the plug”
or switching off the Main Switch on the back panel. Follow
the recommended procedure as below:
• Exit the UI by pressing the red exit button. Respond to the
pop-up menu’s choice Yes / No to power the system down.
• Or shut down the unit by simply pressing the power button
on the front panel.