Operation, Maintenance & storage, How to use your spreader – Agri-Fab 45-03151 User Manual
Page 5: Application tips, Using your spreader
5
HOW TO USE YOUR SPREADER
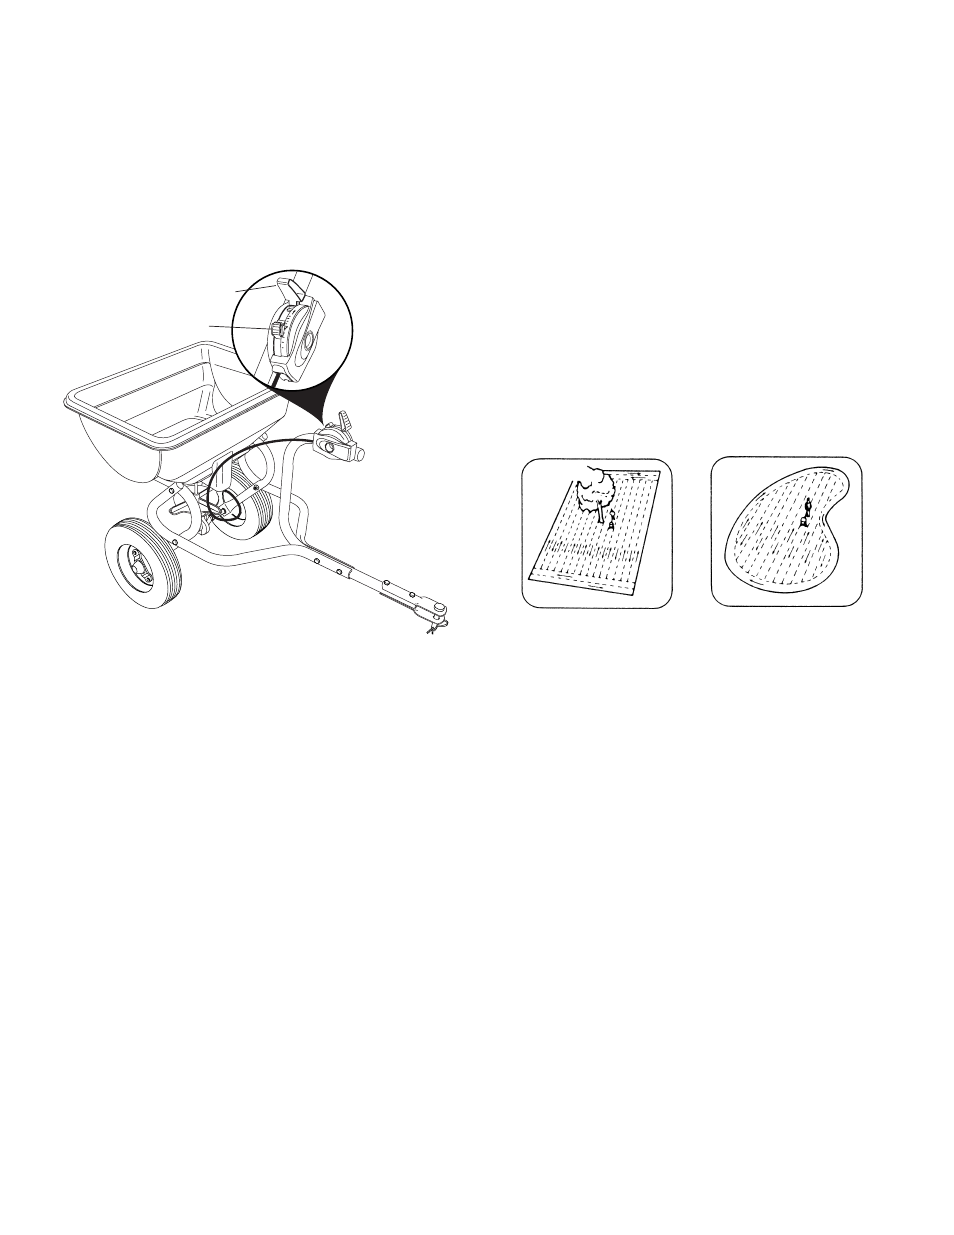
ADJUSTING THE FLOW RATE SETTING
1. Slide the Adjustable Stop to the desired setting.
2. Move the Flow Control Lever until it snaps into the
Adjustable Stop, locking the lever at the desired
setting. See figure 5.
OPERATION
APPLICATION TIPS
1. This unit will cover a 4 to 8 foot wide area depending
on the material used and the towing speed.
2. To avoid misses or striping, make each pass about 5
feet from the previous one so some overlapping of
spread pattern does occur.
3. For easiest application, spread across the shortest
edges of lawn first, making two "header" strips for a
turning area, and then spreading between the header
strips. See figure 6.
4. If lawn is odd shaped, spread a border around the
edges and then spread between the border. See
figure 6.
5. Keep wheel approximately 4 feet from any area you
do not wish to spread.
IMPORTANT:
Be careful when using spreader around
ornamental plants because weed control chemicals
can damage these plants.
USING YOUR SPREADER
1. Check the material package and the Spreader Set-
tings sheet included with your spreader for the proper
spreader setting and application rate.
2. Before filling spreader, move the control lever to the
"OFF" position.
3. Move spreader onto a flat surface - either a walk or a
driveway - and fill.
4. Set the Adjustable Stop to the desired setting.
5. Start the spreader in motion and then start the flow of
material by moving the control lever until it snaps into
the adjustable stop.
NOTE:
Always place control lever in the "OFF" position
while filling spreader and when stopping or turning,
to prevent release of excess fertilizer.
FIGURE 6
5
1
3
7
10
OFF
FLOW CONTROL LEVER
ADJUSTABLE STOP
FIGURE 5
CHECK FOR LOOSE FASTENERS
1. Make a thorough visual check of the Spreader for any
bolts and nuts which may have loosened. Retighten
any loose bolts and nuts.
LUBRICATION
1. Apply a few drops of oil to all moving parts.
CLEANING
1. Always empty spreader after each use, storing left-
over material in it's original bag.
2. Wash the spreader and dry thoroughly after each
use.
STORAGE
1. Empty and clean the hopper as instructed in mainte-
nance section.
2. Store in a clean, dry area.
MAINTENANCE & STORAGE