Audiovox Rampage ACD83 User Manual
Page 12
128-6003A
12 of 20
11
11
11
11
11
OPEROPEROPEROPEROPER
AAAAA
TTTTT
ING INSTRUCING INSTRUCING INSTRUCING INSTRUCING INSTRUC
TTTTT
IONS / SETIONS / SETIONS / SETIONS / SETIONS / SET
TTTTT
ING THE CLOCK / ERRING THE CLOCK / ERRING THE CLOCK / ERRING THE CLOCK / ERRING THE CLOCK / ERR
OR CODESOR CODESOR CODESOR CODESOR CODES
NOTES ON USE OF FRONT PANEL:
1. Make sure the front panel is positioned
correctly when attaching it to the chassis
as it cannot be attached when up-side
down. Use modeate pressure to fully seat
the panel into position.
2.To verify correct panel installation, swing the
panel assembly up into position until it locks
easily into place. If any resistance is
encountered, re-check panel opientation in
chassis mounting plate.
3.When taking the front panel with you,
please use the supplied carrying case to
protect the panel from dirt and damage.
Make sure there is no dust or dirt on the
electrical terminals on the back of the
panel as this could cause intermittent
operation or other malfunctions.
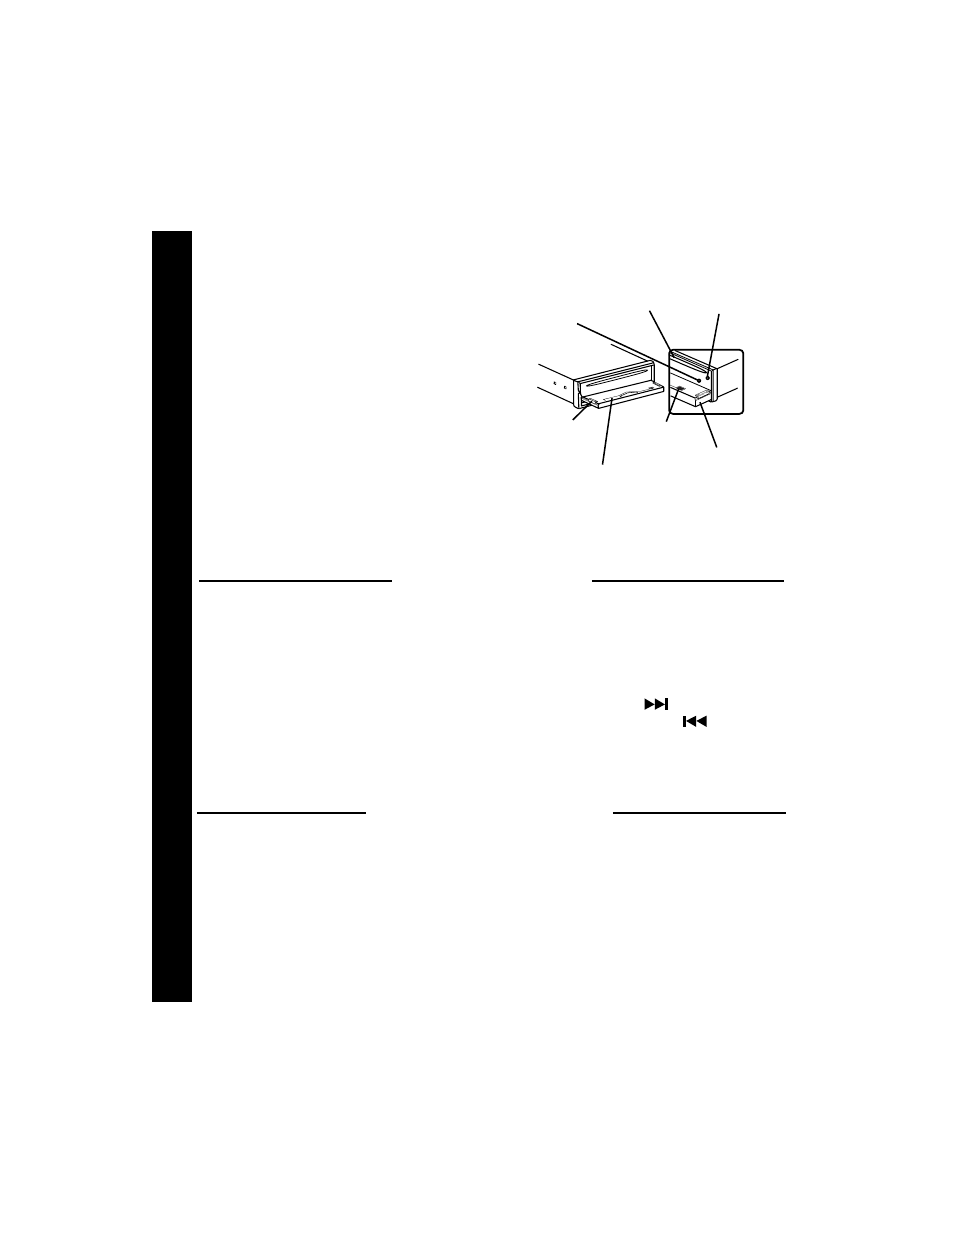
FRONT PANEL
MOUNTING PLATE
GUIDE (2 PLACES)
PANEL
MOUNTING
PLATE
RESET BUTTON
(31)
THEFT DETERRENT
LED (30)
DISC SLOT
(19)
CD EJECT
BUTTON (27)
1. Switch the vehicle ignition and radio “on”.
2. Press the Time/Frequency (T/F) button to call the time display.
3. Within 10 seconds, press and hold the T/F button until a single beep sounds and the
time display flashes.
4. With the display flashing, press the Up TUNE/SEEK/TRACK (
) button to adjust
the hours and A/P indication, or the Down TUNE/SEEK/TRACK (
) button to
adjust the minutes to the correct time.
5. Five seconds after the last hour or minute adjustment is made, the time will be set in
the unit and the display will return to the normal indication.
SET
SET
SET
SET
SET T
TT
TT ING THE CLOCK
ING THE CLOCK
ING THE CLOCK
ING THE CLOCK
ING THE CLOCK
If a problem should develop while operating the CD player, an error code (ER-1, ER-2,
ER-3, etc.) may appear on the display panel. This can indicate a number of problems
with the unit, including a mechanical error or an error in the microprocessor control of the
player. If an error code should appear, try ejecting and re-loading the disc into the player.
While the disc is out of the unit, make sure it is clean, undamaged, and loaded correctly
(label surface up). You may also try activating the RESET button
dm
on the unit, but this
will also erase the time and pre-set memories.
If the suggested measures do not solve the problem, contact an approved warranty
station near you for further assistance.
CD PL
CD PL
CD PL
CD PL
CD PLA
A
A
A
AYER ERR
YER ERR
YER ERR
YER ERR
YER ERROR CODES
OR CODES
OR CODES
OR CODES
OR CODES