Bc a – Nilfisk-ALTO SW 750 User Manual
Page 51
USER MANUAL
ENGLISH
SW 750
146 3080 000(1)2006-10 A
13
SIDE BROOM HEIGHT CHECK AND
ADJUSTMENT
Check that the side broom is at the correct height from
the ground, according to the following procedure:
Drive the machine on a level ground and lower the
side broom.
Keep the machine stationary and turn on the side
broom for a few seconds.
Turn off the side broom by pressing the switch (1),
then lift it and move the machine.
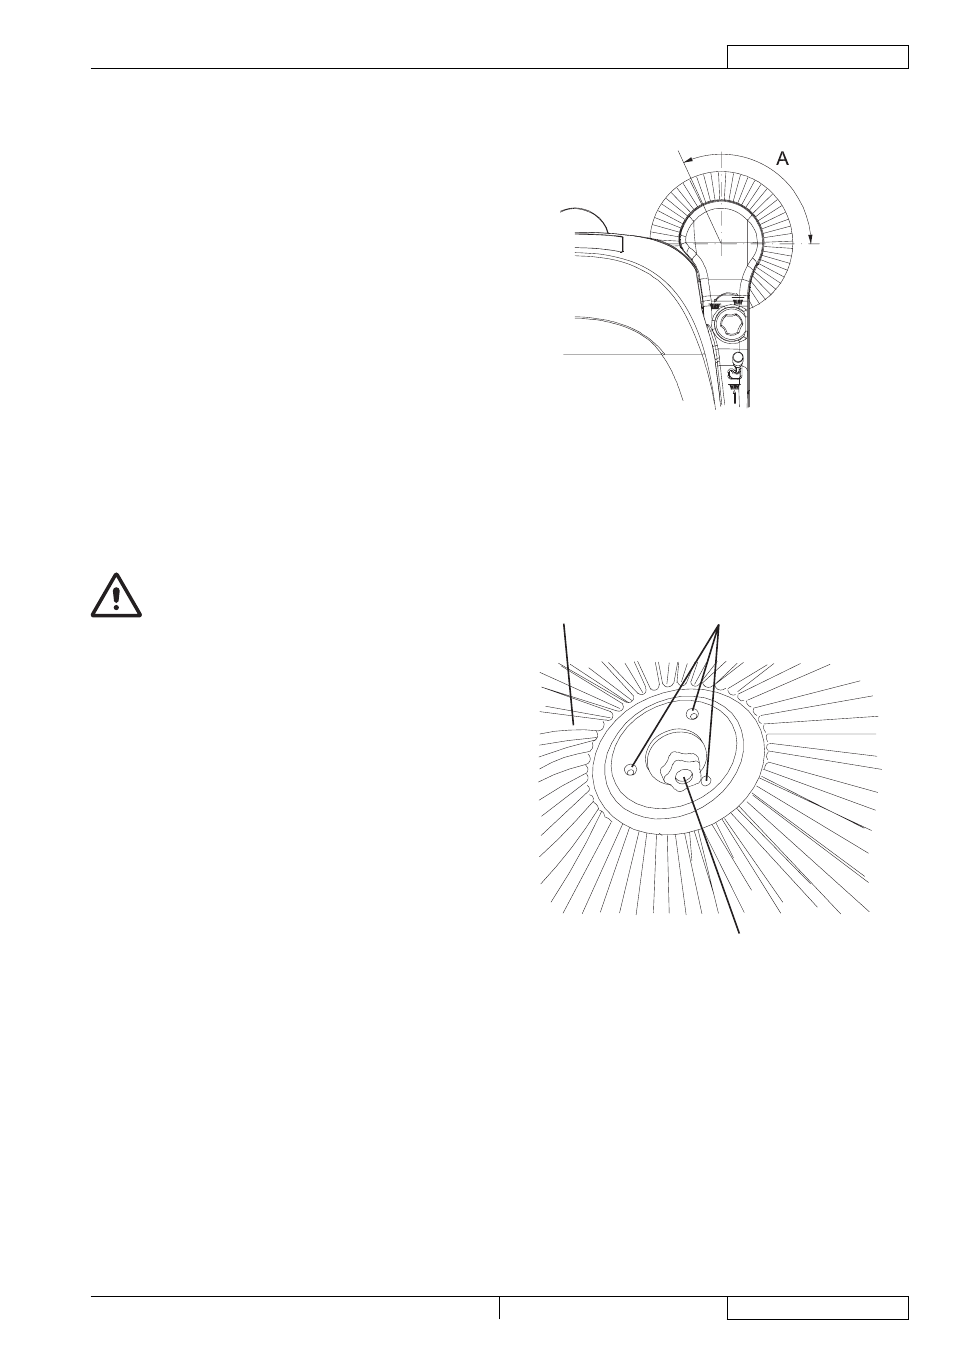
Check if the size and orientation of the print left by
the side broom are as shown in the fi gure (A, Fig. 1):
the side broom must touch the ground along a circle
arc ranging from "11 o'clock" position to "3 o'clock"
position.
If the print is not within specifi cations, it is necessary
to adjust the broom height, according to the
procedure shown in step 2.
Turn the knob (13) clockwise and counter-clockwise to
adjust the broom height.
Perform step 1 again to check that the side broom is at
the correct height from the ground.
When the broom is too worn and can no longer be
adjusted, replace it according to the procedure shown in
the following paragraph.
SIDE BROOM DISASSEMBLY/ASSEMBLY
CAUTION!
It is advisable to use protective gloves when
replacing the side broom because there can be
sharp debris between the bristles.
Drive the machine on a level ground.
Turn the main switch (1) to “0”.
Lift the side broom.
Loosen the knob (A, Fig. 2) inside the side broom, then
remove the broom (B) by disengaging it from the pins
(C).
Install the new broom on the machine engaging it on the
pins (C), then tighten the knob (A).
Adjust the height of the new broom according to the
procedure shown in the previous paragraph.
1.
•
•
•
•
•
2.
3.
4.
1.
2.
3.
4.
5.
6.
B
C
A
S311350
Figure 1
S311351
Figure 2
11
3