English – Atlantis Land NETSERVER A02-PSU_GX02 User Manual
Page 21
ENGLISH
22
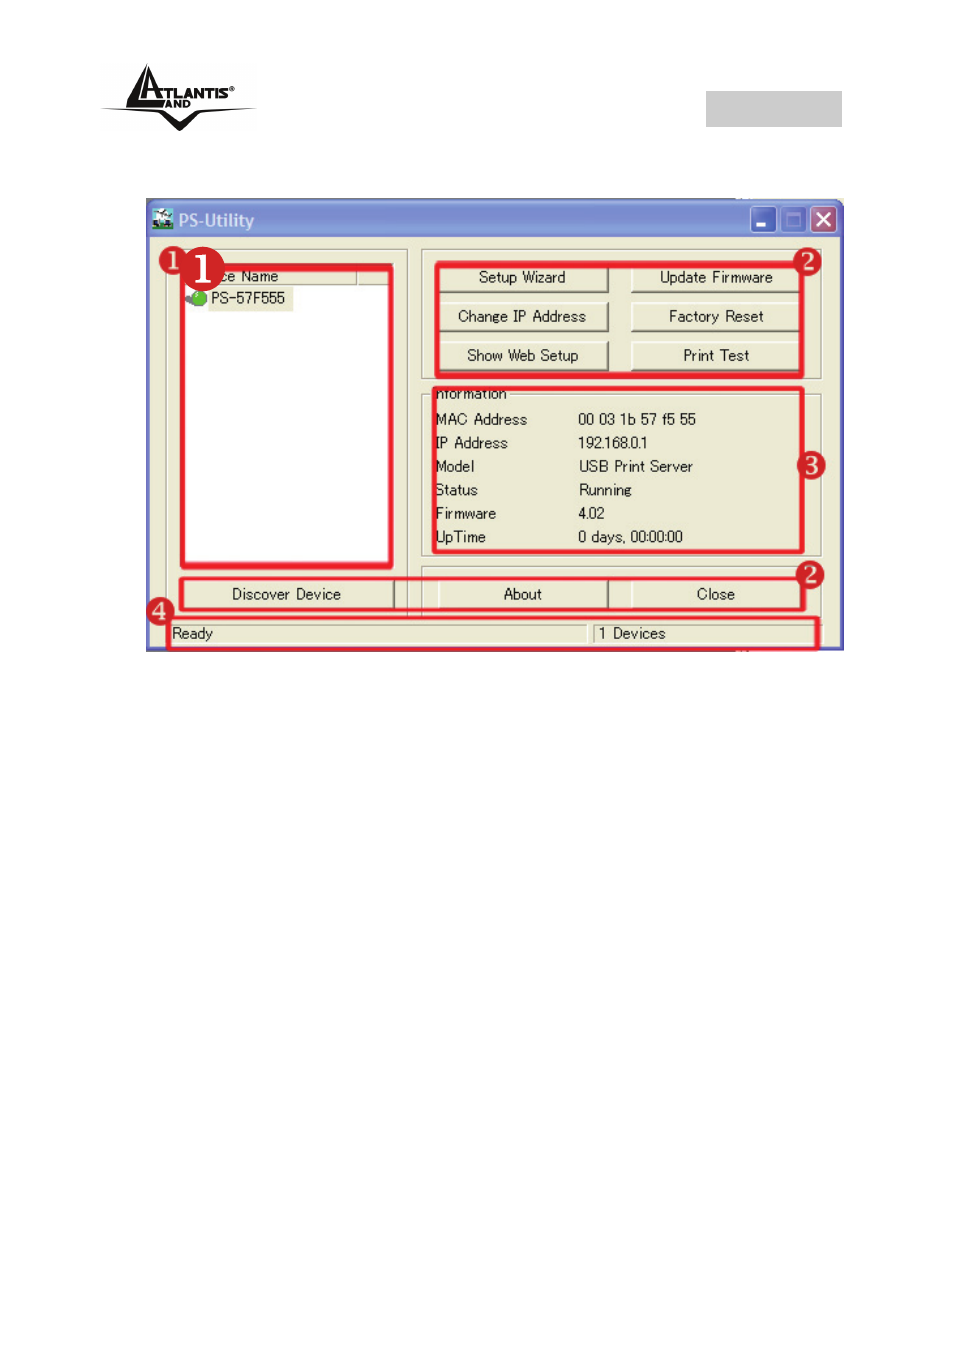
2. The main screen will appear as below, and it starts to
search the connected print server within the network.
1. Device List: Display the connected print server within
the network.
2. Control Buttons: Setup Wizard, Change IP Address,
Update Firmware, Show Web Setup, Factory Reset,
Print Test, Discover Device, About, and Close.
3. Information Field: Display the basic information of the
selected print server in the Device List.
4. Status Bar: Display the system status.
Before you can print over the network using your print
server, you may need to perform some basic setup tasks
through PS-Utility. These settings include:
• Change the print server’s IP Address: clicking the
Change IP Address button will bring up a dialog
box that allows you to change the IP Address of
selected print server.