MXL USB.009 User Manual
Page 8
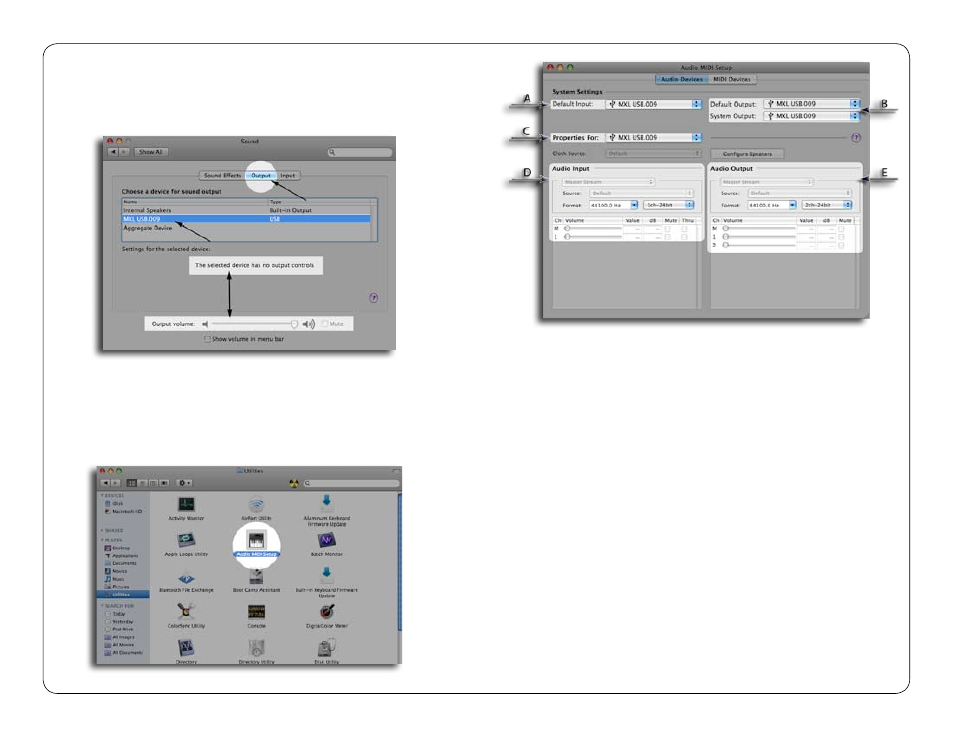
4. Next click on the Output tab and select the device named MXL
®
USB.009. You
will notice that the output volume is grayed out. This is because the volume con-
trol is located on the front of the microphone.
5. Further adjustments to the sample rate and bit-depths can be found in the
Audio Midi Setup (Macintosh HD > Applications > Utilities > Audio Midi Setup.)
You should however, check the settings in the recording program you are using
as they may override or conflict with these settings.
A.
By selecting the MXL
®
USB.009 as the “Default Input” the microphone will
automatically be selected as the input the next time it is plugged in.
B.
By selecting the MXL
®
USB.009 as the “Default Output” the microphone will
automatically be selected as the output the next time it is plugged in. By selecting
the MXL
®
USB.009 as the “System Output”, the microphone will be used as the
output device for any system sounds.
C.
Select the MXL
®
USB.009 to make adjustments to the sample rate and
bit-depth. You will see the two sections D and E appear below.
D.
Here you can make adjustments to the sample rate and bit-depth for the input
(the microphone signal).
E.
Here you can make adjustments to the sample rate and bit-depth for the output
(the signal to the headphones).
Your computer is now setup to use the MXL
®
USB.009 microphone. However, after
changing these settings you should still check the settings in your recording
program. If the sample rate and/or bit-depth in the software are not the same as
your hardware, you will most likely hear clicks and pops, or the audio will be the
wrong pitch.
14
15