JJC RM-E10 User Manual
Jjc rm-e10
JJC RM-E10
Infrared Remote Control Instruction
Thank you for purchasing JJC RM-E10 Infrared Remote Control. For the best performance, please
read this instruction carefully before use.
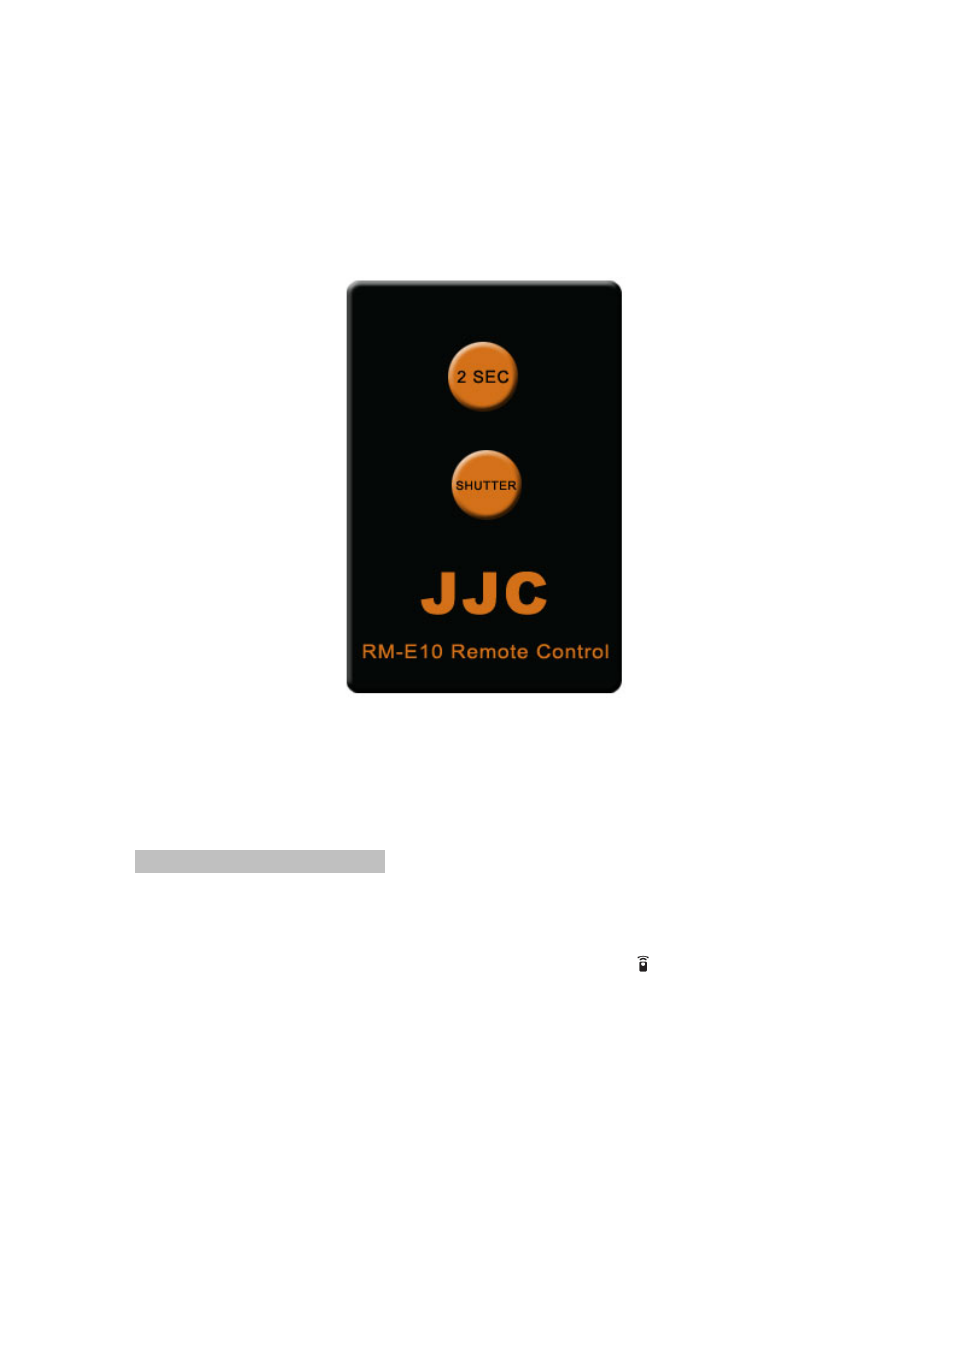
z Identifying the buttons
¾ 2 SEC button (shutter release in 2 seconds)
¾ SHUTTER button (shutter is released right away)
z To use RM-E10 Remote Control
1. For the first time use, please pull out the plastic separator (if your remote control has it) at the
battery holder.
2. Mount the camera on a tripod (recommended) or place the camera on a stable, level surface.
3. To shoot with the RM-E10 Remote control, set the drive mode to ( Remote control).
4. Aim the transmitter on the remote control at the infrared receiver on the camera (usually within
+/- 20 degree of the lens axis, from the left to the right and from the top to the bottom) and
press the shutter-release button on the remote control (when using the remote outdoors, make
sure that the subject is not
backlit and that the line of site between the transmitter and the
infrared receiver is not blocked by the lens or other obstacles).
5. Press the SHUTTER button, the shutter is released right away.
6. Press 2 SEC button, the shutter is released about two seconds later.
7. Verify that the subject is visually in focus, and point the transmitter at the remote sensor located
on the front of the camera, and then press the SHUTTER or 2 SEC button.
8. Infrared cannot be seen by human eyes. So you will see no visible light from the LED on the
front end of the remote control when operating.