Additional features and operation, Rfcurrent2000a – MadgeTech RFCurrent2000A User Manual
Page 5
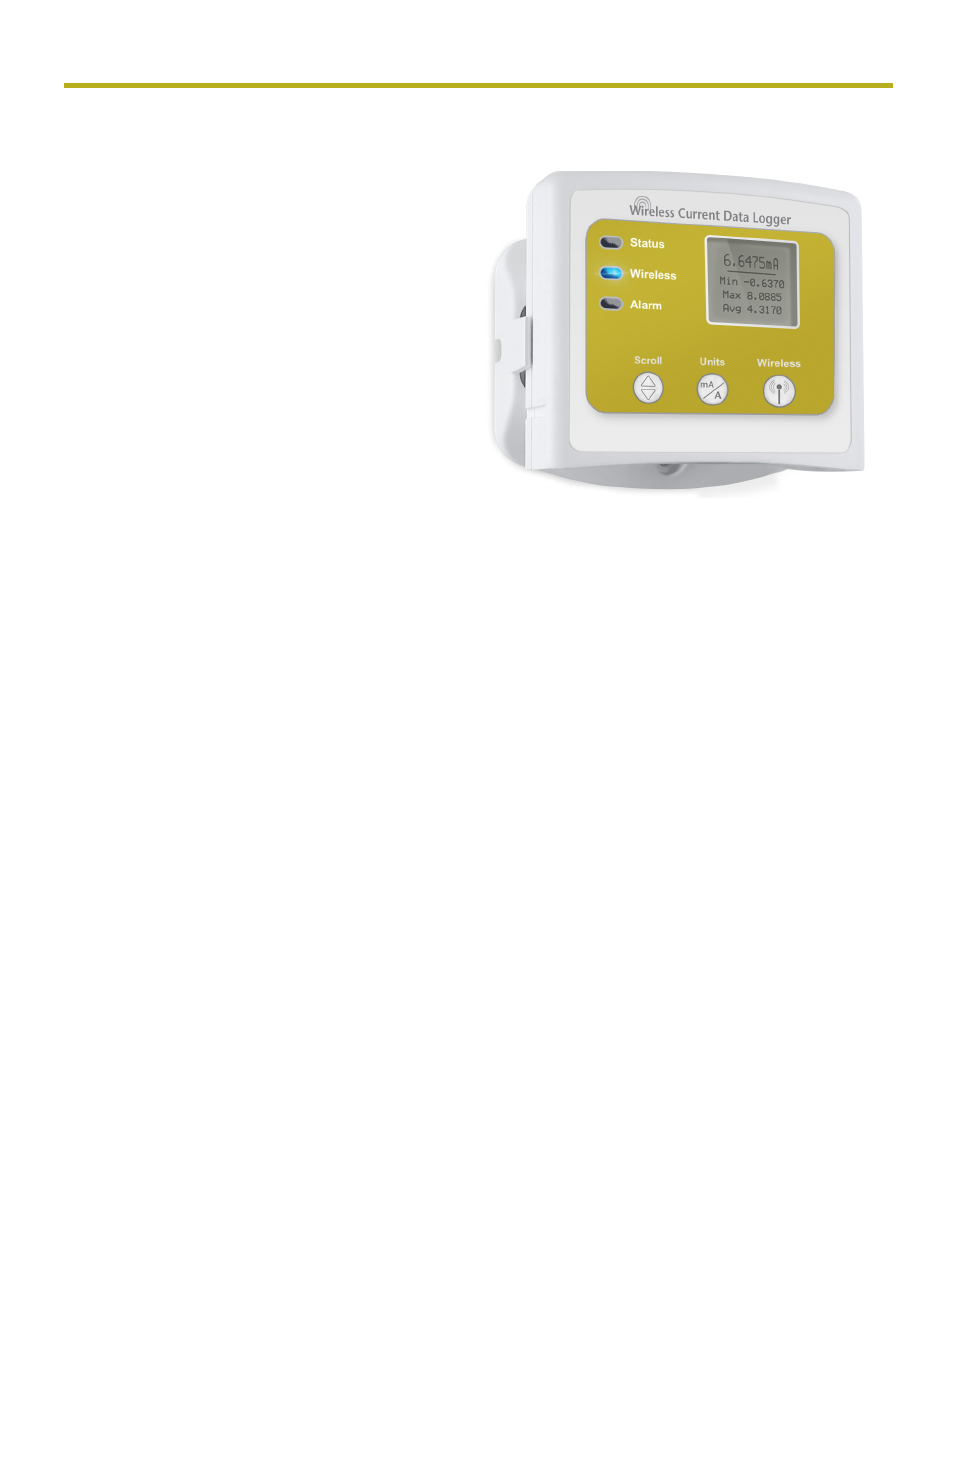
RFCurrent2000A
Additional Features and Operation
Alarm Settings/Rules
In the Data Logging Software, alarms can be
created on two levels; in the software itself,
and programmed specifically to the data
logger. Creating alarm rules in the software
allows the user to utilize alarms while
real time recording, and have the added
benefit of features such as e-mail and SMS
notification. An alarm that is programmed
on the data logger will only alert the user
from the device itself, whether that is by a
flashing LED, audible alarm, or local LCD
notification.
Creating a Real time Alarm Rule
1. Within the Device tab in the Data Logging Software, in the Alarms group, click Manage
Rules, then select New.
2. Enter a name in the Rule name box, and select whether notifications will occur when
All conditions are met or Any condition is met.
3. Select the desired conditions to have met before notifications occur, and select which
notifications will occur from the drop down menus.
4. If selecting to receive notifications by email or text message, click Email settings and
make sure the correct info has been entered. Email and text message notifications will
not be received if settings are incorrect.
5. Click OK. The OK button will be disabled if the Rule name box is empty.
Changing the Alarm Settings of a Device
1. In the Connected devices panel, select the RFCurrent2000A device.
2. Click the Properties button under the device tab at the top of the software, and select
the Alarm tab in the Properties window.
3. The High and Low settings indicate reading thresholds at which the alarm becomes active.
4. The Delay setting indicates how long to wait before the alarm becomes active after
passing an alarm threshold.
5. The Use cumulative alarm delay checkbox indicates whether the alarm delay should
reset when reading values fall back within the alarm threshold.
6. Once the alarm is configured appropriately, click Apply to save the settings.
3