NSi Industries DIN100A User Manual
Page 5
5
When you have set the desired time, press the
¹
button to store it in memory, and go back to run
mode.
Setting schedules for
programmed load events
1: In the run mode, press the “Prog.” button. We
will assume that no previous events are set.
The following display will be shown. This is
called the “free memory location”;
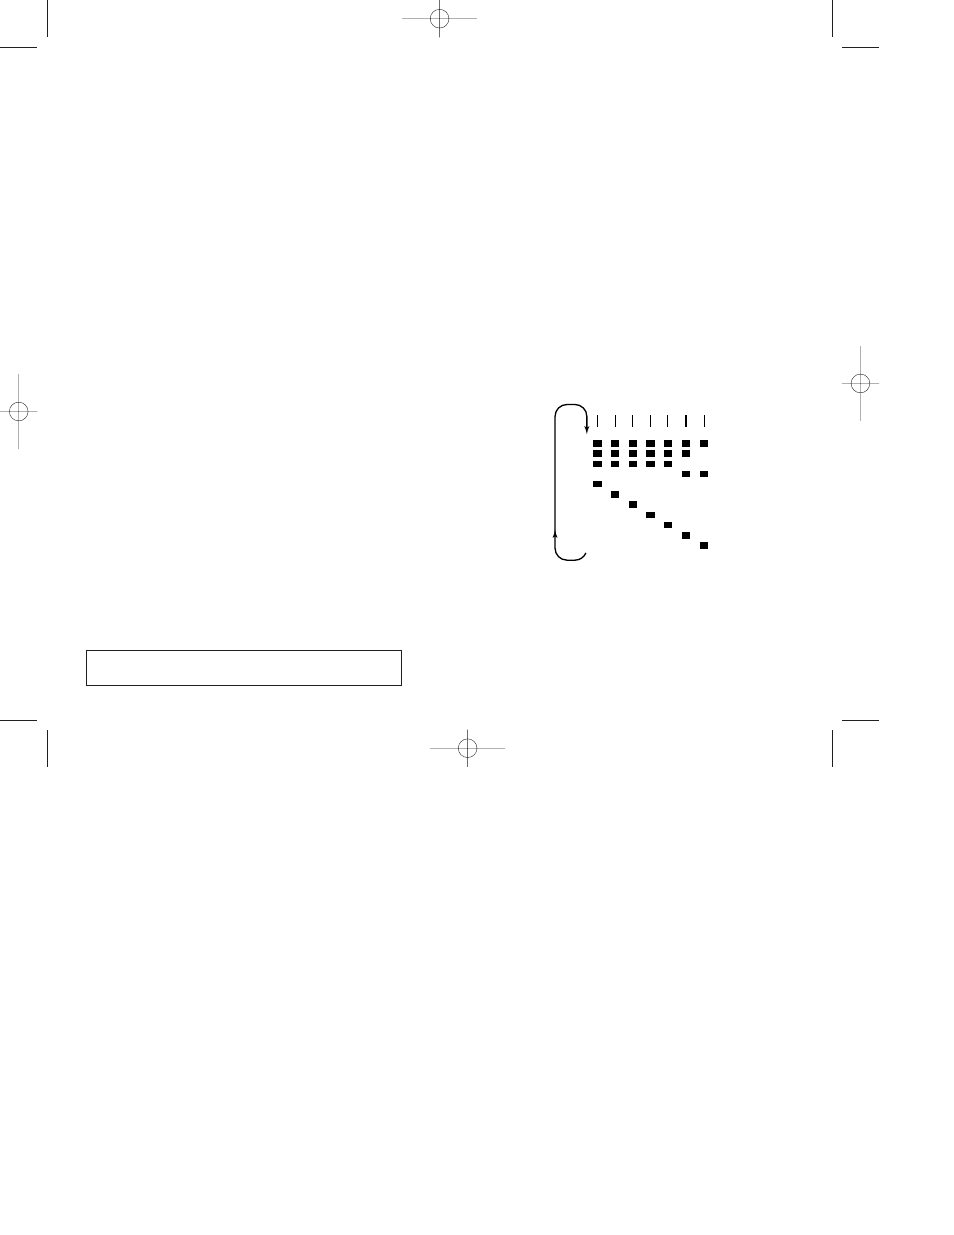
2: To choose which day or days the program will
run: Each time you press the “day” button, the
active days change. The following chart
describes the display and the active days-of-
the-week.
3: Using the “h” and “m” buttons, set the desired
start time of the event.
4: Press the
E
1 button(s) to set the load status.
CH1
.
= ON
CH1 = OFF
1
1
2
3
4
5
6
7
8
9
10
11
2
3
4
5
6
7
Monday
Tuesday
Wednesday
Thursday
FridaySaturday
Sunday
З
З
2: When you have set the desired date, press
“Prog.” to store it. The unit automatically calcu-
lates the day-of-the-week, in which the
changeover occurs. So if you have entered the
last Sunday in October, the unit will remem-
ber, and update this day each year.
3: When you finished setting the current date,
and the beginning and the end of daylight sav-
ings time, press the
¹
button to return to run
mode.
No daylight savings time
Skip this section if you have already set day-
light savings information.
1: If you do not want to use daylight savings time
press the “+1h” button until the display says “no”
2: Press the
¹
button to tell the unit not to use
daylight savings time. The unit will go into run
mode.
3: To set the day of the week, press the
¹
but-
ton again. The channel status indicators will
disappear. Press the “Day” button. The cursor
under the numbers “1” – “7” indicate the day,
with “1” for Monday, “2” for Tuesday, etc.. and
“7” for Sunday. Press the
¹
button.
Setting current time
1: To change the current time, first enter the set
mode. Press the
¹
button. The channel sta-
tus indicators will disappear.
2: Press the “h” and “m” buttons to set the current time.
NOTE: The difference between AM and PM is a small
dot near the “P” which indicates AM (P.M)
4
- - - -
- -
DIN100A 8/15/00 3:00 PM Page 4