KYORITSU 8241 USB Communication Set User Manual
Model 8241, Precautions before use, General specifications
Precautions before Use
●
This communication package is for our digital multimeters (DMM) and cannot be used
with other Kyouritsu products.
●
To ensure safety, turn off the DMM and remove the testing leads before attaching the
communication adapter.
●
Read through the instruction manual of the DMM as well.
General Specifications
●
Infrared Communication Adapter
External dimensions
: 40.6(L)×65(W)×22.5(D) mm
Cable length
: Approx 2m
Weight
: Approx 80g
Specification of USB
: Ver.1.1 (Reference)
●
Communication Application Software
・System Requirements
Operating system
: Windows2000 or later
CPU
: Pentium 133 MHz or faster (use a personal computer
with a faster CPU if you cannot properly acquire
measurement data)
Memory
: At least 64 MB
D
isplay
: 1024×768 dots, 65536 colors or more
Storage device
: Hard disk with at least 10 MB of free space and one
CD drive
Microsoft Excel
: Excel2000 or later
・Main Specifications for Communication Application Software
Data receiver
: Can receive save-mode and logging-mode memory
data, and real-time data from a DMM. (Maximum
receive real-time data: 32767)
Data processor
: Can display digital data and trend graphs, saved and
read data, and transfer data to Excel.
Windows and Excel are registered trade marks of Microsoft in the United States.
Pentium is a registered trademark of Intel in the United States.
External View
Connecting to DMM
Attach the adapter to the back of the DMM in
such a way that the cable is positioned in an
upward direction.
Unlock the Knob to remove the adapter.
Installing DMM Application Software
Insert the CD-ROM into the CD drive.
If the installer doesn't run automatically, execute the Setup.exe contained in the CD.
Follow the instructions in the supplied instruction manual to install the application.
This manual describes the specifications and handling precautions
of the package. Before using this product, thoroughly read this
manual to obtain a clear understanding on proper use.
Starting Application Software
Click on the Windows Start Menu and point to Programs, KEW and then DMM Application.
The following screen appears.
●
Descriptions of Toolbar Buttons
Reads saved data.
Saves received data.
Transfers displayed data to Excel.
Specifies new settings for receiving real-time data.
Starts receiving real-time data.
Receives DMM logging-mode data.
Receives DMM save-mode data.
Starts receiving monitor data.
Specifies interval and period for receiving real-time data.
Specifies graph scaling.
Turns on/off monitor display.
How to Use the Product
●
Connecting to Personal Computer
Connect the communication to a USB Port of the personal computer.
●
Setting Communication Port
Set the communication port to which the product is connected.
Select Settings and then Communication Port. Specify the communication port
number of the personal computer used. Refer to “3-3 COM Port Number” in the
supplied Installation Instructions for the port number.
●
Receiving Data
Turn on the DMM to receive real-time data, logging-mode data and save-mode data.
These data can be received by clicking the respective toolbar buttons shown above.
Do not select the PRINT function of the DMM during a data receiving.
* This figure is an example of real-time data reception
●
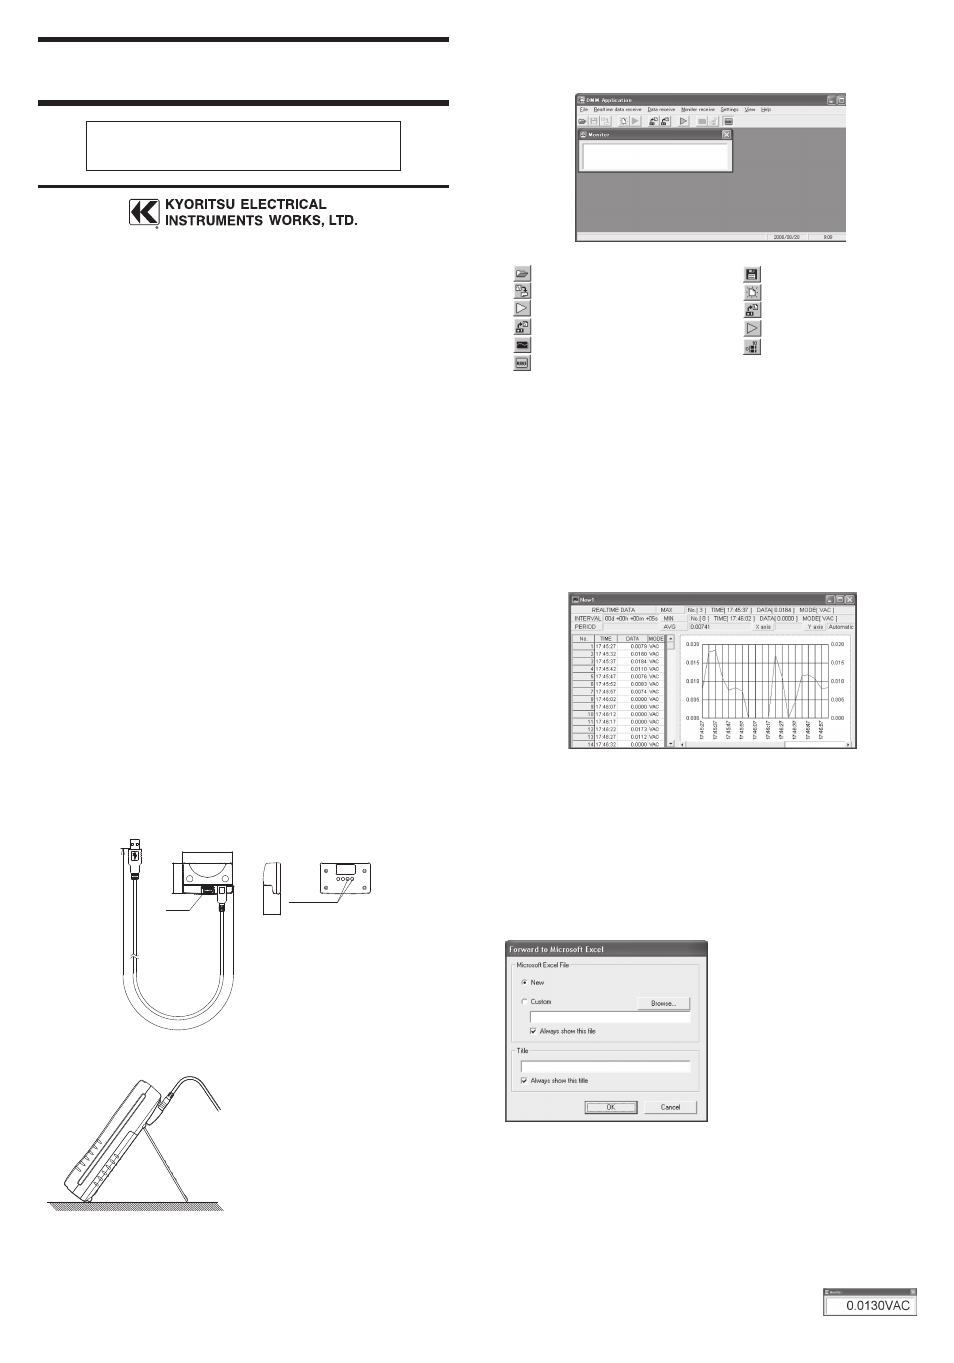
Auto-transferring Data to Excel
Whenever you attempt to receive each data, a message appears asking whether
or not to transfer the data to Excel. Click OK to receive data and transfer them
simultaneously.
Specify a file type from New or Custom in the dialog box that appears:
New file
: You can arbitrarily choose a file name when saving from Excel.
Custom file
: Adds a new spreadsheet to an existing file.
You can also specify a graph title. Enter any title in the box shown in the dialog box
and check the respective check boxes to store the existing custom file name and the
title to memory until you restart DMM Application and transfer data to Excel.
Clicking OK automatically activates Excel
and starts data transfer. When the transfer is
complete, a graph frame and the graph are
automatically generated. When you select
Forward to Microsoft Excel from the File
menu after receiving each data, the acquired
data is immediately transferred and a frame
and graph are generated.
Note: To interrupt data receiving or display
a trend graph while real-time data
is being received and transferred
to Excel simultaneously, display
DMM Application which is running
in the background by clicking DMM
Application on the taskbar.
●
Reading and Saving File
You can read or save each of the acquired data. Select the commands from the File
menu or the respective toolbar buttons for reading or saving the existing data.
Note: Data is saved as a CSV file. You can directly read the file in Excel, but do not
overwrite the data. Doing so results in you not being able to read the data from
DMM Application.
●
DMM Monitor
The DMM measured values can be regularly displayed on a
personal computer screen. The Monitor screen is displayed by
clicking the button for starting data reception.
22.5
KNOB
65
40.6
2000
±50
Photo Sensor
Instruction Manual
MODEL 8241
USB Communication Set