Jenway 73 Series User Manual
Page 6
6
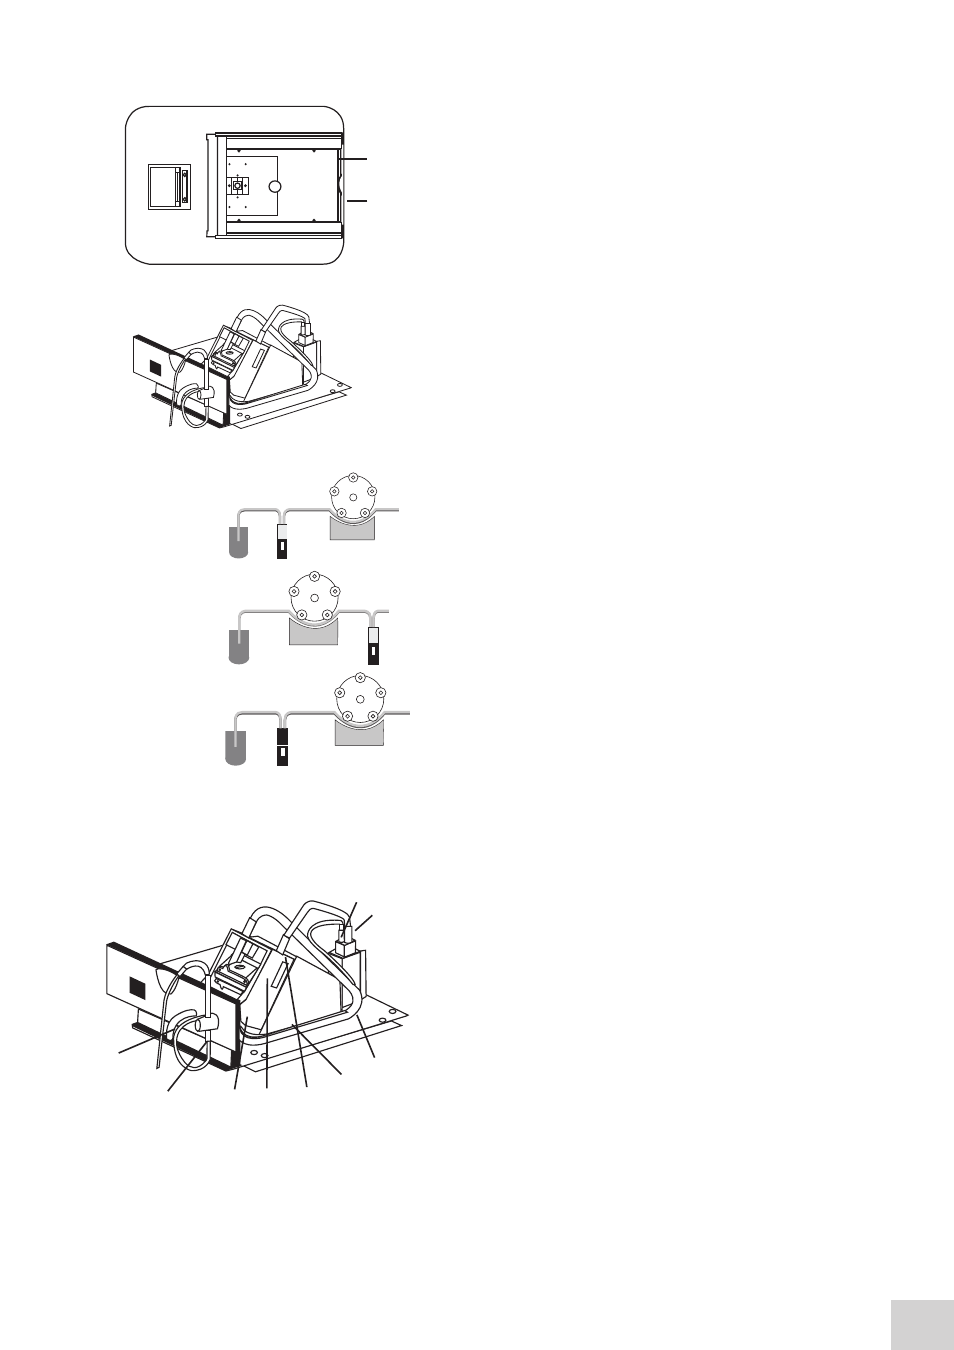
1.2.3.3 Sipper pump
For this accessory as well as removing the passive
accessory base plate, the front panel of the instrument
must also be removed. Loosen screws 5 and 6 until the
front panel can be lifted out in a forward direction.
Take the sipper base plate. Connect the power supply
in the bottom of the sample chamber to the connector
on the underside of the base plate. Place the base plate
in the sample chamber. Replace screws 1 to 4. Take the
sipper front panel and slot into place before re-tightening
screws 5 and 6.
The tubing should be connected depending on the
function that the sipper pump is going to perform. All
tubing must be kept as short as possible and the tubing
must not be allowed to obstruct the ligth path.
For sipping:
1. Connect the sipper pump tubing to the outlet port on
the flow-through cuvette.
2. Secure the tubing using the clip on the righthand side
of the pump head.
3. Ease the tubing round the rollers by carefully rotating
them clockwise, by hand. Clamp the tubing into the clip
on the left hand side of the motor.
4. Once secured, ensure the tubing is routed into the two
retaining clips located on the base plate at the side of the
pump head.
5. Cut the tubing at the point where it fits comfortably
onto the left hand tube located on the inside of the front
bulk head.
6. Connect a suitable length of this tubing to the external
waste pipe.
Bi directional flow A
(sipping)
Continuous flow
1.
7.
3.
4.
9.
6.
5.
8.
2.
Bi directional flow B
(pumping)
5.
6.