Jenway 73 Series User Manual
Page 4
4
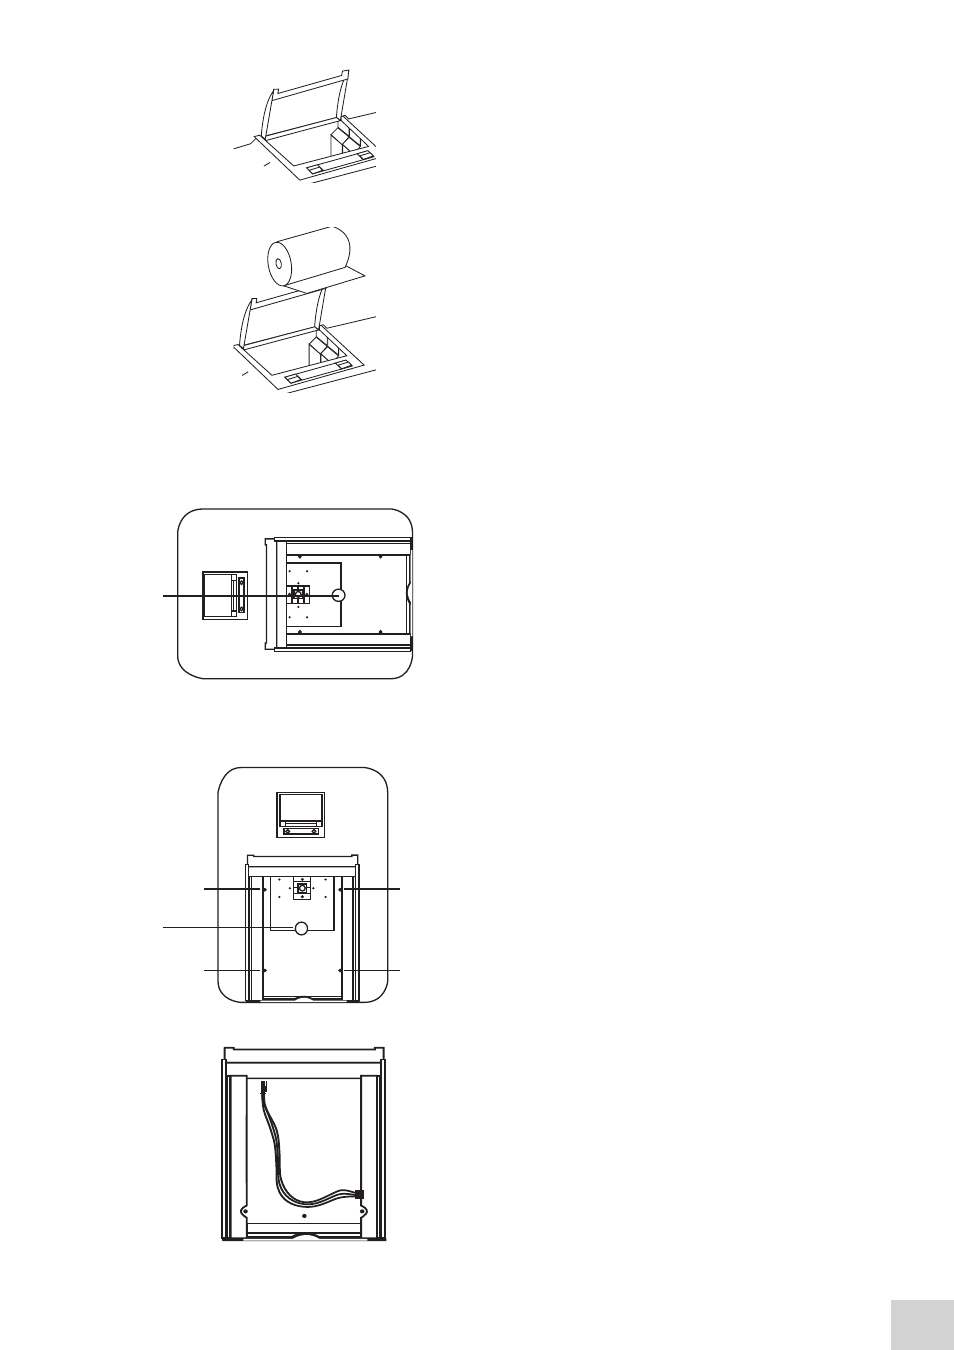
Squeeze the grey plastic clips together so that the printer
top opens. Slot the printer into the top of the instrument
and push down until it fits flush to all four sides.
Insert the paper roll into the printer – ensuring that there
is some paper sticking out of the printer before clicking
the grey plastic back into place. Switch the instrument
on. The power and error lights on the printer will flash.
Once the instrument power on tests are complete press
the feed button to check that the paper is fed correctly.
1.2.2
PASSIVE ACCESSORIES
Unscrew the thumb screw to undo the passive accessory.
Lift out the passive accessory. To fit a different passive
accessory simply place the accessory in the correct
orientation, align the thumb screw and tighten to fix in
place.
To replace the passive accessory with an active accessory
refer to section 1.2.3.
1.2.3
ACTIVE ACCESSORIES
Unscrew the thumb screw to undo the passive accessory.
Lift out the passive accessory. To fit an active accessory
unscrew screws 1 to 4 and lift out the metal base plate.
This will expose the bottom of the sample chamber with
the power supply connection needed to operate the
active accessories.
2.
4.
1.
3.
Thumb
screw
Thumb
screw