Step 3, Step 4 – Catskill Craftsmen 57253 User Manual
Page 4
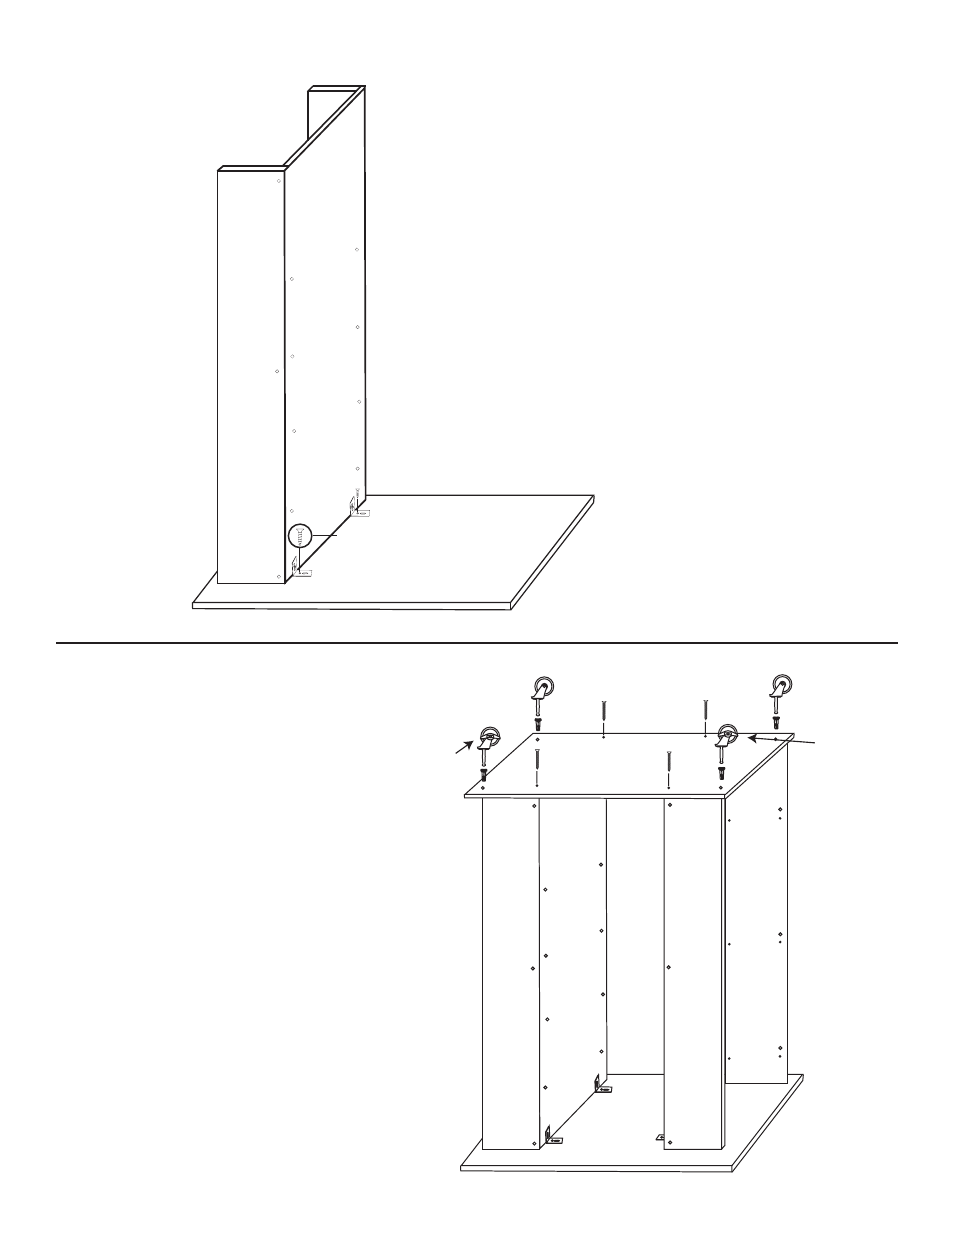
STEP 3
A. Invert one assembled rack and
place on the bottom of the cart top
as in illustration and secure with two
5/8” Phillips Flat Head #7 Screws.
Repeat with the other rack.
5/8 #7
RACK BOTTOM
STEP 4
With the cart still inverted attach the
cart bottom to the bottom ends of
the legs with four 1 1/2” Phillips Flat
Head #8 Screws. Next, tap in caster
sockets through the holes in cart
bottom nto the holes in the bottom
ends of the rack sides until the teeth
of the socket just bite into the wood
CAUTION! Do not pound stems flat
or casters will not enter socket hole.
Next, tap in casters with a hammer
by hitting straight down on fixed solid
metal part of caster until seated.
Note: Position the two locking casters
as illustrated.
Locking
Locking
1 1/2” #8
- 1426 (13 pages)
- 1447 (5 pages)
- 1429 (14 pages)
- 1481 (16 pages)
- 1533 (12 pages)
- 1521 (16 pages)
- 1448 (14 pages)
- 1536 (12 pages)
- 1537 (13 pages)
- 1538 (14 pages)
- 1544 (14 pages)
- 1563 (12 pages)
- 1569 (12 pages)
- 1575 (13 pages)
- 1576 (14 pages)
- 1580 (14 pages)
- 1582 (17 pages)
- 1622 (7 pages)
- 1842 (18 pages)
- 1925 (6 pages)
- 2005 (11 pages)
- 2007 (11 pages)
- 2008 (11 pages)
- 1531 (13 pages)
- 1529 (14 pages)
- 1527 (12 pages)
- 1526 (13 pages)
- 1480DOR (17 pages)
- 1476 (13 pages)
- 1470 (12 pages)
- 1461 (8 pages)
- 1428 (15 pages)
- 3314 (6 pages)
- 3310 (6 pages)
- 7237 (12 pages)
- 14485 (14 pages)
- 15445 (14 pages)
- 43017 (13 pages)
- 51524 (12 pages)
- 51526 (13 pages)
- 51527 (11 pages)
- 51531 (12 pages)
- 51533 (11 pages)
- 51536 (11 pages)
- 51537 (12 pages)