Step 5, Step 6 – Catskill Craftsmen 61532 User Manual
Page 7
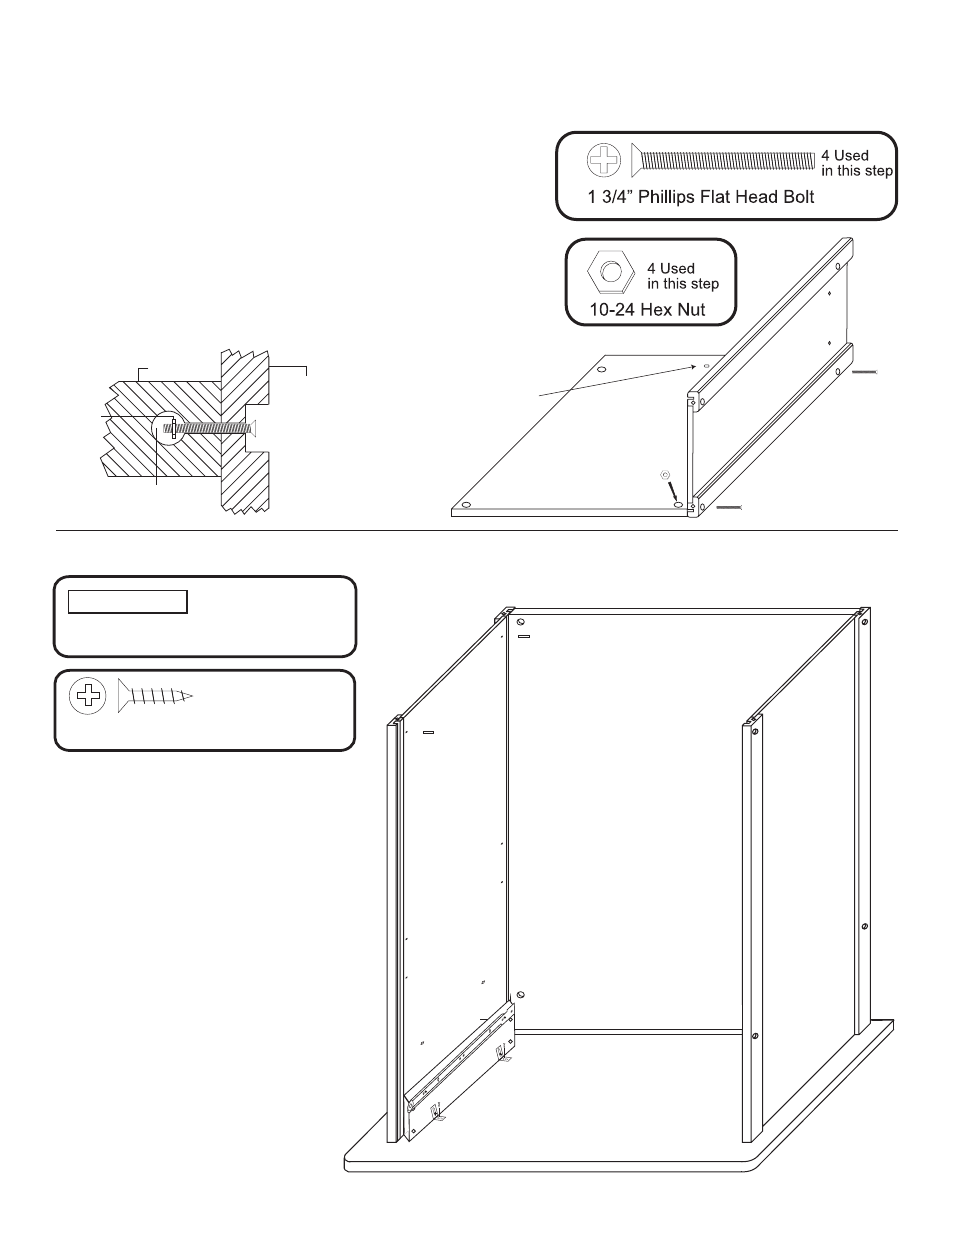
STEP 5
A. Lay back panel flat on a smooth surface with holes
up.
B. Attach both side panels with 1 3/4” machine screws
(bolts) and hex nuts. After inserting bolt(s) through the
holes in the side panels, through the holes in the long
edges of the back panel, place a hex nut on the tip of
your finger, align nut with bolt and tighten.
C. Look ahead to step 7 which shows side panels
attached to back panel.
Note: Make sure you position the side panels according
to drawer side (left or right).
Not used
if present
4 Used in this step
1” Long 3/16” DIA. Steel Pin
PIN
PIN
5/8” Phillips Head #7 Screw
4 Used in this step
STEP 6
A. Turn the side/back assembly
(from step 2) upside down (invert)
on top of the inverted table top.
B. Align the “L” brackets
with the 4 inside pilot holes in the
table top and secure with 5/8” #7
screws. The outer pilot holes will
not be used with this model.
C. Tap two 1” pins into each side
panel. These pins will hold the
bottom shelf. See illustration 7.
Side Panel Leg
Inside Brace
Countersunk Hole in Leg
( disk goes in this hole to
hide bolt head! )
Nut Access Hole
Hex Nut