Caution, Warning, Saw maintenance – Vitrex BT65011IND User Manual
Page 9: Water pump maintenance
Angle / Mitre Cuts
Step 1: Turn off the power.
Step 2: Position the cutting table in its farthest back position and lock with slide tube
locking knob.
Step 3: Loosen the Angle Adjustable Knob on the Angle Support Arm (See
Diagram 18), found at the back of the motor head, to adjust the guide by tilting
the head (See Diagram 19) to 22.5° or 45°angles. (Make sure the blade aligns
with the angle slot provided on the cutting table.)
Step 4: Tighten the Angle Adjustable Knob when the cutting head is positioned on the
desired angle.
Step 5: Turn on the power and make angle cuts by pushing the cutting table toward
the cutting head
For the long life and best performance of saw:
1. Always clean the saw after every use.
2. Wipe off all exterior surfaces and keep the cutting table clean and free of all debris.
3. Wipe off both the guide bars and the rollers of the cutting table.
4. Keep ventilation slots of the motor clean to prevent overheating.
5. Always check the blade for cracks or signs of damage.
6. Clean the Side Extension Table tubes after each use.
NEVER attempt to service the internal parts of the motor. Contact our company’s
Customer Service Department for any motor function problems or failures.
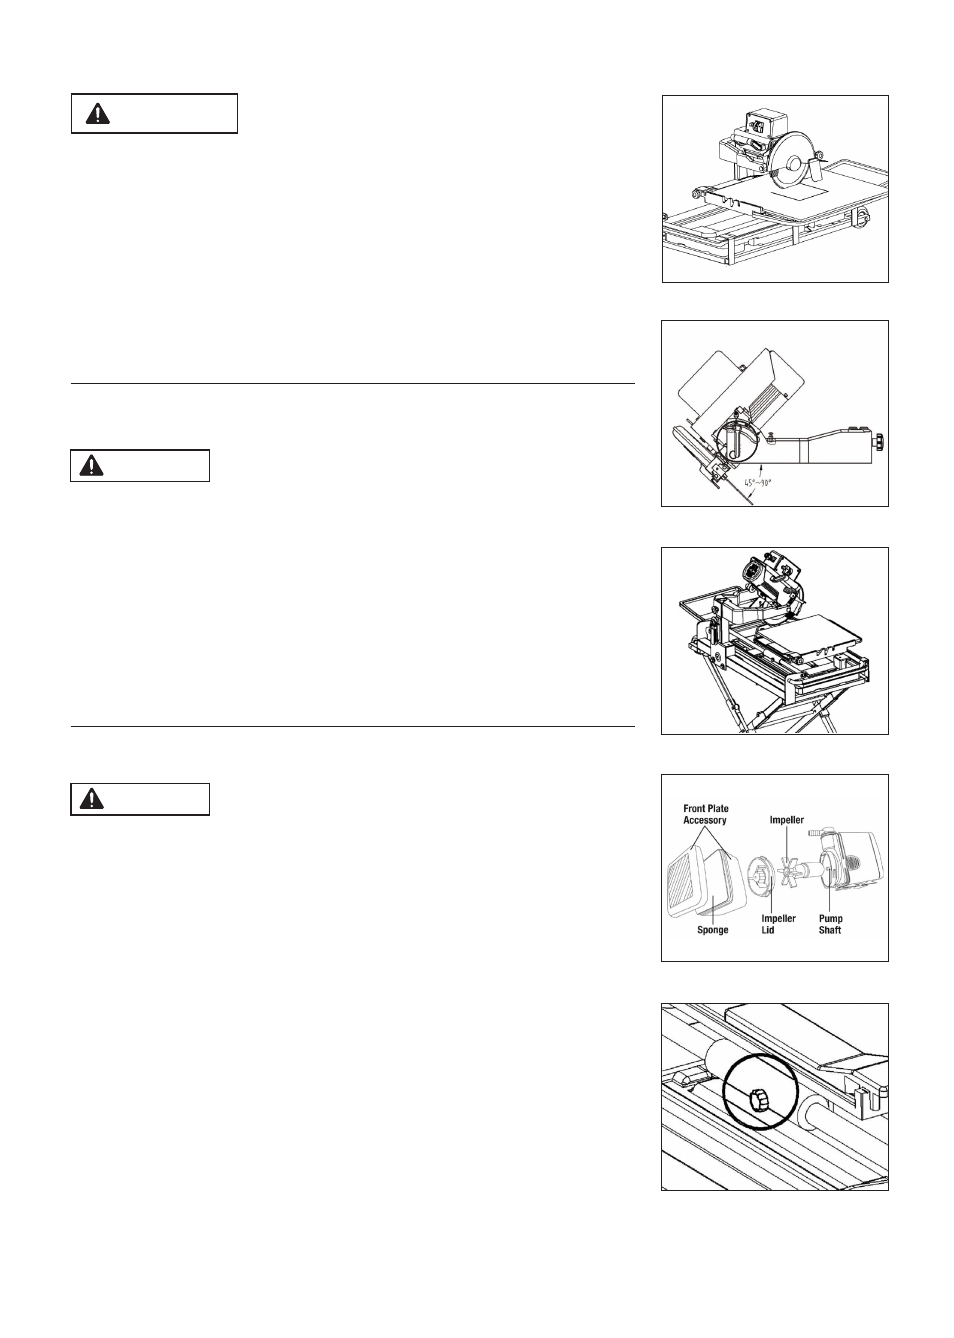
1. Disassemble the water pump to see if any cracks or dirt are inside. (See
Diagram 20)
2. Check if the water tubing is clogged where the water cannot flow. Clear the tubing
with warm water.
3. Make sure pump is plugged in during use.
4. Make sure the in-take sponge filter is cleaned after each use.
5. Pump clean/ fresh water for one minute through the water pump and the blade
guard to prevent waste build-up and clogging.
Do not run the pump without water.
Moving the saw
1. Before moving the saw, be sure to tighten the Slide Tube Locking Knob at the Main
Working Table sliding tube, to prevent Main Working Table from sliding randomly
during transport. (See Diagram 21)
2. This saw includes two sets of wheels:
• Use the wheels attached to the saw, when moving the saw longer distances to
the job site. (See Diagram 22) The stand folds up for easy transport, as well.
(See Diagram 23)
• Use the stand with the locking wheels, when moving your saw short distances,
around the job site.
Diagram 18
Diagram 19
CAUTION!
Do not service, clean, or maintain the saw without first turning
off the motor and unplugging the saw from its power source.
Failure to do so may result in serious injury to the operator.
SAW MAINTENANCE
CAUTION!
Disconnect the power before maintain the pump.
WATER PUMP MAINTENANCE
Diagram 17
Diagram 20
Diagram 21
- 9 -
The saw is adjustable to three positions (0°, 22.5 °or 45°).
Any other angle cut will damage the work table.
WARNING!