Enjoy your mount – Video Mount Products ER-W24 User Manual
Page 4
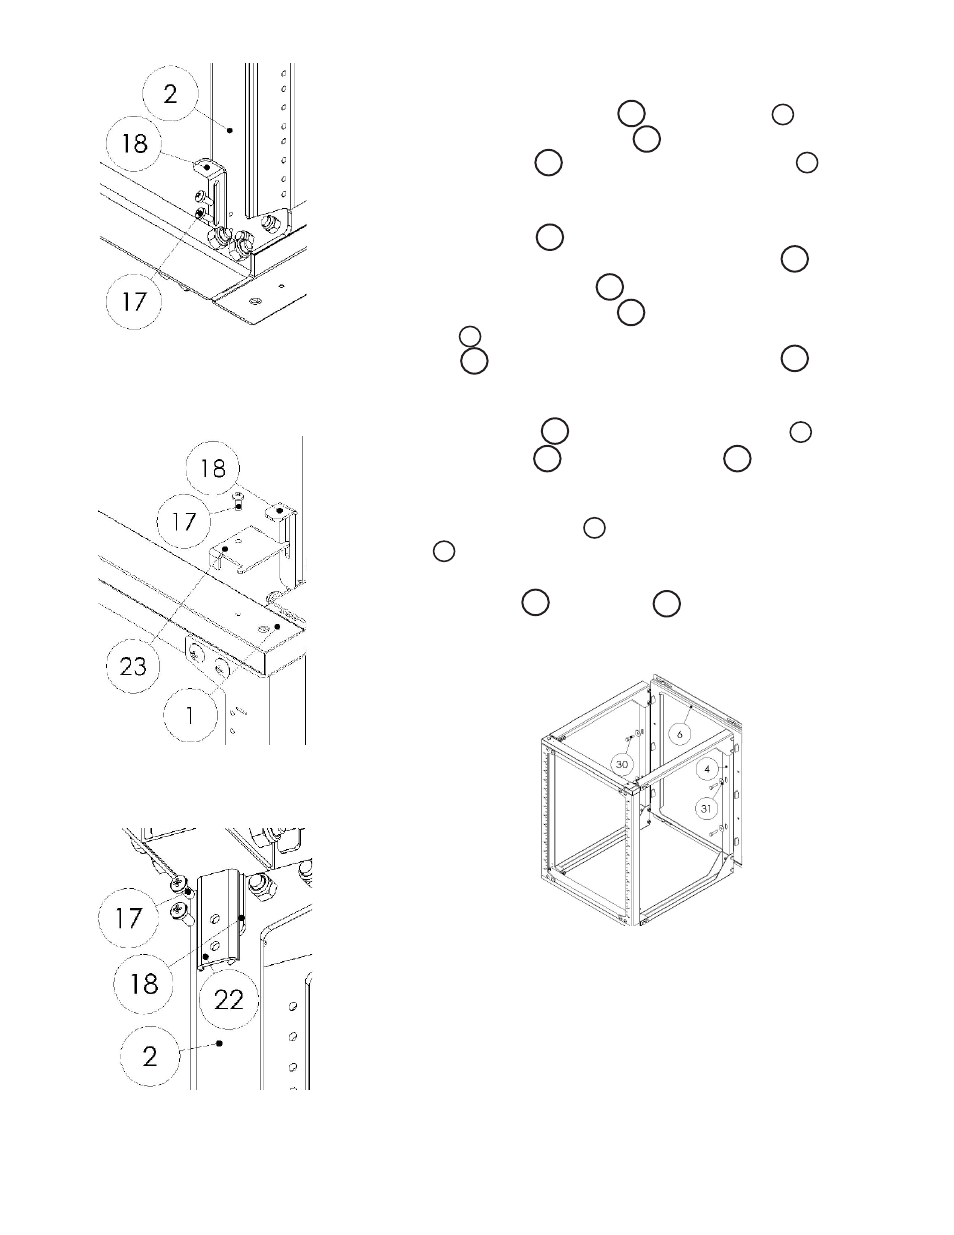
Step 6
Attach the bottom slide lock to the rack rail opposite the
pivot point using the M4 screws . To lock the bottom lock simply
slide the slide lock into the slot in the support bar .
Step 7
Take the top stop and point it so the side with the downward
ears is closest to the pivot point. Take the slide lock and place
the fl at ear on the top stop closest to the wall into the slot in the
slide lock. Slide the slide lock into the slot cut into the top sup-
port bar on the side opposite of the pivot point and secure the
top stop to the support bar using the M4 screw .
Step 8
Take the top catch and attach it to the rack rail on the side
with the slide lock using the M4 screws .
Step 9
Lift the vertical supports onto the tabs coming out of the wall
plate . Pull the vertical supports down onto the tabs as far as pos-
sible. Secure the vertical supports to the wall plate using the short
5/16” hex screws and washers .
Please verify that all nuts and screws are securely tightend.
WARNING: The installer of these products must verify that the mount-
ing surface, ceiling or wall, will safely support the combined weight
of all attached equipment and hardware. Video Mount roducts will
not be held liable for the improper use or installation of its products.
Enjoy Your Mount!
4
6
30
31
Step 9: Attaching the vertical sup-
ports to the wall plate
Step 6 : Attaching the bottom
slide lock
Step 7: Attaching the top slide lock
Step 8: Attaching the top catch
1
18
2
17
18
1
23
23
18
18
23
17
2
22
18
17