Video Mount Products ER-W24 User Manual
Page 3
Step1
Before starting, lay out all parts to your mount and match them to
the parts list provided. Verify that you have all your parts before at-
tempting to assemble the mount.
Step 2
Mark the wall or desired mounting surface in preparation of installation
of wall mounting plate . Pre-drill if necessary and mount wall plate
to desired surface.
Warning: Please verify that your mounting surface will support the
combined weight of your equipment, equipment rack and mounting
hardware. Also verify that the mounting surface is safe to drill through.
If in doubt, please contact a professional installer.
Step 3
Attach the support bars to the wall arm supports making sure
the threaded holes in the support bars are point out from the center
of the rack. Use the 2.25” long 5/16” screws and nylon nuts )
to attach the support bars to the wall arm supports .
Step 4
Create the rack rail frame by attaching the rack rails to the hori-
zontal supports using the ¼” screws and nylon nuts .
Step 5
Attach the rack rail frame to the support bars using the 2”
long 5/16” screws and nylon nuts .
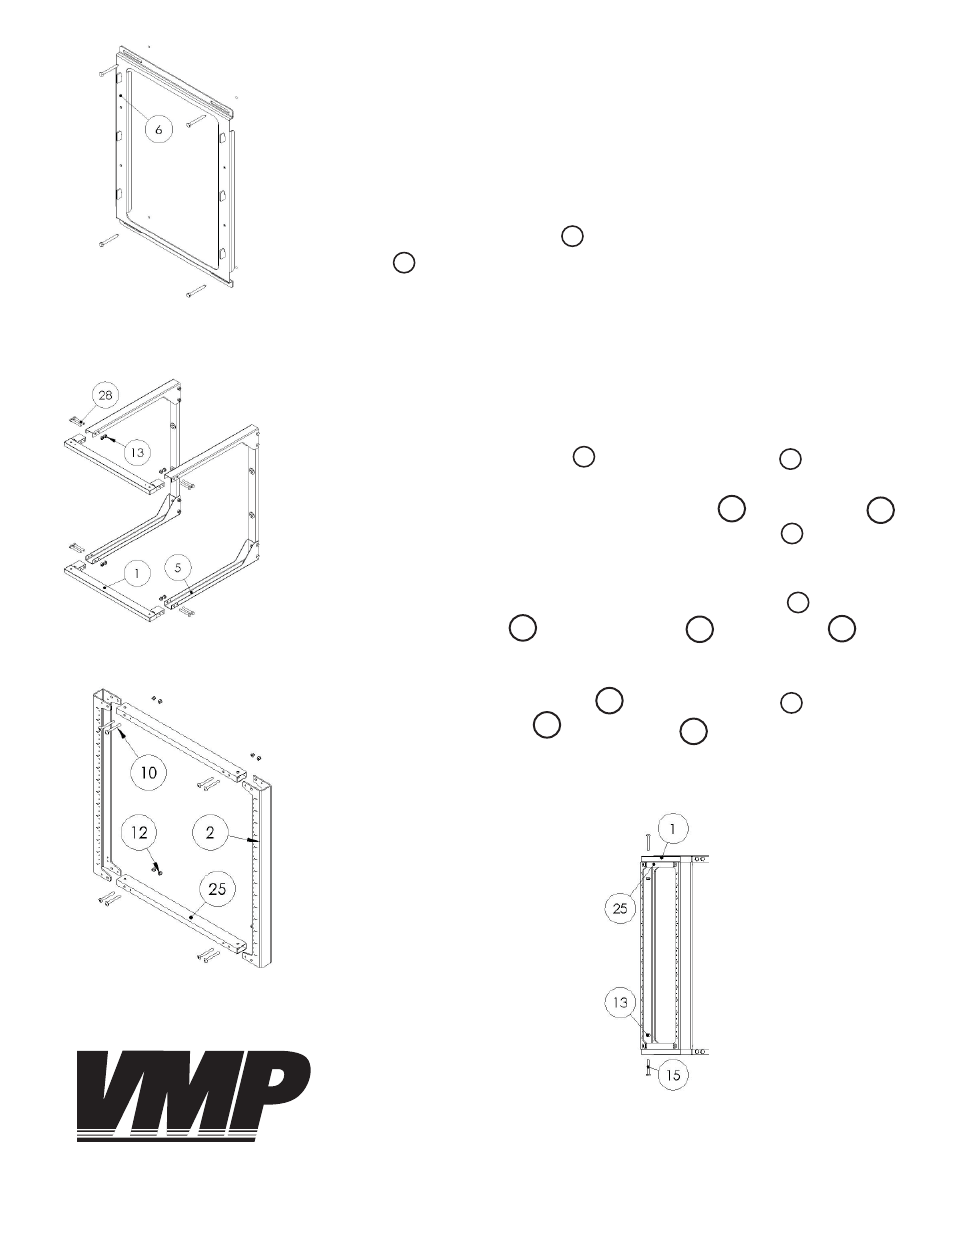
Step 2: Mounting the wall plate
(Lag screws are not included)
VIDEO MOUNT PRODUCTS
6
6
Step 3: Attaching the support bars
Step 4: Creating the rack rail frame
Step 5: Attaching the rack rail
frame to the support bars
5
5
1
28
13
2
25
10
12
1
25
15
13