Video Mount Products FP-XMFTB User Manual
Page 3
Step 1
Before starting, lay out all parts to your mount and match them to the
parts list provided. Verify that you have all your parts before attempt-
ing to assemble the mount.
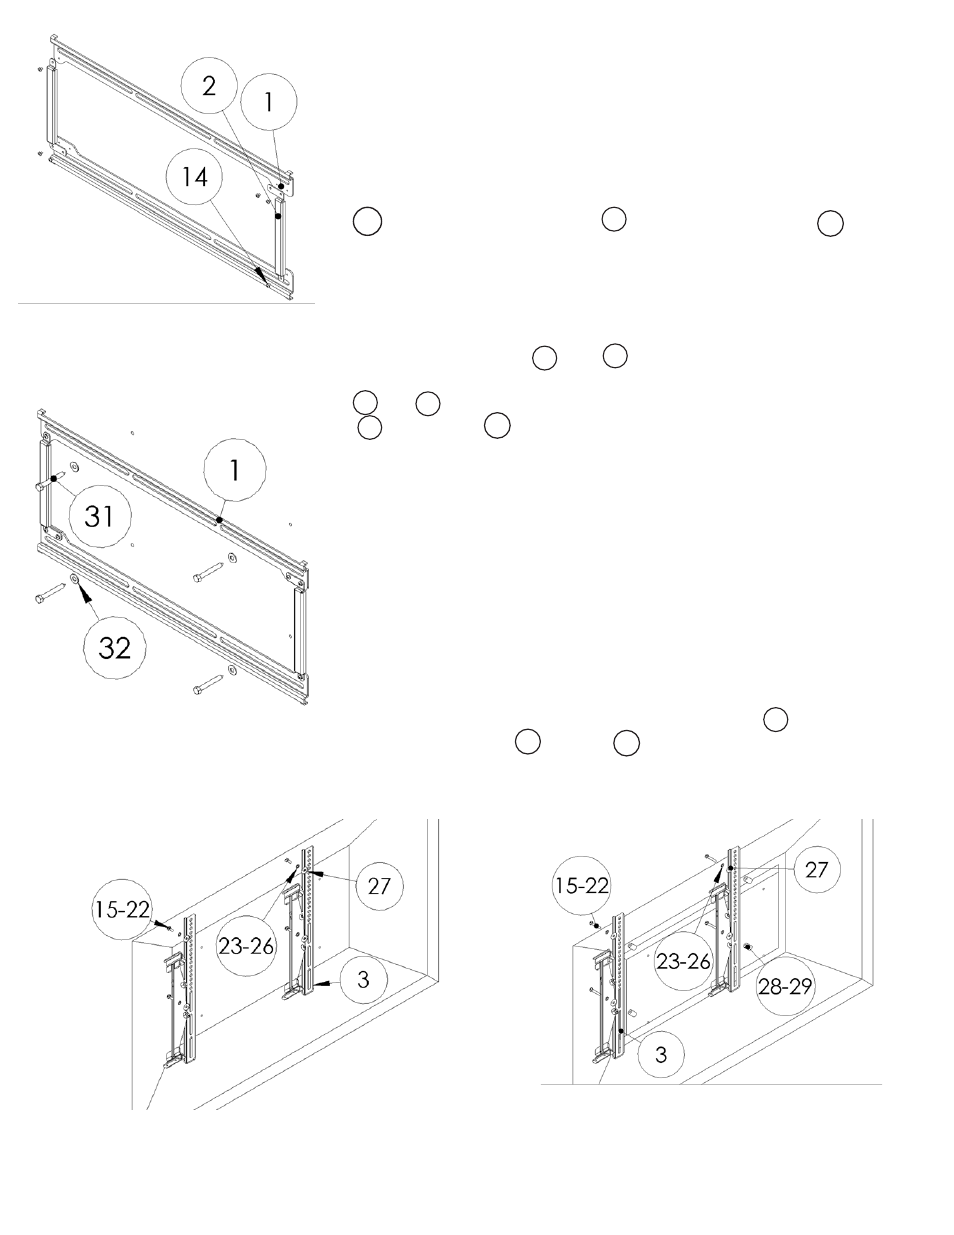
Step 2
Assemble the wall plate by attaching the two horizontal wall plates
using the vertical supports and short M4 screws . You
can identify the difference between the top and bottom rail by the
fact that the top rail is the one with the stopper flaps on either end.
Step 3
Mark the wall or desired mounting surface in preparation of installation
of wall plate assembly and . If mounting to wooden studs, pre
drill pilot holes using a 7/32” drill bit. Attach the wall plate assembly
and to the wooden stud using the 5/16” by 2.5” long lag screw
and washer making sure the folded tabs on the wall plate as-
sembly are towards the top. WARNING: Please verify that your mount-
ing surface will support the combined weight of your mount, mounting
hardware, and flat panel. Also verify that the mounting surface is safe
to drill through. Please note only mounting hardware for mounting to
wooden studs will be provided with the unit. If mounting to a surface
other than wooden studs then other hardware will be required. If in
doubt or uncertain about any of the above, please contact a profes-
sional installer.
Step 4
Determine the correct screw size and if you need to use washers, lock
washers, or spacers. Note: Spacers are used for TVs with recessed
hole patterns. Secure the display to the tilt bracket using the ap-
propriate hardware through . Note: The brackets have to be
level with each other to work properly.
Step 2: Assembling the wall
plate
Step 3: Mounting the wall plate
Step 4A: Attaching the tilt brackets to the screen
(spacers not needed)
1
14
1
31
15
29
2
32
3
Step 4B: Attaching the tilt brackets to the screen
(spacers used due to recessed hole pattern)
2
2
1