Enjoy your mount – Video Mount Products LCD-MID-CHB User Manual
Page 4
WARNING: The installer of these products must verify that the mount
surface, ceiling or wall, will safely support the combined weight of
all attached equipment and hardware. Video Mount Products will
not be held liable for the improper use or installation of its products.
Enjoy Your Mount!
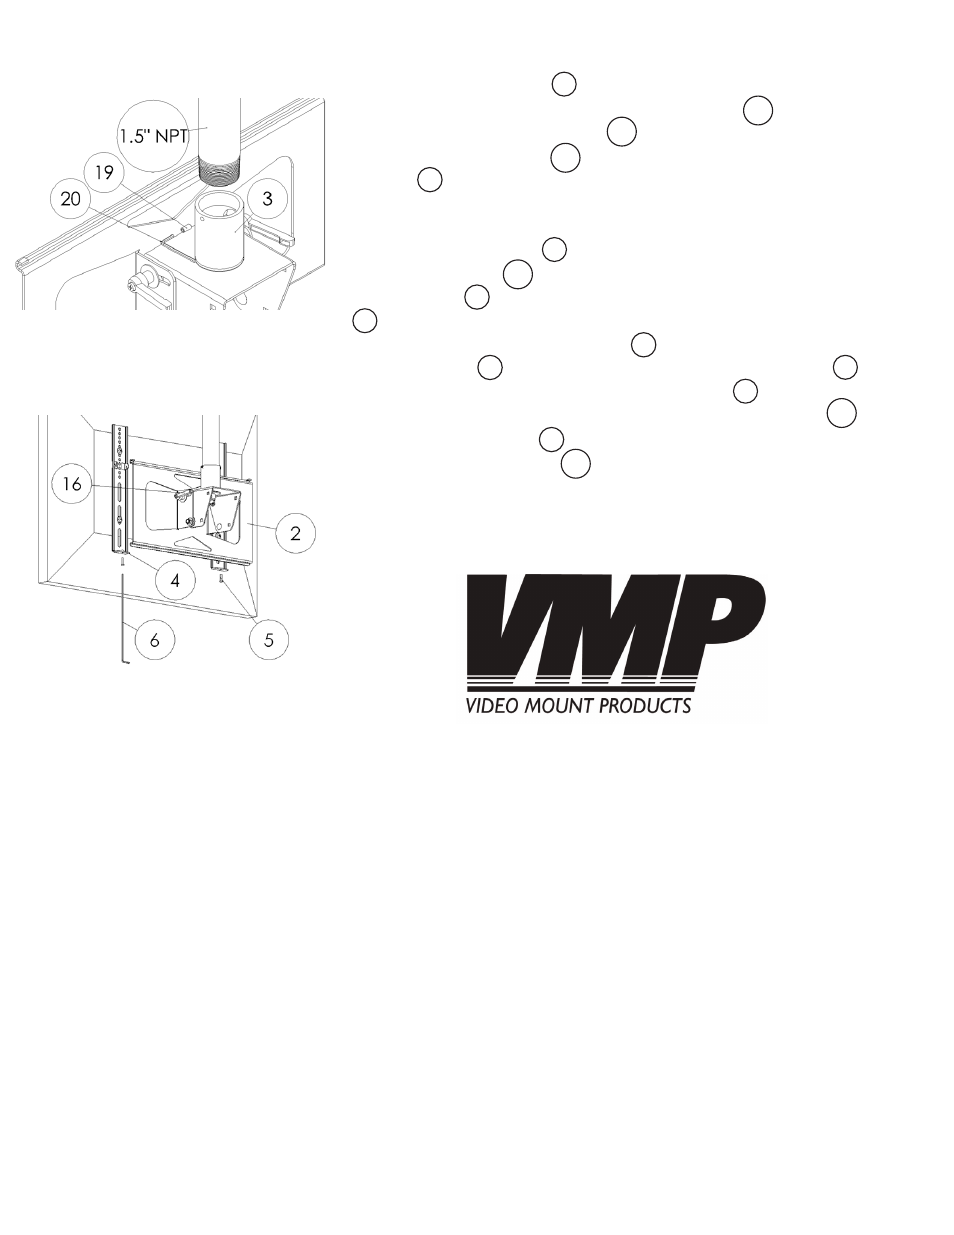
Step 5: Attaching the pipe couple
to the 1.5” NPT mast (mast not
provided)
Step 5
Screw the pipe couple
(#3)
onto the 1.5” NPT mast as tight as pos-
sible. Then tighten the ¼” – 20 brake screw
(#19)
into the pipe
couple using the M3 Allen Key
(#20)
. Note: It is important to tighten
down the brake screw
(#19)
as far a possible to prevent the pipe
couple
(#3)
from rotating off of the 1.5” NPT mast.
Step 6
Make sure the tilt plate
(#2)
is locked into place by tightening down
the lever handles
(#16)
as far as they will go. Lift the screen mount-
ing brackets
(#4)
with the attached flat panel onto the tilt plate
(#2)
. Then while another person is holding the flat screen in place
tighten down the security screws
(#5)
as far as they will go with the
long Allen key
(#6)
to lock the screen mounting brackets
(#4)
into
place. Once the screen mounting brackets
(#4)
are secure then
you can adjust the tilt by loosening the lever handles
(#16)
and
adjusting the tilt plate
(#2)
to the desired position and then retight-
ening the lever handles
(#16)
once it is in position.
Please verify that all nuts and screws are securely tightened.
Step 6: Attaching the flat panel
and adjusting the tilt
3
19
20
19
3
2
16
4
4
2
5
6
4
16
2
16